Mastering Real Property: Land & Buildings

Setting up your Real Property ensures that your model accounts for the physical footprint of your business, including major expenses like rent, mortgage payments, or land acquisition.
Step 1: Access the Real Property List
-
Open your Scenario.
-
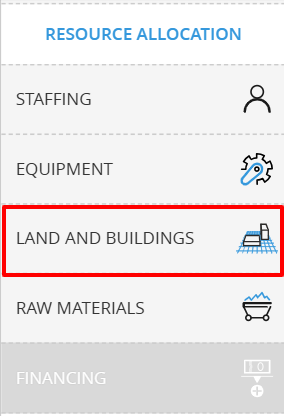
Under the Resource Allocation menu, click on Land and Buildings.
-
Select Real Property to open the management window.
Step 2: Add Your Property

-
Click the + ADD REAL PROPERTY button.
-
Name your asset: Give it a clear title (e.g., "Brewpub").
-
Define the Type: Choose from the dropdown:
-
Land: For raw land acquisition or use.
-
Building: For physical structures.
-
Space: For specific leased areas or rooms.
-
-
Terms: Decide how you are acquiring the space:
-
Purchase: For assets you buy and own.
-
Rent: For leased property.
-
Area footprint & Unit of measure: Enter the size of the property and select your units (e.g., Square meter, Acre, Hectare, or Mu).
-
Activity group: Assign the property to a cost center (e.g., Production, Selling, Administrative) to ensure the expenses hit the right part of your P&L.
-
Cost : Enter the purchase price or the monthly rent amount.
-
Timeline: Set the Start use date and, if it's a purchased building, its Useful life (years) for depreciation purposes.
-

Step 2: Set its rules
Click RULES on a property list
For Building
Rules: Building Size Configuration

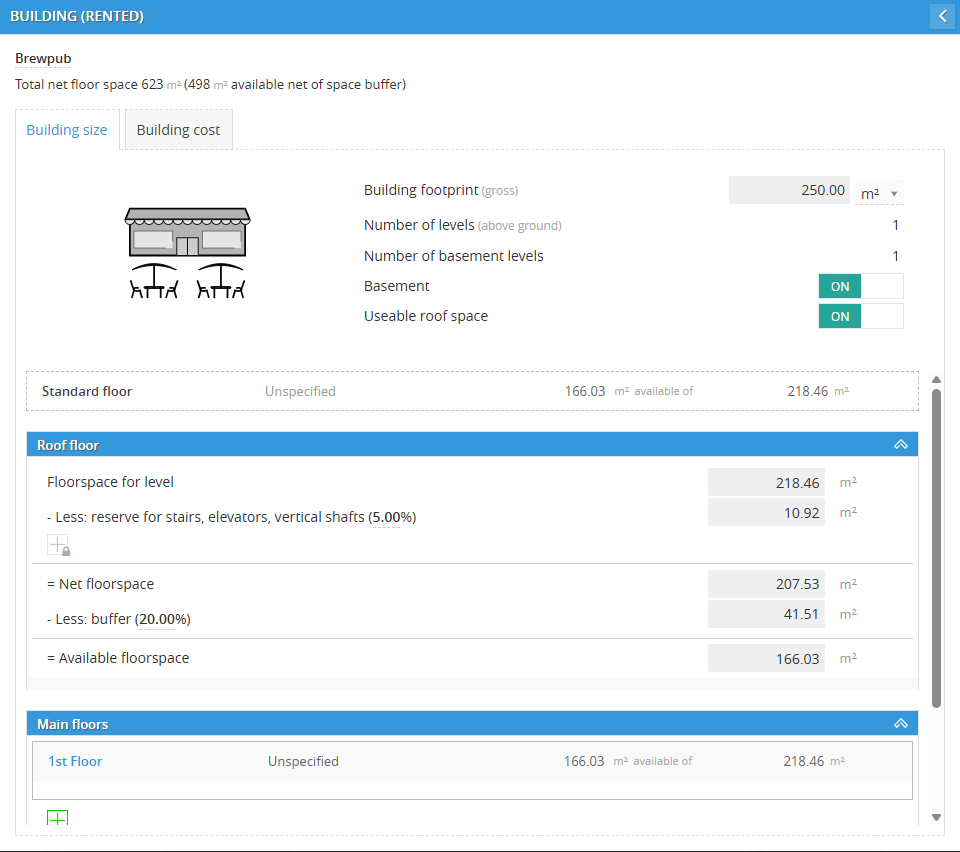
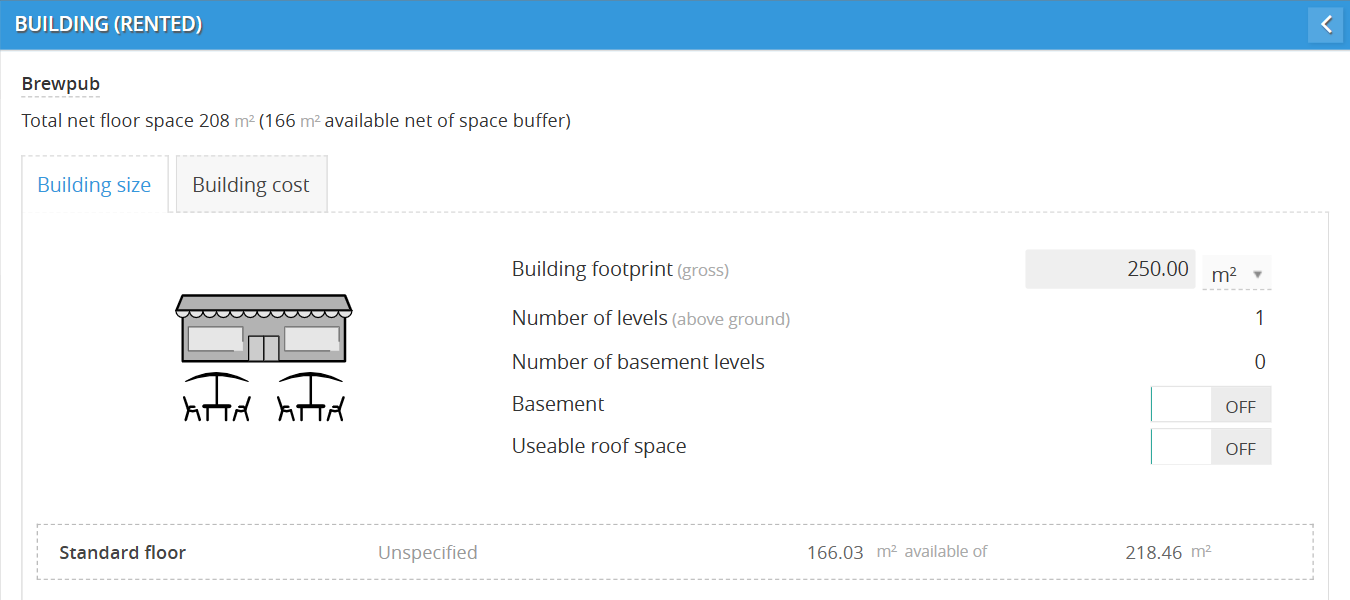
When you click RULES on a building, the Building size tab is your architectural blueprint.
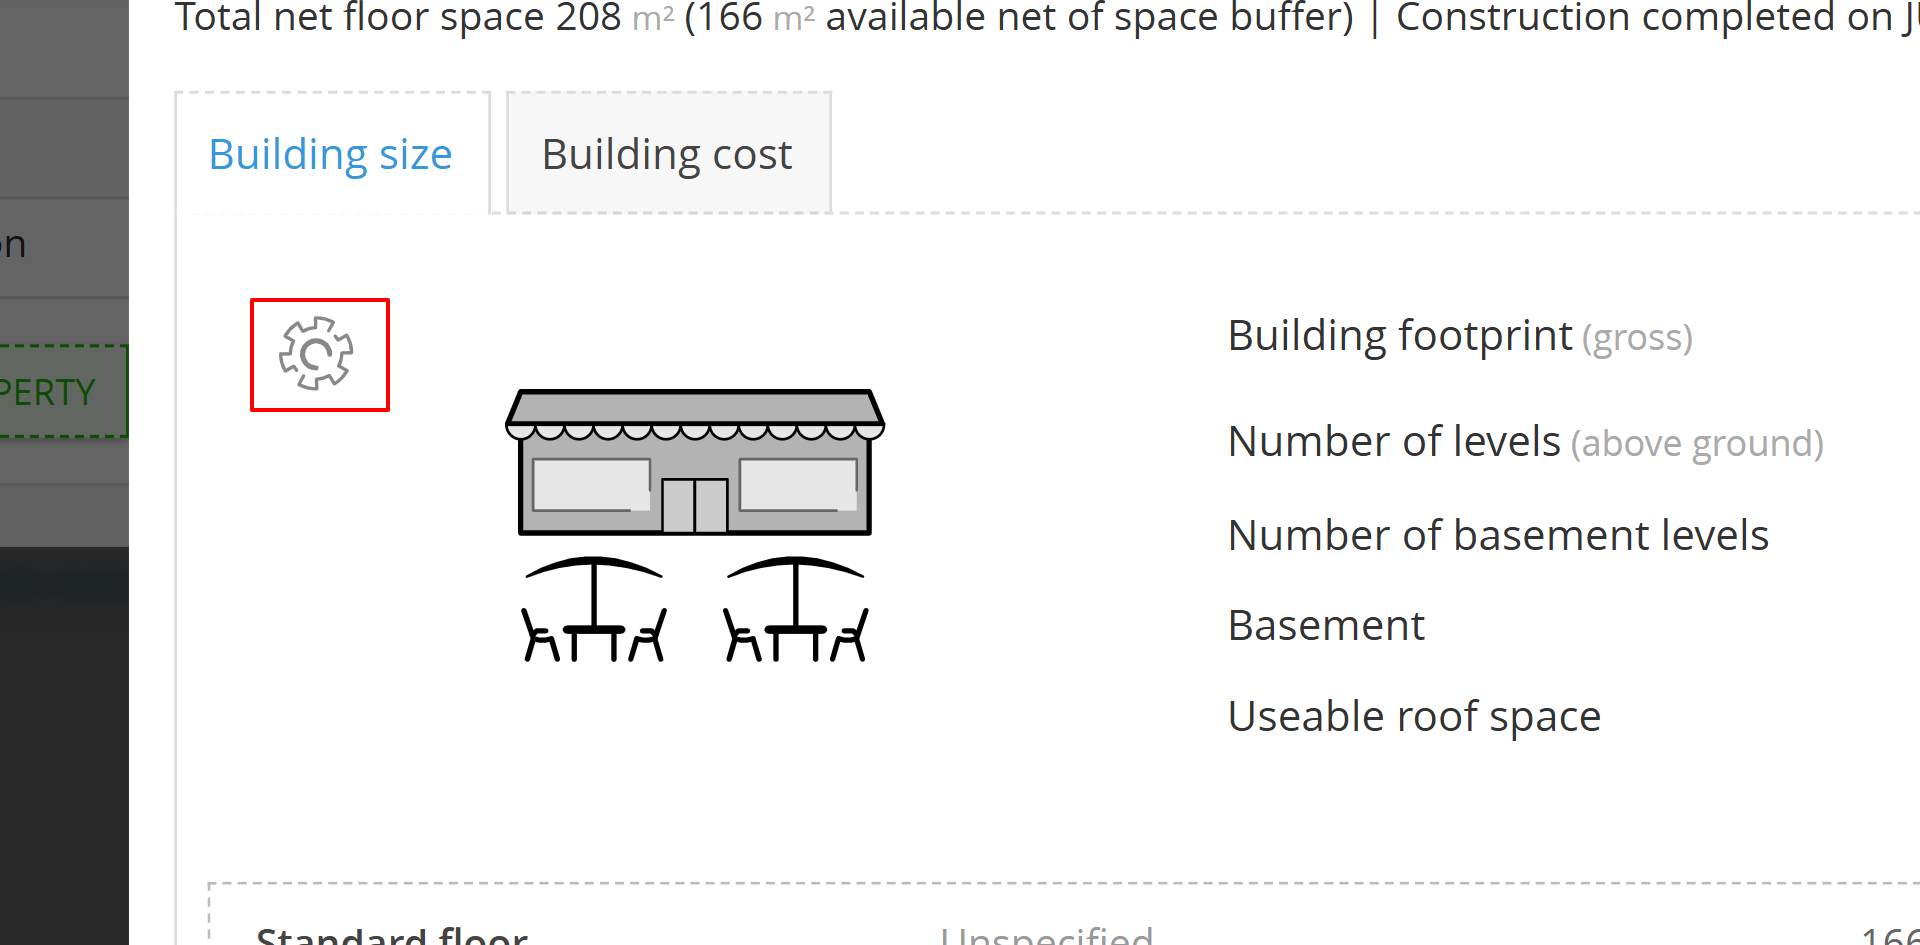
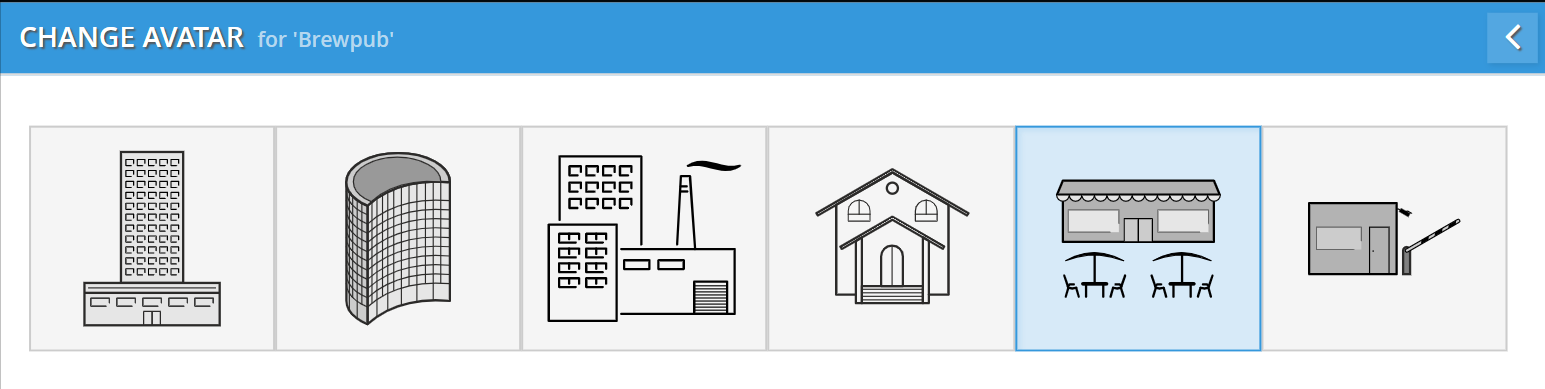
Tips: you can hover over the building's avatar to change it by clicking the settings icon and choosing the avatar list.
The Vertical Structure
-
Building footprint (gross): This is the total area of the ground floor. If you’re renting a $250$ $m^2$ warehouse, this is the number you enter.
-
Basement / Useable roof space (Toggles): Switch these ON to activate those areas for equipment or inventory placement. If they are OFF, the system won't let you "place" anything there.
For Main floor
Within the Building size rules, you can define the horizontal and vertical scale of your facility:
-
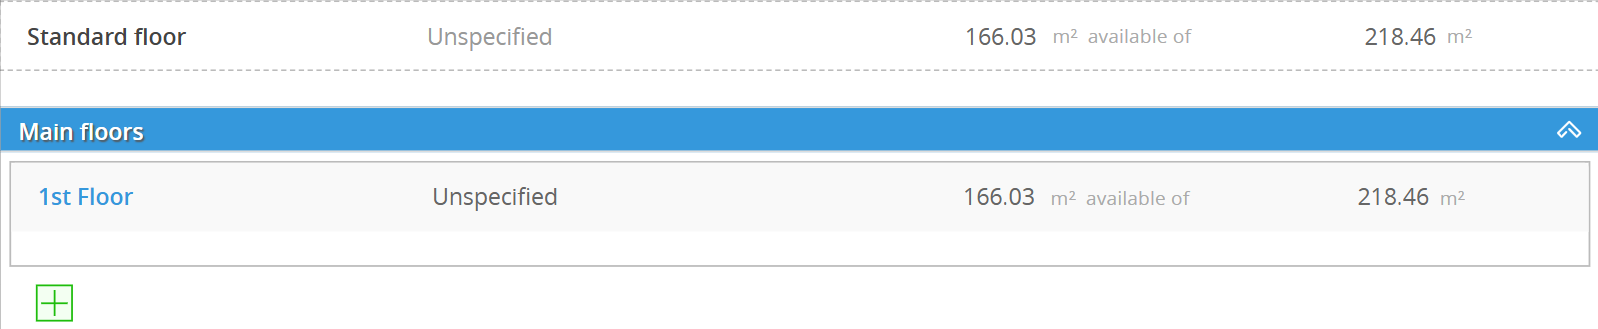
Default Floor: By default, every building starts with a 1st Floor that mirrors the gross footprint you defined.
-
Adding Levels: You can expand your facility vertically by clicking the green [+] button under the Main floors header. Each additional floor is created with the same dimensions as your primary footprint.
For Roof floor (if enabled)
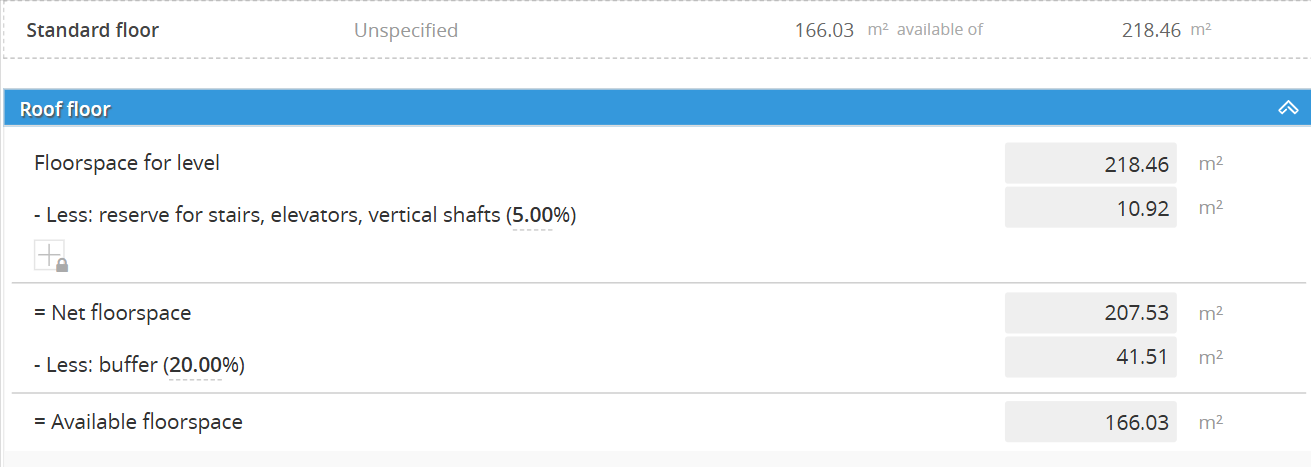
This is the most critical part of the screen. DC doesn't believe you can use 100% of your floor space, and neither should you.
-
Floorspace for level: The raw total area of that specific floor.
-
Reserve for stairs, elevators, vertical shafts (5.00%): DC automatically "eats" 5% of your space for the things that let people move between floors.
-
Net floorspace: What’s left after the vertical shafts are taken out.
-
Buffer (20.00%): This is for hallways, safety clearances, and "breathing room" around your machines.
-
Available floorspace: This is your "Real" number. This is the only space DC considers "open" when you try to place Equipment or Raw Materials.
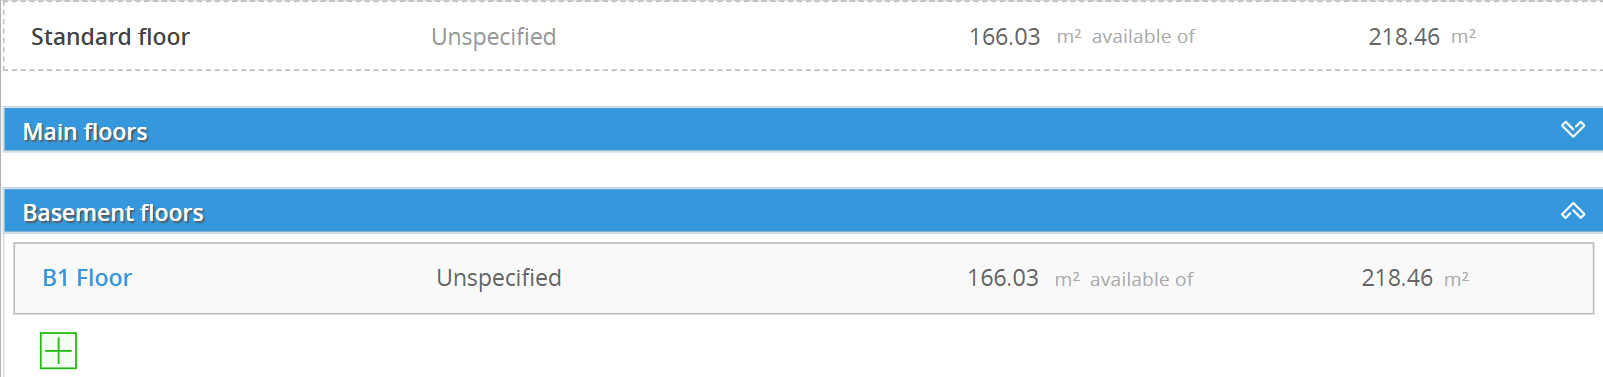
For Basement Floors (if enabled)
-
When Basement is toggled ON, you can add multiple underground levels (e.g., B1 Floor) for heavy storage or specialized production environments.
.
Rules: Configuring Property Acquisition Costs
When you click RULES on a building, the Building size tab is your architectural blueprint.
n Decision Critical, the Building cost tab is where you define how your business acquires its physical space. This ensures your Balance Sheet and Cash Flow Statement accurately reflect whether you are buying, renting, or constructing your facility.
Option 1: Terms - Purchase
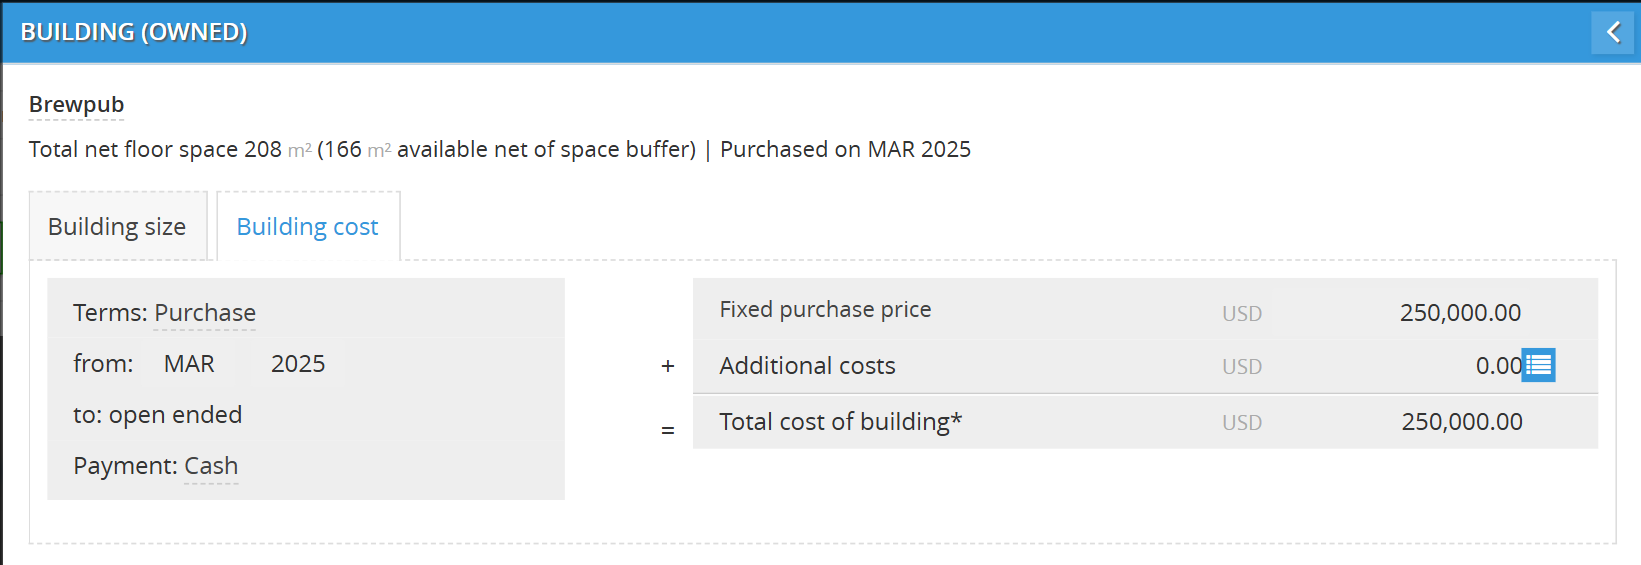
Use this option if you are buying an existing building or land plot.
-
Set the Timeline: Define the from date (e.g., FEB 2025) when the acquisition occurs.
-
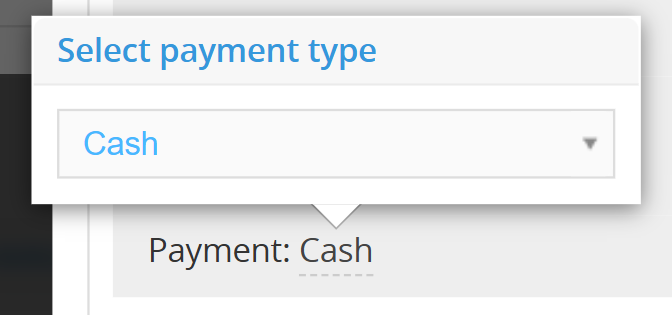
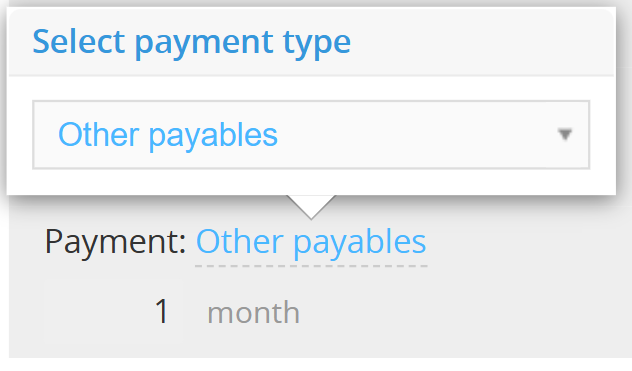
Payment Method: Choose between
-
Cash (immediate outflow)
-
Other Payables (deferred or financed payment).
-
-
Enter Financials:
-
Fixed purchase price: The primary cost of the asset.
-
Additional costs: Click the List Button to add associated fees like legal costs, inspections, or transfer taxes.


-
-
Total Cost: The system automatically calculates the total capitalized value of the building.
Option 2: Terms - Rent
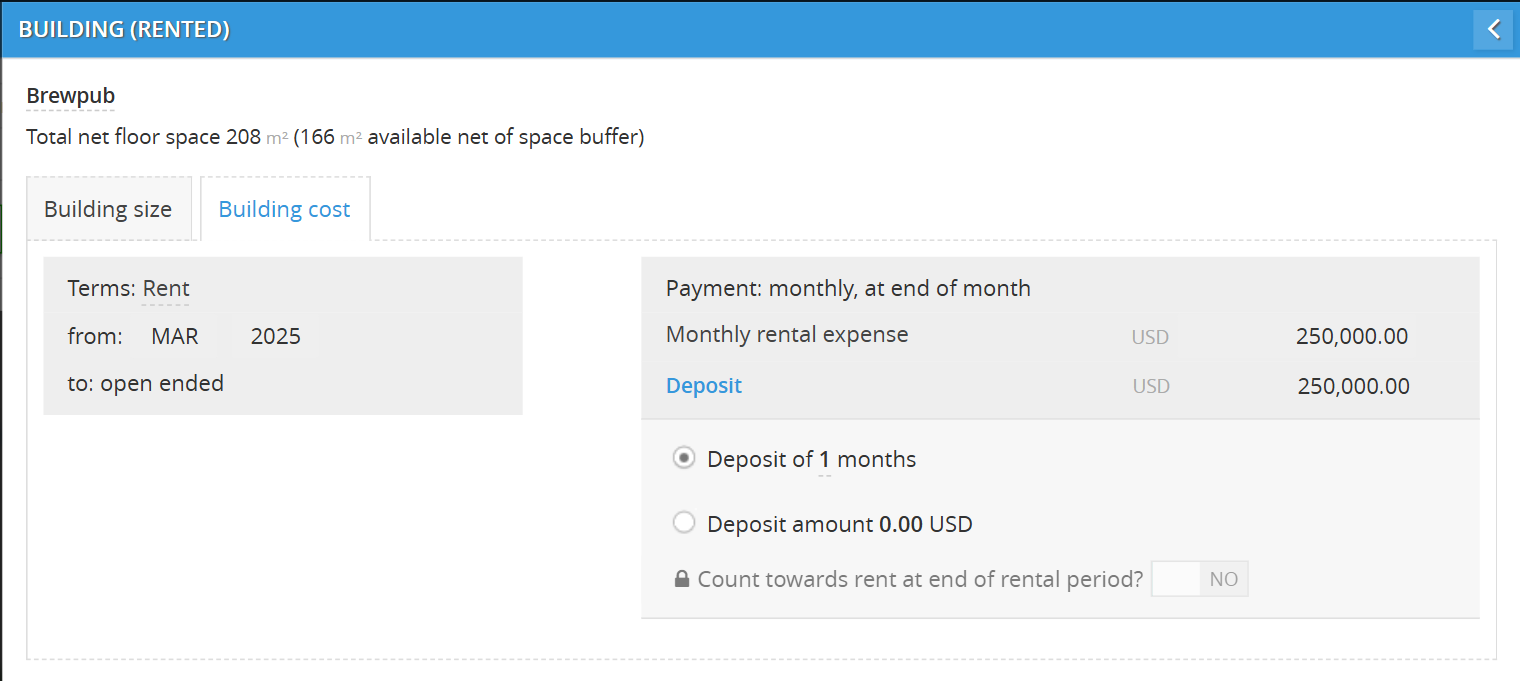
Select this option to model a standard lease agreement.
-
Set the Lease Timeline: * From: Define the month and year the lease begins (e.g., MAR 2025).
-
To: Set a specific end date or keep it as "open ended" for long-term planning.
-
-
Define Recurring Costs:
-
Enter the Monthly rental expense
-
Note that payments are assumed to occur monthly, at the end of the month.
-
-
Configure Security Deposits:
-
Click the Deposit label to extend the detailed configuration section.
-
Choose to set the deposit as a multiple of months (e.g., Deposit of 2 months) or a specific Deposit amount in USD.
-
Governance Tip: Toggle "Count towards rent at end of rental period?" to YES if the landlord will apply your deposit to the final months of the lease.
-
Option 3: Terms - Build
Use this option for simplified construction projects managed by a third party for a set fee.
-
Define Project Details:
-
Project type: Select New structure, Expansion of structure, or Continuation of construction.
-
Status on completion: Define if the space is immediately
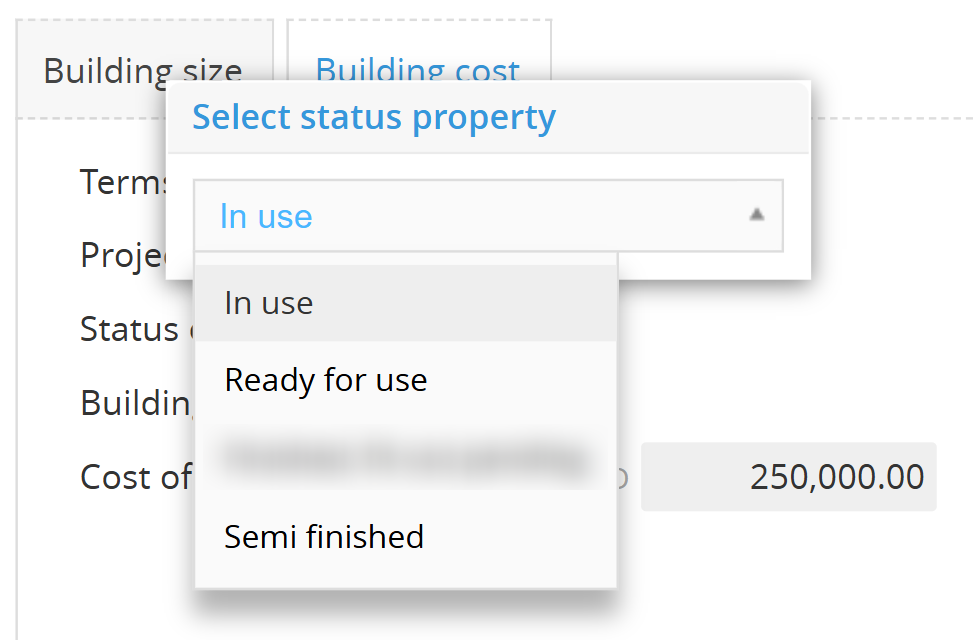
-
In use
-
Ready for use in ..[enter the amount].. month(s)
-
Semi finished
-
-
Cost of project: Enter the total budget
-
-
Set the Construction Timeline:
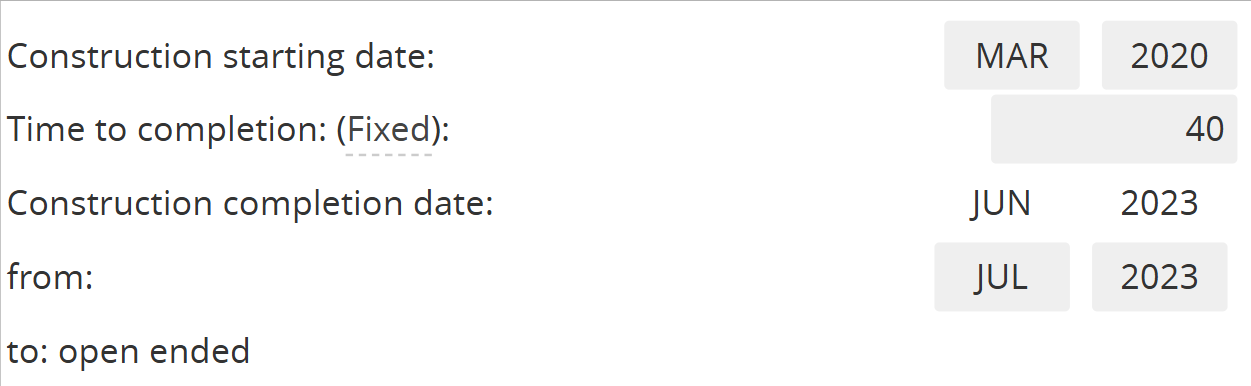
-
Enter the Construction starting date in [month] and [year] and the Time to completion in the amount of months it took.
-
-
Configure Payment Terms:
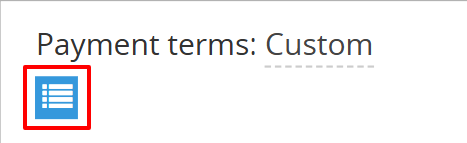
-
Custom Installments: Choose Custom and click the List Button to define specific progress payments. (only "Custom" available now [March, 2026])
-
Installment Types: You can add a Deposit, Progress payment, or the final Balance. For each, define the Term (e.g., Before, Current period, or After completion).
-
The 3 Types of Installments
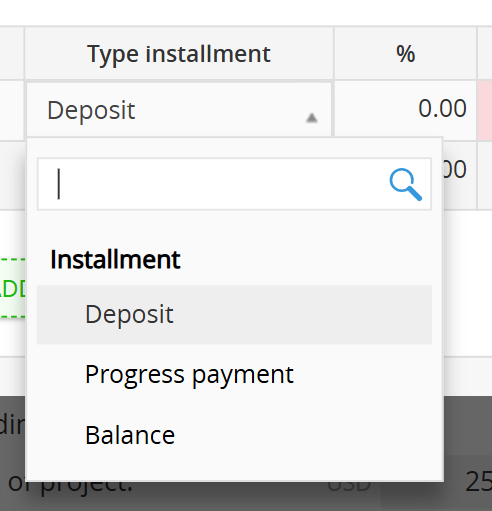
When you click + ADD INSTALLMENT, you can choose from three primary payment categories:
-
Deposit: Typically an upfront payment required to secure the contractor or mobilize materials.
-
Progress payment: Periodic payments made as specific construction milestones are met (e.g., foundation complete, framing finished).
-
Balance: The final payment made to close out the project cost once the work is finalized.
Setting the Payment "Term" (Timing)
For each installment, you must define exactly when the cash leaves your account relative to the construction timeline:
-
Before: Use this for Deposits. It allows you to model payments made before construction officially starts.
-
Current period: The payment happens during the active construction phase.
-
End current period: Use this for Progress payments that are due specifically at the close of a work cycle.
-
After: Use this for the Balance or final retainage payments that are due after construction is officially marked as complete.
-
-
-
Type of Property - Land
Land represents your physical real estate plots. It acts as the "anchor" for your facility development and long-term asset growth.
1. Setting the Foundation
When adding a new land asset, focus on these specific fields to ensure your unit economics are accurate:
-
Name: Give it a clear geographical or operational label (e.g., "North Ridge Vineyard").
-
Type property: Select Land.
-
Terms: Usually set to Purchase for land you own. If you are leasing the ground itself, you can select Rent.
-
Area footprint & Unit: Define the total size (e.g., Square meter, Acre, Hectare, or Mu).
-
Activity group: Link it to the department it serves (e.g., Production for a vineyard or farm).
-
Cost (USD): The total acquisition price (e.g., $500,000.00).
-
Useful life (years) field is set to Indefinite. (Land does not "wear out" like a tractor or a roof)
2. Land Rules and Financial Terms
In Decision Critical, the Rules for a land asset define its physical boundaries and the financial obligations tied to its acquisition. Unlike buildings, land is a permanent asset that requires specific logistical handling for unit economics.
Option 1: Terms - Purchase
Use this for land you own outright or are financing.
-
Payment Method: Select Cash for immediate payment or Other payables to defer the cash hit (e.g., a short-term owner financing or a 30-day settlement).
-
Fixed purchase price: Enter the primary acquisition cost (e.g., $500,000).
-
Real Property Addition Costs: Click the List Button to record extra fees.
-
Type: Choose from Encumbrance, Closing cost, Improvement, or Sale of salvaged items.
-
Payment Terms: Just like the main purchase, you can pay these additional costs via Cash or Other payables.
-
Option 2: Terms - Rent
Use this for land you are leasing (e.g., ground leases for agriculture or mobile storage).
-
Monthly rental expense: Enter your recurring payment. DC assumes these payments occur monthly, at the end of the month.
-
Timeline: Define the start date and the lease duration (usually "open ended" for ongoing operations).
This section is the "Reality Check" for your site development.
-
Land area: Confirm the total size and unit (e.g., Square meter, Acre, Hectare, or Mu).
-
The "Built Space" Audit: Decision Critical automatically tracks how you use this plot.
-
Total built space: As you link Buildings to this plot, this number will rise from $0.00\%$.
-
Total unbuilt space: Shows how much raw land remains.
-
Available space: This tells you exactly how much "empty" land is left for future expansion.
-
Type of Property - Space
In Decision Critical, "Space" rules are all about horizontal precision. Whether you own, rent, or build a specific station or booth, these settings ensure the system knows exactly how much "working room" you have after accounting for the physical realities of the site.

Configuring a Space (like a "Shared Kitchen Station") involves defining its physical limits and its financial lifecycle.
Tab 1: Space Size (The Reality Check)
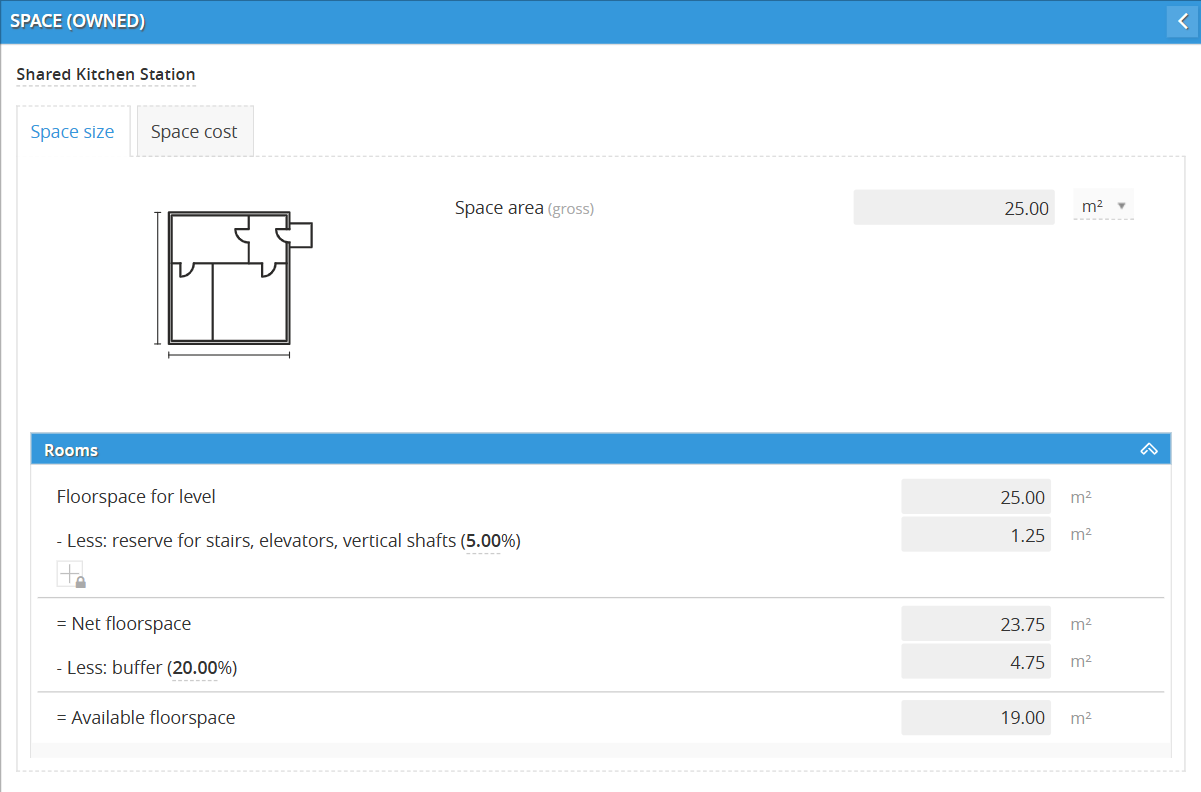
This tab calculates your actual operating capacity.
-
Space area (gross): Confirm the total area you are paying for
-
Reserve for stairs, elevators, vertical shafts (5.00%): Deducts space for vertical movement within the larger facility.
-
Net floorspace: The area remaining after structural reserves.
-
Buffer (Adjustable %): This is the "breathing room" for your staff and equipment. You can adjust this percentage to reflect how "tight" or "open" your operation is.
-
-
Available floorspace: This is the final number (e.g., $19.00$ $m^2$) that DC uses to "house" your equipment and inventory.
Tab 2: Space Cost (The Financial Blueprint)
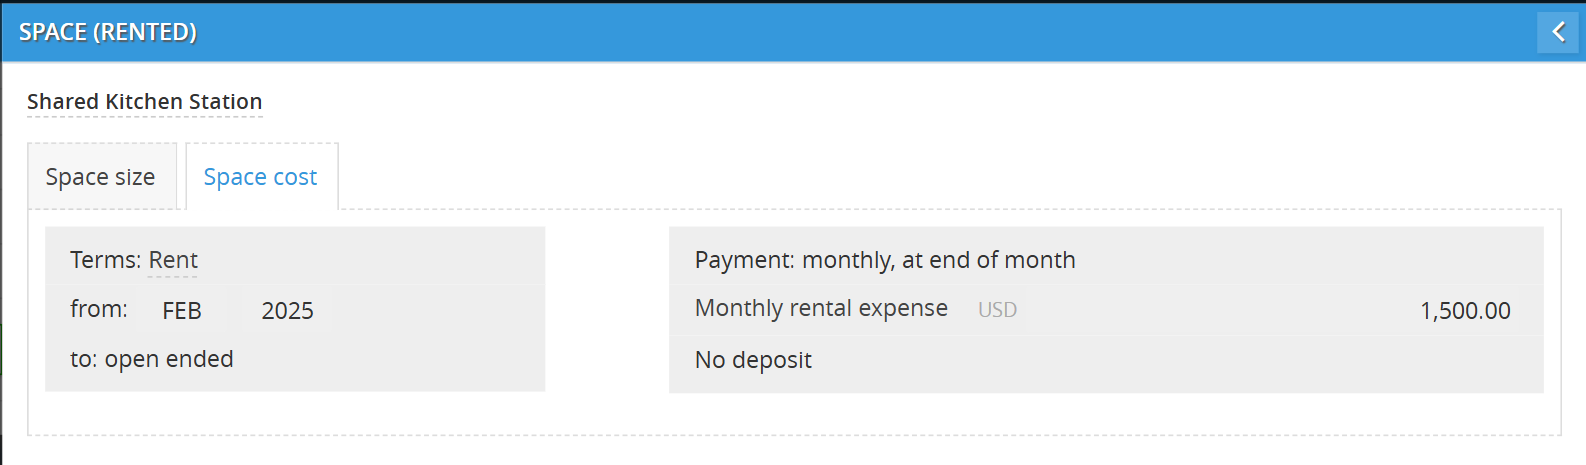
Depending on how you acquired the space, you’ll configure one of three terms:
-
Rent: Set your Monthly rental expense and Lease timeline. If there's an upfront deposit, click Deposit to model that cash outflow.

-
Purchase: Enter your Fixed purchase price and select a payment method:
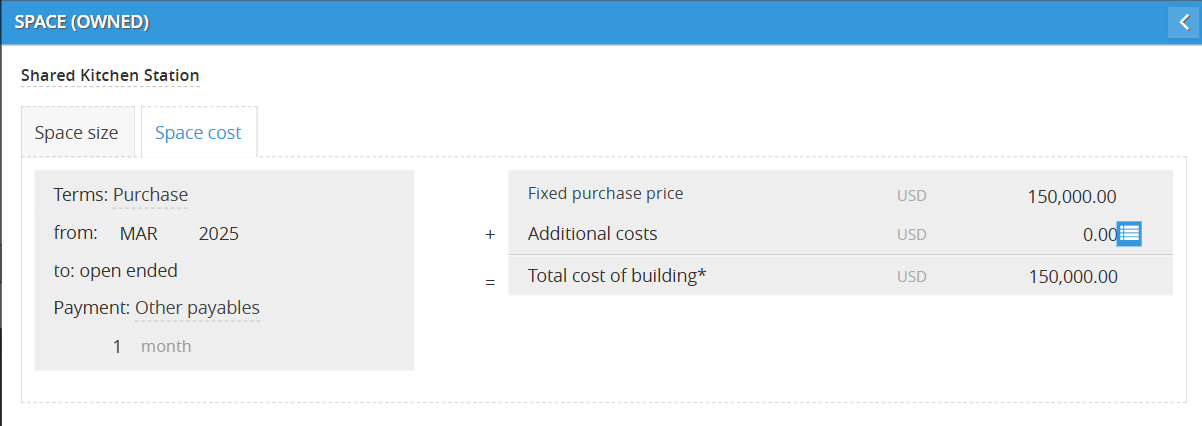
-
Cash: Immediate payment.
-
Other payables: Deferred payment (set the month count).
-
Additional costs: Click the list button to add Closing costs or Improvements.
-
-
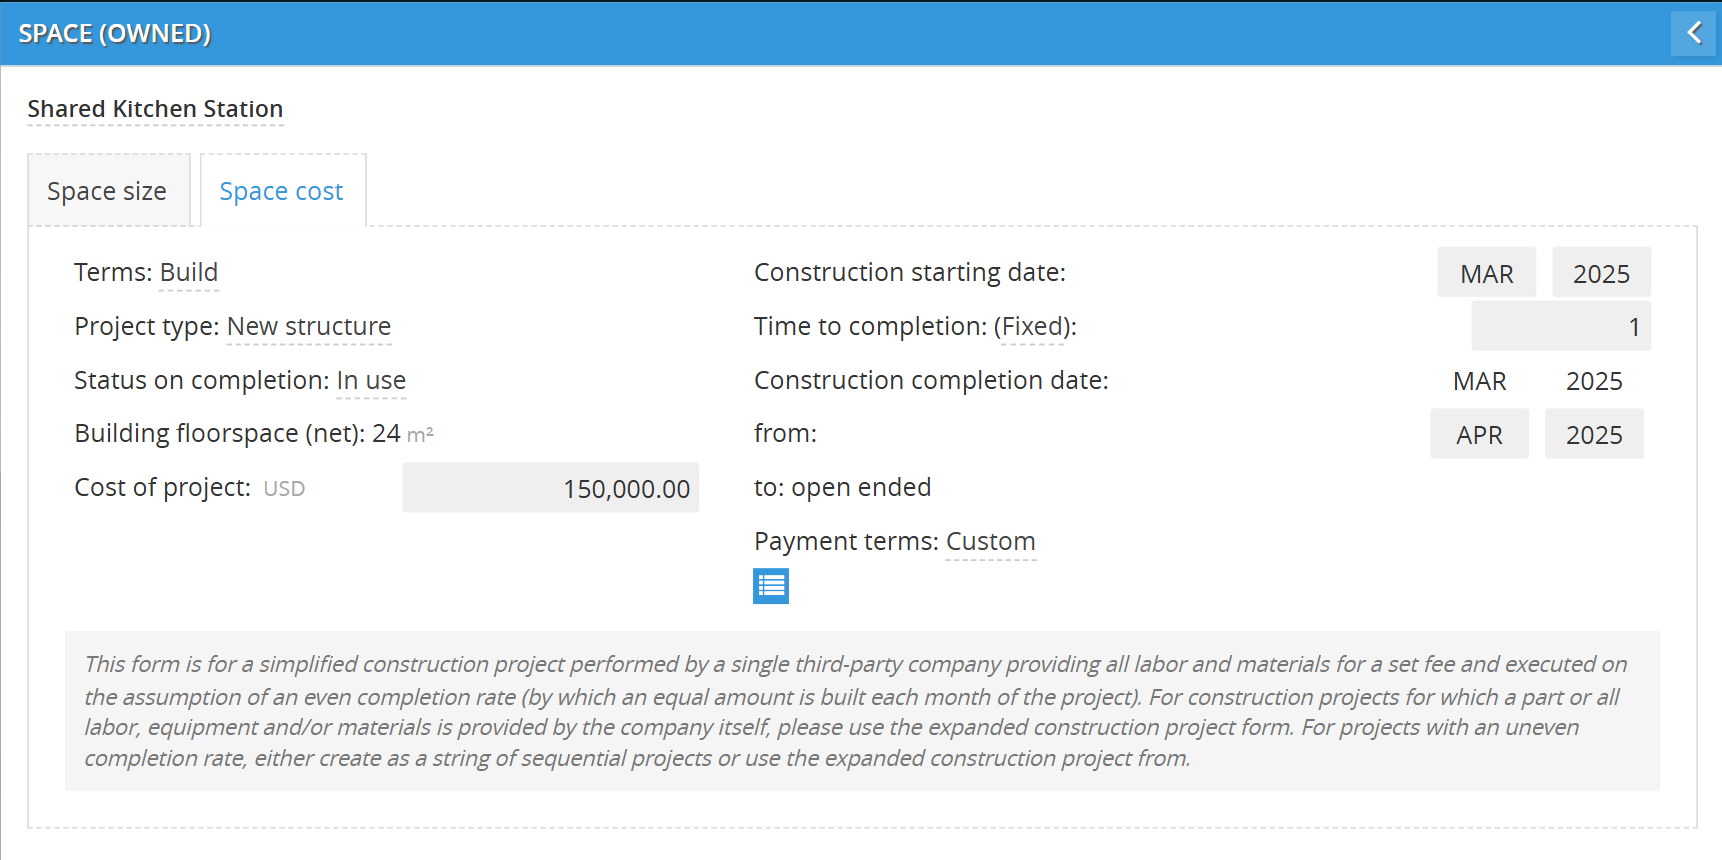
Build: Use this for custom build-outs of a space, like installing a kitchen line or a retail counter.
-
Define the Timeline: You have two ways to tell the system when the work happens:
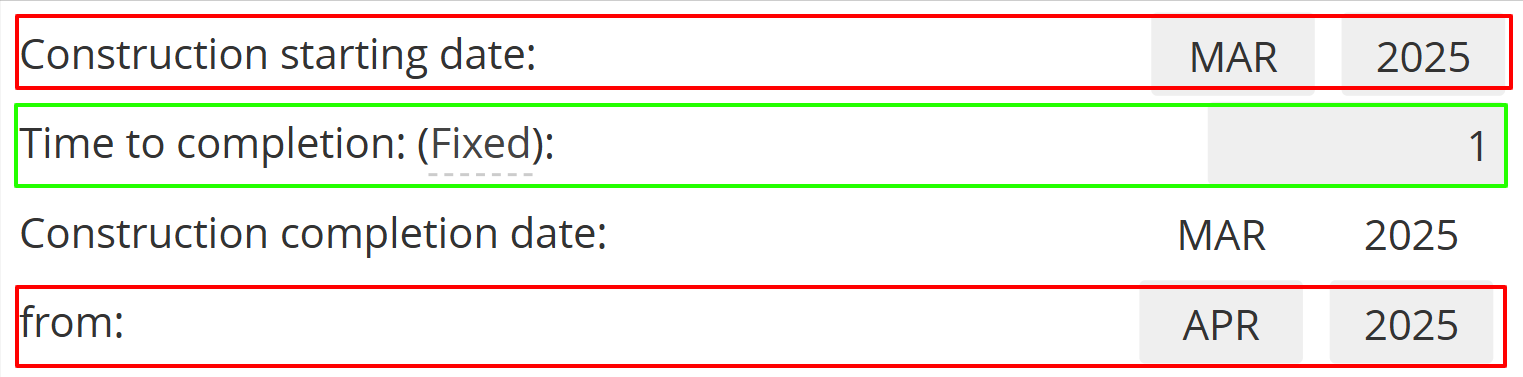
-
Fixed Duration: Enter the Time to completion in a specific amount of months (e.g., "3 months").
-
Date Range: Manually select the Construction starting date and Construction completion date.
-
-
Installments: Click the list button to define your payment milestones (Deposit, Progress payment, or Balance). This ensures your cash flow drops only when the contractor's bill is actually due.
-
💡 If this doesn’t solve your issue or you have more questions, feel free to reach out through our [contact form]. We’ll get back to you within 2–3 business days.