How to add a basic services to product assumptions?
Product card for basic service product
Production settings for basic service product
Demand assumptions settings for basic service product
Collection terms (product sales terms) for basic service product
Unit (unit conversion rates) for basic service product
Other expenses (product-driven expenses) for basic service product
How to add a basic services to your Product assumptions?
To add basic service:
- Click PRODUCTS assumption under the Business Concept section.

- In the Add New Product window, click Services.

In case you don't see the ADD NEW PRODUCT window right after you click PRODUCTS,.
Just simply click the Add New Product To Begin Working or Add New Product to begin working button, you will still access the Add New Product window directly.

- Select subtype of services as a basic service, Click BASIC.
WHAT IS A "BASIC SERVICE" PRODUCT TYPE IN DECISION CRITICAL?
Simple service: Intangible or partially-tangible services rendered via processes performed by personnel and / or equipment.
Imagine a service like getting a haircut. It's not a physical product you can hold, but it's a service a person (the stylist) performs using tools (scissors, clippers). This is a simple service - intangible (the haircut itself) or partially tangible (using equipment) delivered through skilled people.
- Provide details of your service.

- Product(service) Name (e.g., Website Design)
- Main Unit of Measure (e.g., session, project)
- Default Sale Price (e.g., $25,000 per project)
- Once you finished entering the details, click "CREATE PRODUCT AND PROCEED TO PRODUCT CARD" to proceed to the Product card (we recommend this). If you are not willing to proceed to the Product card, click "CREATE PRODUCT AND RETURN TO LIST OF PRODUCTS" to return to the Products list. In case you are willing to go to the Product card at a later time, you can do so.

- Add the settings to the product card.

Here are the essential settings you'll need for your basic service:
- Production: This section focuses on how your service is delivered to customers. It doesn't involve physical production processes like manufacturing, but rather outlines the resources required to fulfill the service.
- Demand: This section focuses on how customers will interact with your service. It allows you to forecast how much demand you expect for the service and how it might fluctuate.
- Product sales terms: This section allows you to specify the conditions under which you'll sell your service. It outlines the financial aspects of the customer transaction.
- Unit conversion rates: This section allows you to precisely define how you measure and track your service offerings within Decision Critical. It's particularly relevant for services with variable units of measure, allowing for consistent financial modeling across your scenarios.
- Product-driven expenses (if any): This section allows you to define any additional expenses directly associated with delivering the service.
- Once the product card is set up, return to the product list.
Product card for basic service product
Here are the essential settings you'll need for your basic service:

Production settings for basic service

To add production setting:
- Open Production settings.
- Before you can start working in Production settings, there is an important settings that needs to be added.

Note:
Production plan for basic service is "produce as needed", means Decision Critical doesn't automatically generate fixed production orders for your service offering. Instead, production is triggered by actual customer demand or by reaching specific inventory levels (if applicable).
Priority (Inventory Reserve) for basic service is "Low" priority, signifies that maintaining a high level of reserve inventory for this service is not critical. You are comfortable accepting a slightly higher risk of running out of capacity to fulfill service requests compared to higher priority services.- Production rules (settings icon in "Type: Simple goods"): Set of options that define how you manage the production of a manufactured good.


In the service product, the only eligible production rule option is production goal setting.
Allow production:
Basically, allow production is enabled (YES), The only thing you need to decide is the production goal.
-
Set Production Goals Automatically (Dynamic Production Plan):
System generates service production goals based on real-time demand or pre-defined rules. Ideal for services with fluctuating demand or short lead times. -
Set Production Goals Manually (Fixed Production Plan):
You define fixed production goals (e.g., staff scheduling) in advance. Suitable for services with predictable demand or long lead times (e.g., training sessions).
-
- Type of process: This defines how your service is delivered. Options might include:

-
Sequential Multi-Step Process: The service involves multiple, dependent steps that must be completed in a specific order.
-
Outsourced Process: The service delivery is handled by a third-party provider.
-
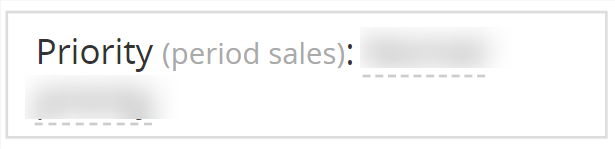
- Priority (Period Sales): Categorize the importance of a service's demand within your service portfolio.
Priority Levels:

-
Normal: This is the default or standard priority level assigned to services with average demand expectations.
-
Low: This indicates that the service has relatively low anticipated demand volume.
-
High: This signifies the service is expected to be in high demand within your service offerings.
-
Medium: This indicates the service has above-average demand potential but isn't considered the top priority.
-
- Production rules (settings icon in "Type: Simple goods"): Set of options that define how you manage the production of a manufactured good.
- **CONTINUE ONLY IF YOU CHOSE Type of process as "Sequential Multi-Step Process"**

Once you finished with the settings in Production settings, click ADD STEP TO BEGIN WORKING to add production process.
- Add production process.
To add process: Click Select a process to get started > select the process that shows in dropdown (or click Add new process to create a new process.)
To create a new process: Click Select process > Add new process > Enter a descriptive name for your new service delivery process > Click OK to save the new process. Your newly created process will be automatically selected to proceed.
- Once you've have a production process, add its details.

- Direct Labor: Specify the labor resources (from Staffing assumptions) required for each production step.
To add Direct labor: Click ADD DIRECT LABOR > click Select direct labor (dropdown) > select the direct labor you want to add.
You might assign specific personnel types (e.g., Back-end developer) or roles needed for each step.
Once you select the direct labor, it will shows (position): (x quantity).
**You might encounter prompts if you haven't defined staff (from Staffing assumptions under Resource Allocation) in the scenario yet.
To change the direct labor, simply click on the name of the labor and select the other labor you prefer. If you wish to adjust the number of labor, just click on the number and enter your desired quantity.
To reset direct labor details, hover on direct labor wait until delete button appear.
You can either skip these sections and define them later or create the necessary staff resources before proceeding.
- Direct Equipment
Specify any equipment (from Equipment assumption) directly used in completing process step (e.g., Laptop, PC).
To add Direct labor: Click ADD DIRECT EQUIPMENT > click Select direct equipment (dropdown) > select the equipment you want to add.
Once you select the direct labor, it will shows (Position): (x QUANTITY).
To change the direct labor, simply click on the name of the labor and select the other labor you prefer. If you wish to adjust the number of labor, just click on the number and enter your desired quantity.
To reset direct labor details, hover on direct labor wait until delete button appear.
**You might encounter prompts if you haven't defined equipment (from Equipment assumptions under Resource Allocation) in the scenario yet.
You can either skip these sections and define them later or create the necessary equipment resources before proceeding. - Unit Time Type
Define how you measure the time it takes to complete each step. Options is between time per unit and :
Time/Unit: This means you'll specify the average time required to produce one unit of your good (e.g., 12 hour per project).
Units/Time: This option is used if a specific number of units can be completed within a given time frame (e.g., 2 project per 24 hour).
- Direct Labor: Specify the labor resources (from Staffing assumptions) required for each production step.
- Once you done with all settings for production process, return to product card to save.

- To add more steps, just click on the "ADD STEP" button. Then, repeat steps 4 to 6 again until you have completed the entire process. Finally, return to the Product card.

- Review your production process settings again at Product Card.

Demand settings for basic service

To add a market demand assumptions:
- Click "ADD DEMAND TO ACTIVATE SALES"
- In MARKET DEMAND ASSUMPTIONS window, Click on "Select Channel" and choose the specific channel. (If this is your very first time setting up demand assumptions, you can starting with the default channel. However, we recommend setting up additional channels yourself. You can find more information in the "Here's a tips" section.)

- Select the demand assumptions and enter the details of the selected sales channel.

- Constant Demand: Demand for your service remains consistent over time.
- Step Growth: Demand for your service increases in steps or jumps at specific points in time.
- Linear Demand Growth: Demand for your service increases steadily over time at a constant rate.
- Phased Linear Demand: Demand for your service exhibits periods of constant linear growth followed by plateaus or slower growth phases.
- Seasonal Demand: Demand for your service fluctuates predictably throughout the year based on seasonal trends.
- Segment Dynamics: Demand for your service varies depending on specific customer segments you target.
- Demand Funnel (various growth types): This models the conversion process of potential customers into paying customers, considering different growth patterns at each stage of the funnel (e.g., Constant demand for website visitors, Step growth for qualified leads).
- Geographic Demand: Demand for your service varies depending on the geographic location of your customers.
- Once you have finished entering the details, click "CREATE DEMAND".
- Check the market purchase assumptions of your selected channel.

Note: Data in the images (e.g., name, unit, price) is for demonstration purposes only and may not reflect your actual values.
This might includes:
- Demand Overview: After you've selected and configured the sales channel and demand type, you'll see a summary of the forecasted demand for your outsourced manufactured good. This summary displays:

For example: "Y1: 50 x Month , USD 10.99 (Excluding VAT)"
That's mean in the first forecasted year (year 1), there will be 50 new subscribers with the price of each subscriber as 10.99 USD (excluding VAT).
-
Detailed Breakdown (Expanded): This summary provides a high-level overview. By clicking on this section (it might appear collapsed or expandable), you'll be able to see a more detailed breakdown of the demand forecast:

- Month: Each month within the forecast year will be listed.
- Demand per Month: The specific number of units demanded for each month.
- Unit Price per Month: The sales price per unit for each month (excluding VAT). This allows you to see if there are any price fluctuations planned throughout the year.
- Demand Overview: After you've selected and configured the sales channel and demand type, you'll see a summary of the forecasted demand for your outsourced manufactured good. This summary displays:
- Click "UPDATE AND CONTINUE" to save and return to Product Card.
- Review the market purchase assumptions again at Demand at Product Card.

Here's a tips:
- In case you want to come back to edit the demand assumptions later, just simply click on the settings icon located in the top-right corner.

- To cancel and return: click RESET, on the top left.

- We highly recommend setting up your sales channels. Choose clear names, add all relevant channels, and configure cross-border settings if needed.
For detailed instructions on setting collection rules, adding channels, or renaming (including cross-border settings),
Read more: Adding more channels and Cross-border setting.
Collection terms settings for basic service

The Collection terms (or Product Sales Terms) settings within a product card in Decision Critical helps you define how revenue for your service is recognized. Here's a breakdown of the key aspects:
Channels and Collection Terms:
- Channels: These represent the different ways customers can access your virtual service. Common channels might include online subscriptions, pay-as-you-go models, or through partner integrations.
- Collection Terms: This specifies when revenue is recognized for each channel. Decision Critical likely uses a standard term (e.g., "month" or "year") after access is granted, indicating when payment is typically collected after the service becomes available to the customer.
To set the collection terms:
-
Locate the "Collection terms" settings within Product Card, click the list icon button to access.

- In the "PRODUCT SALES TERMS" window, select the specific sales channel you want to configure.

- Select the collection rule from drop-down options:
- On Account: Revenue is recognized when the customer receives an invoice for the service.
- On Delivery: Revenue is recognized when the service is delivered to the customer. (so you don't need to set its collection period)
- Prepayment: Revenue is recognized when the customer pays for the service upfront, before it occurs.
- Set collection terms: Define timeframe when revenue is recognized for this channel (e.g., 1 Days after delivery for "on account").
- Once you finished, you can return to Product card to proceed.
- **We highly recommend setting up your sales channels. Choose clear names, add all relevant channels, and configure cross-border settings if needed.
For detailed instructions on setting collection rules, adding channels, or renaming (including cross-border settings),
Read more: Adding more channels and Cross-border setting.
Units (unit conversion rates) settings for basic service

The "Units" settings within your product card allows you to configure how units are handled. This section offers flexibility to accommodate different scenarios.
- Allow partial Units: Enable this option if you want to allow users to purchase your service in parts (applicable only to specific units you choose). This provides greater flexibility for your customers.

- Alternative Units: This feature allows you to define additional units for your service alongside the primary unit. You can then set a conversion rate (CR) for each alternative unit, indicating how many units of the alternative unit are equivalent to one unit of the primary unit. This caters to users who might prefer to see prices or purchase your service in different units.
- To enable alternate unit: Click "alternate unit not set" > Select the alternate unit >


- To enable alternate unit: Click "alternate unit not set" > Select the alternate unit >
Example: Project-Based Services with Item Flexibility
Imagine you offer a project-based service, such as website design. In this case:
- Primary Unit: Project (represents the entire website design project)
- Alternative Unit: Item (represents individual components of the website, like a page or a form)
- Conversion Rate: 1 Project = 10 Items
With this setup, customers can see the overall price for the entire website design project (in Projects) but also have the option to view pricing for individual components (in Items). The conversion rate clarifies that 10 Items are equivalent to 1 Project.
By utilizing these options, you can tailor your service offering to better suit your customers' needs and preferences. They can choose the unit that makes the most sense for their project scope.
Other expenses (product-driven expenses for all channels) settings for basic service

The "Other Expenses (all channels)" section empowers you to define additional costs associated with your service. These are considered product-driven expenses, meaning they're directly tied to the use of your service.
To add product-driven expenses:
- Open PRODUCT-DRIVEN EXPENSES by clicking the list icon on the right side of Other expenses (all channels).
- In PRODUCT-DRIVEN EXPENSES window, click "+ ADD EXPENSES" to add new expenses. To add expenses:

- Enter expenses name (e.g., Packaging Materials).
- Select expenses rule: On shipment, On production.
- Select a calculation method and set the number of expenses (e.g., $0.05 per piece).
- Set the activity group.
- Review the expenses you added, and then return to PRODUCT CARD. The newly added product-driven expenses will be listed.

Here's what you can specify for each expense:
- Expense Name: Give your expense a clear and descriptive name (e.g., "Web Hosting," "Development Time").
- Expense Rule: Select an existing expense rule from your settings. These rules could represent cost components like materials, labor, or software usage.
- Calculation Method: Choose how the expense is calculated:
- Per Unit Cost: This method assigns a fixed cost per unit of your service (e.g., "$10 USD per Project").
- % (Percentage) of Amount Sold: This method calculates the expense as a percentage of the total revenue generated from selling your service (e.g., "5% of Sales").
- Activity Group: Categorize the expense by its nature. Common categories include:
- General: Expenses that apply broadly to your business operations.
- Administrative: Administrative costs associated with managing your service.
- Selling: Costs related to marketing and selling your service.
- Production: Costs incurred during the production or delivery of your service.
- Non-Operating: Expenses not directly related to your service's core operations.
- By defining these product-driven expenses and utilizing expense rules, you gain a clear understanding of your overall costs per unit and their impact on your accounting practices.
- This information empowers you to set competitive prices, optimize your supply chain, and ultimately ensure the profitability of your product offering.
- To delete the expenses, simply click on the delete button located on the right side of the list in PRODUCT-DRIVEN EXPENSES.
