How to a basic traded goods to product assumptions?
Product card for basic traded goods
Production of basic traded goods
Demand assumptions settings for basic traded goods
Collection terms (product Sales Terms) for basic traded goods
Unit (unit conversion rates) for basic traded goods
Other expenses (product-driven expenses) for basic traded goods
How to add a basic traded goods to your Product assumptions?
To add a basic traded goods:
- Click PRODUCTS assumptions in the Business Concept section.

- In the Add New Product window, click TRADED GOODS.

In case you don't see the ADD NEW PRODUCT window right after you click PRODUCTS,.
Just simply click the Add New Product To Begin Working or Add New Product to begin working button, you will still access the Add New Product window directly.

- Select subtype of traded goods as a basic traded goods, Click BASIC.
WHAT IS A "BASIC TRADED GOODS" PRODUCT TYPE IN DECISION CRITICAL?
Basic Traded Goods: Buy-and-sell trading (For enterprises that carry inventory and conduct wholesale, online or retail trading)
Imagine a store that sells things you can hold, like clothes or groceries. These are "basic traded goods" because they involve buying and selling physical products (inventory). The store can sell these products wholesale (to other businesses), online (through a website), or directly to customers in a retail setting (like a physical store).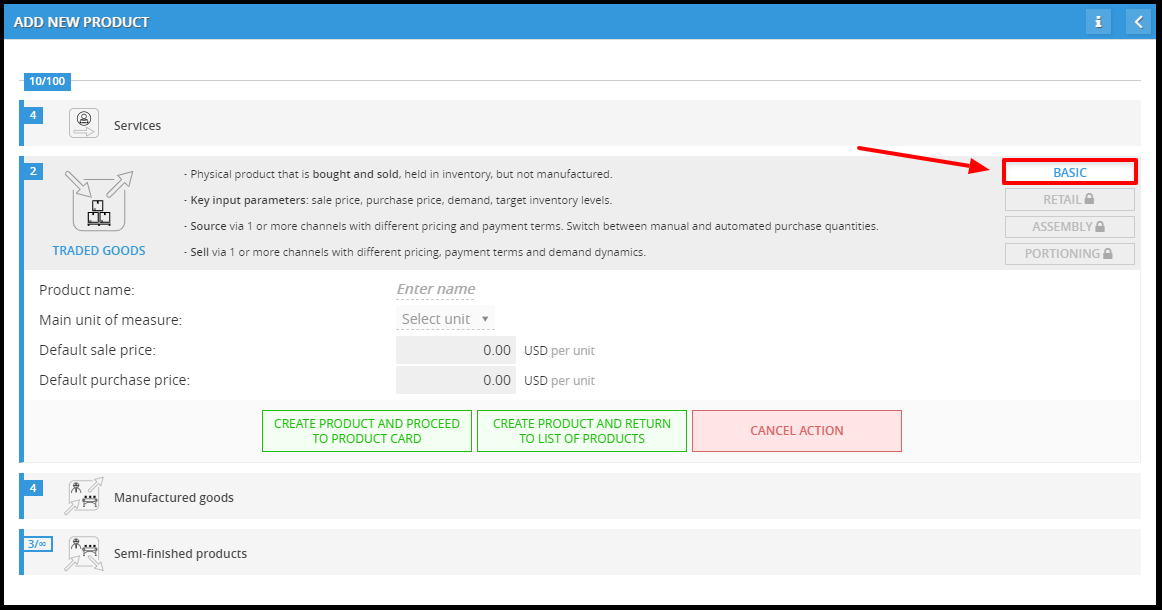
- Provide details of your traded goods.

- Product Name (e.g., Website Design)
- Main Unit of Measure (e.g., session, project)
- Default Sale Price (e.g., $25,000 per project)
- Click "CREATE PRODUCT AND PROCEED TO PRODUCT CARD" to go to the Product Card (recommended).
Otherwise, click "CREATE PRODUCT AND RETURN TO LIST OF PRODUCTS" to go back to the Products list and access the Product Card to add the product details later (then continue at step 6).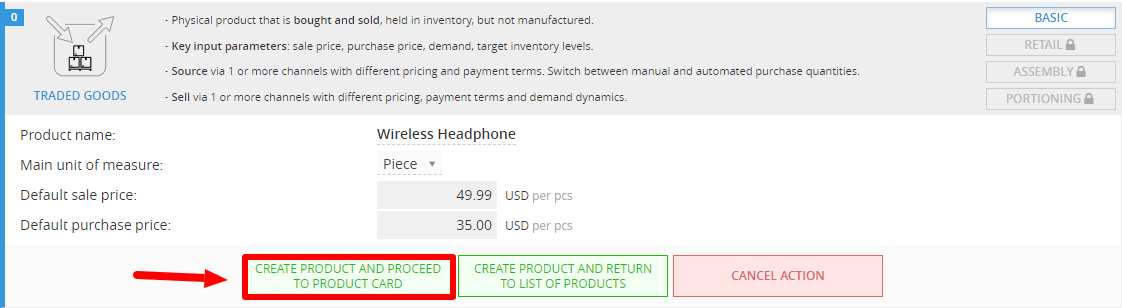
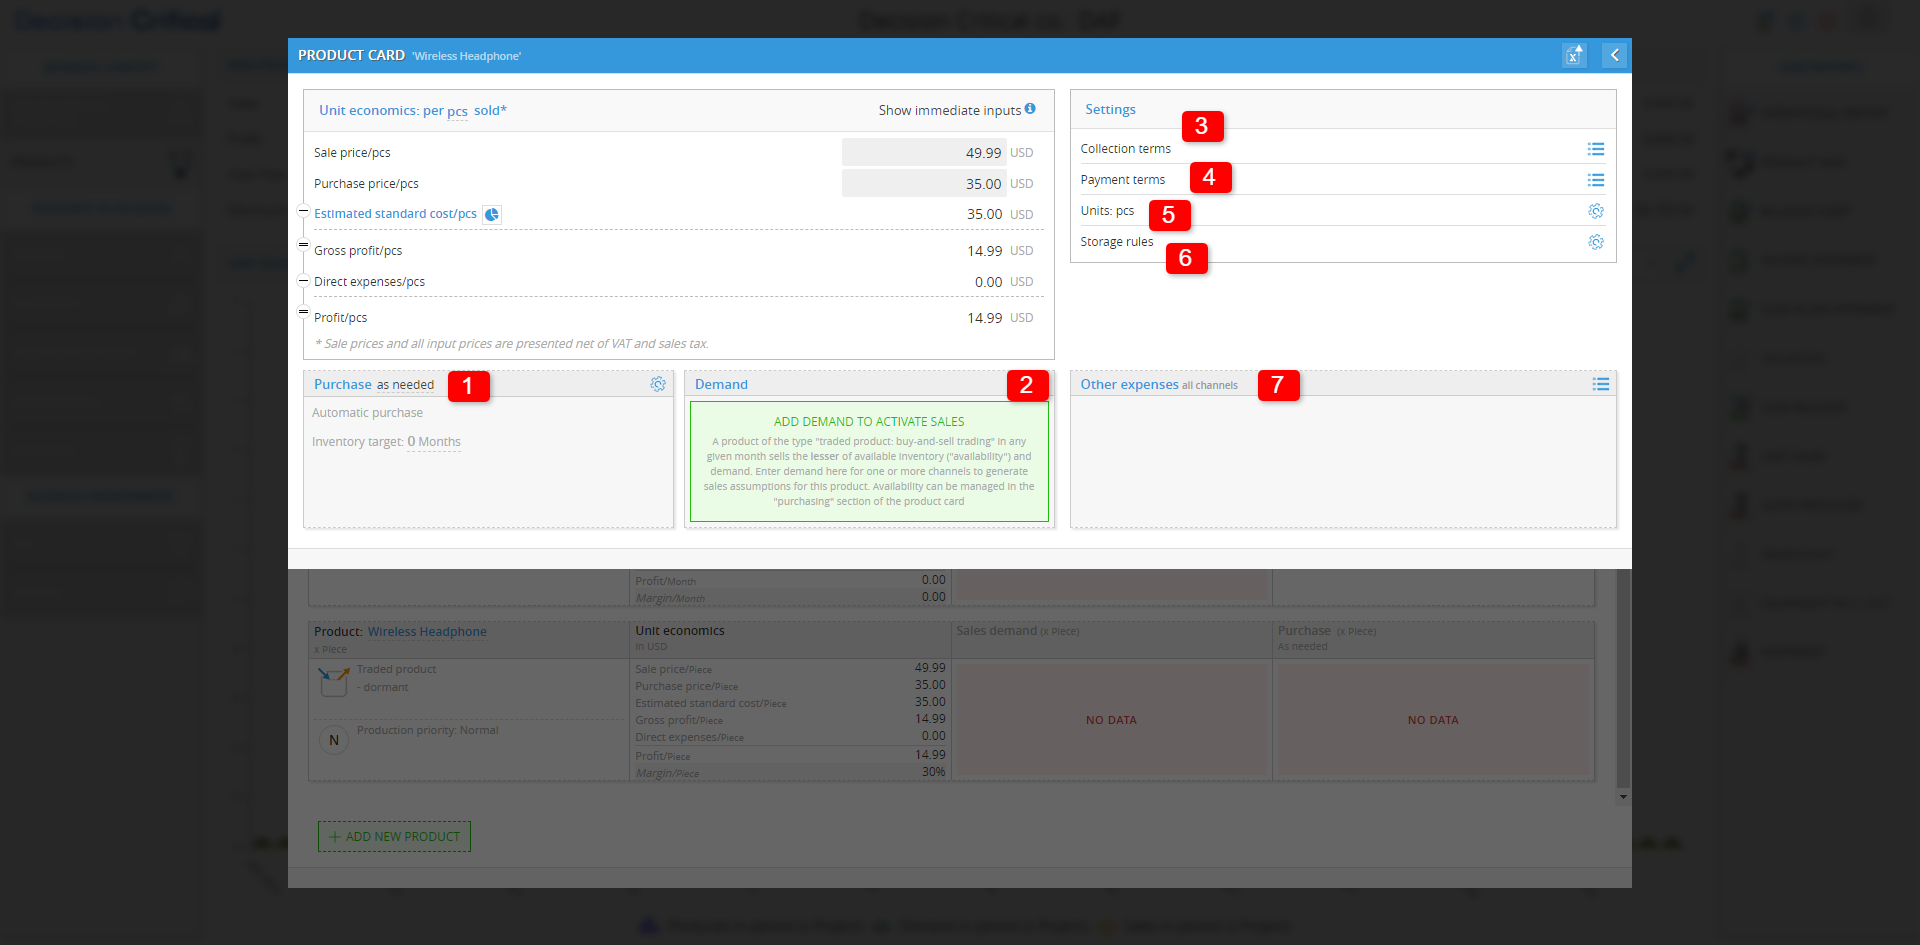
- Add your product settings to the PRODUCT CARD.

Here are the essential settings you'll need for your traded goods:
- Purchase (Market Purchase Assumptions) help define how your company acquires "Basic Traded Goods" (physical inventory) within a scenario.
- Demand (Market Demand Assumptions): This section allows you to forecast customer demand for the traded good. You can choose different models (e.g., Constant Demand, Seasonal Demand) to predict future sales.
- Collection Terms: This section defines when revenue is recognized for the traded good.
- Payment Terms: This section defines the payment terms you offer to your customers.
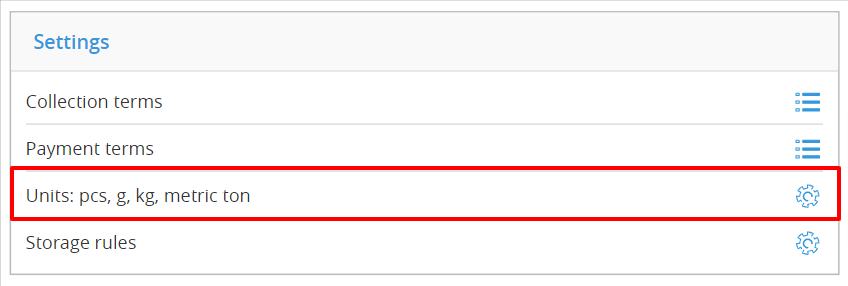
- Units: This specifies the primary unit of measure used to track the traded good.
- Storage Rules: This section defines how you manage the inventory of the traded good.
- Product-driven Expenses: This section allows you to define any additional costs associated with selling the traded good.
- Once the product card is set up, return to the product list.
Product card for basic traded goods
The essential settings you'll need for your basic traded goods:
- Purchase
- Demand
- Collection terms
- Payment terms
- Units
- Storage rules
- Other expenses
For details on each setting, refer to the following section.
Purchase settings for basic traded goods

Note:
A product of the type "traded product: buy-and-sell trading" in any given month sells the lesser of available inventory ("availability") and demand. Enter demand here for one or more channels to generate sales assumptions for this product. Availability can be managed in the "purchasing" section of the product card
Similar to Market Demand Assumptions for products, Market Purchase Assumptions in Decision Critical allow you to define how you obtain traded goods (physical products) for your business.
To add production:
- Click the setting icon on the top right of Purchase to open Purchase settings.

- In MARKET PURCHASE ASSUMPTIONS window, Click on "Select Channel" and choose the specific channel. (If this is your very first time setting up purchase assumptions, you can starting with the default channel. However, we recommend setting up additional channels yourself. You can find more information in the "Here's a tips" section.)

- In MARKET PURCHASE ASSUMPTIONS window, select the Purchase rule between Purchase as Needed and Purchase as Manual.

- Purchase as Needed: This option allows you to model a dynamic purchasing strategy. Decision Critical might automatically trigger purchase orders based on pre-defined inventory levels or reorder points. (continue at step 4)
- Purchase as Manual: This option gives you more control over purchasing decisions. You manually create purchase orders within Decision Critical. (continue at step 5)
- If you have set the Purchase rules as "Purchase as Needed", you will need to set the inventory target manually.

To set the inventory target:
- Make sure you select purchase rules as "Purchase as needed"
- Return to PRODUCT CARD ,
-
In Purchase settings, you'll find the "Inventory Target" set to "0 Months." This value represents your desired average inventory level.
Click directly on the "0 Months" text to edit and enter your preferred target inventory level.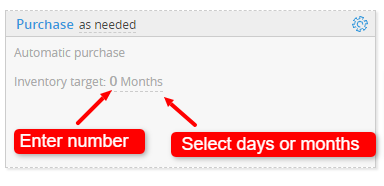
- If you have set the Purchase rules as "Purchase manual", you will need to set the market purchase assumptions.
To set market purchase assumptions:
- Select your preferred sales channel. (step 3)
- Make sure you select purchase rules as "Purchase manual".
- Choose the market purchase assumptions type to define the forecasted demand for the traded good from your suppliers.
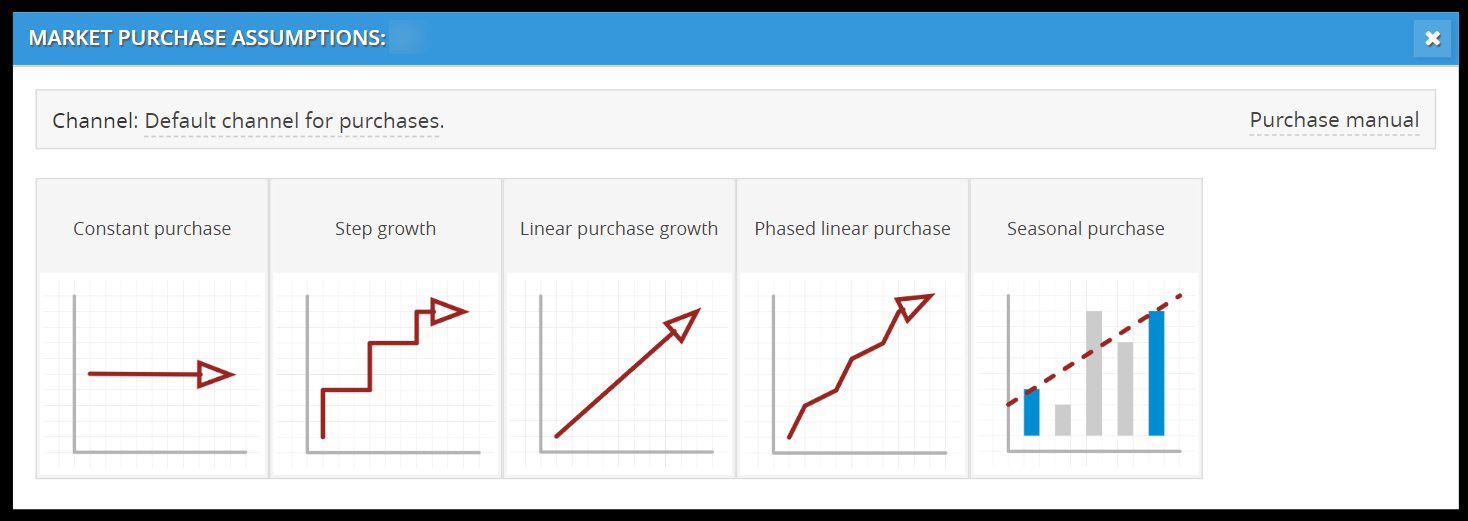
- Constant Purchase: Demand for the traded good remains consistent over time.
- Step Growth: Demand increases in steps or jumps at specific points in time.
- Linear Purchase Growth: Demand increases steadily over time at a constant rate.
- Phased Linear Purchase: Demand exhibits periods of constant linear growth followed by plateaus or slower growth phases.
- Seasonal Purchase: Demand fluctuates predictably throughout the year based on seasonal trends.
- Provide the specific details and click "CREATE DEMAND".
- Check the market purchase assumptions of your selected channel.
This might includes:
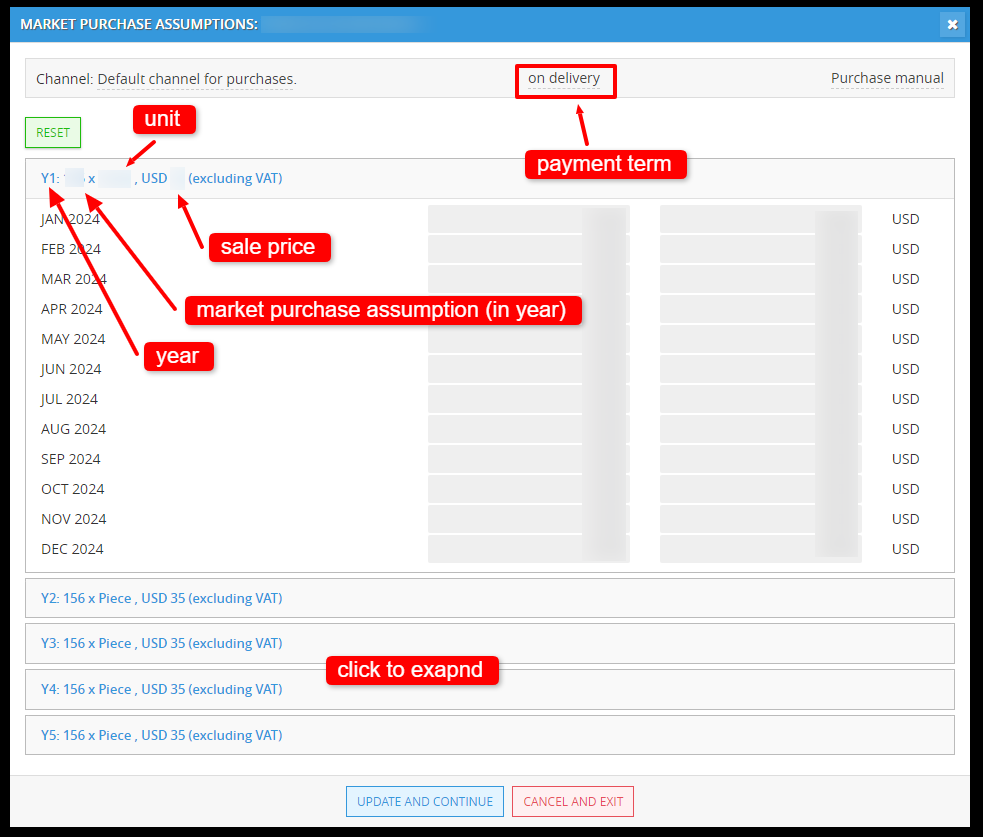
- Purchase Assumptions Overview: After you've selected and configured the sales channel and market purchase assumptions type, you'll see a summary of the forecasted purchase for your traded goods. This summary displays:

For example: "Y1: 1200 x Piece , USD 35 (Excluding VAT)"
That's mean in the first forecasted year (year 1), there will be 1,200 pieces of traded goods purchase with the price of each as 35 USD (excluding VAT).
- Detailed Breakdown (Expanded): This summary provides a high-level overview. By clicking on this section (it might appear collapsed or expandable), you'll be able to see a more detailed breakdown of the purchased forecast:

- Month: Each month within the forecast year will be listed.
- Demand per Month: The specific number of unit purchased for each month.
- Unit Price in Month: The purchased price per unit in each month (excluding VAT).
- Payment term: It defines how you pay your suppliers for the traded goods you purchase within Decision Critical. The structure is very similar to Collection Terms, but focuses on the purchasing side.

To select the payment term:- Click on the Payment term (e.g., "on delivery").
- Select Payment term from dropdown menu.
- On Account: You receive the goods and are invoiced later (typical for credit purchases).
- On Delivery: Payment is made when you receive the goods.
- Prepayment: You pay for the goods upfront before they are delivered.
- If you have never set the payment terms, we recommend going to the payment terms settings in Product Card and setting the timeframe for payment, especially if you select the payment term "On account" or "Prepayment".
- Purchase Assumptions Overview: After you've selected and configured the sales channel and market purchase assumptions type, you'll see a summary of the forecasted purchase for your traded goods. This summary displays:
- Click "UPDATE AND CONTINUE" to save and return to Product Card.
- Review the market purchase assumptions again at Purchase at Product Card.


Here's the tips:
- To cancel and return: click RESET, on the top left.

- In case you want to come back to edit the purchasing assumptions later, just simply click on the settings icon located in the top-right corner.
- We highly recommend setting up your purchase channels. Choose clear names, add all relevant channels.
For detailed instructions on setting collection rules, adding channels, or renaming.
Read more: Modifying purchase channels.
Demand settings for basic traded goods

Market Demand Assumptions:
For basic traded products, the concept of "demand" is less relevant compared to product. Since these products are physical goods with limited stock, you wouldn't use direct demand forecasting techniques.
Focus on Sales Assumptions:
This section focuses on how much of your product you expect to sell through different channels (e.g., online marketplaces, direct sales). Defining these sales assumptions helps you create realistic sales forecasts and plan for inventory management and resource allocation effectively.
To add a market demand assumptions:
- Click "ADD DEMAND TO ACTIVATE SALES"
- In MARKET DEMAND ASSUMPTIONS window, Click on "Select Channel" and choose the specific channel. (If this is your very first time setting up demand assumptions, you can starting with the default channel. However, we recommend setting up additional channels yourself. You can find more information in the "Here's a tips" section.)

- Choose the demand assumptions relevant to your selected sales channel.
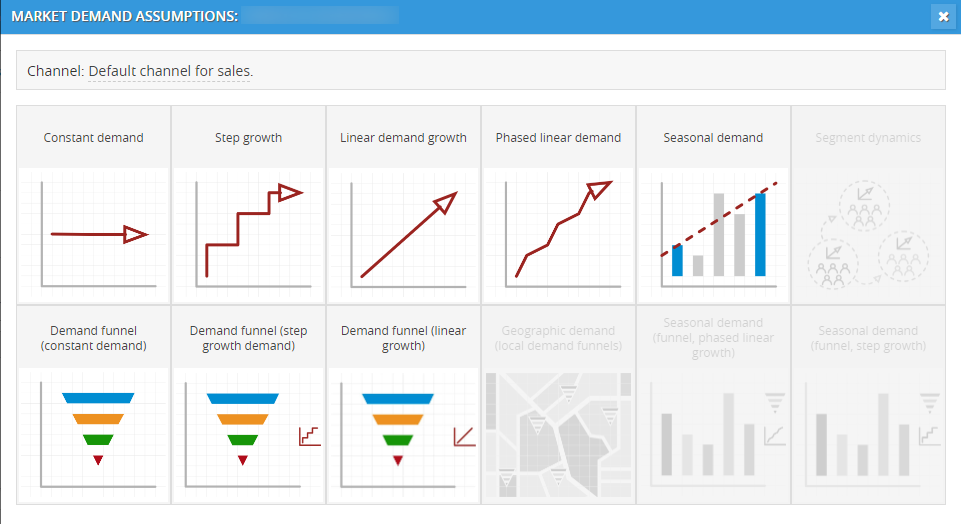
- Constant Demand: Demand for your product remains consistent over time.
- Step Growth: Demand for your product increases in steps or jumps at specific points in time.
- Linear Demand Growth: Demand for your product increases steadily over time at a constant rate.
- Phased Linear Demand: Demand for your product exhibits periods of constant linear growth followed by plateaus or slower growth phases.
- Seasonal Demand: Demand for your product fluctuates predictably throughout the year based on seasonal trends.
- Segment Dynamics: Demand for your product varies depending on specific customer segments you target.
- Demand Funnel (various growth types): This models the conversion process of potential customers into paying customers, considering different growth patterns at each stage of the funnel (e.g., Constant demand for website visitors, Step growth for qualified leads).
- Geographic Demand: Demand for your product varies depending on the geographic location of your customers.
- Provide the specific details and click "CREATE DEMAND".
- Check the demand of your selected channel.

Note: Data in the images (e.g., name, unit, price) is for demonstration purposes only and may not reflect your actual values.
This might includes:
- Demand Overview: After you've selected and configured the sales channel and demand type, you'll see a summary of the forecasted demand for your outsourced manufactured good. This summary displays:

For example: "Y1: 50 x Month , USD 10.99 (Excluding VAT)"
That's mean in the first forecasted year (year 1), there will be 50 new subscribers with the price of each subscriber as 10.99 USD (excluding VAT).
-
Detailed Breakdown (Expanded): This summary provides a high-level overview. By clicking on this section (it might appear collapsed or expandable), you'll be able to see a more detailed breakdown of the demand forecast:

- Month: Each month within the forecast year will be listed.
- Demand per Month: The specific number of units demanded for each month.
- Unit Price per Month: The sales price per unit for each month (excluding VAT). This allows you to see if there are any price fluctuations planned throughout the year.
- Demand Overview: After you've selected and configured the sales channel and demand type, you'll see a summary of the forecasted demand for your outsourced manufactured good. This summary displays:
- Click "UPDATE AND CONTINUE" to save and return to Product card. (Click RESET in case you want to cancel and return)

- In case you want to come back to edit the demand assumptions later, just simply click on the settings icon located in the top-right corner.

- To cancel and return: click RESET, on the top left.

- We highly recommend setting up your sales channels. Choose clear names, add all relevant channels, and configure cross-border settings if needed.
For detailed instructions on setting collection rules, adding channels, or renaming (including cross-border settings),
Read more: Adding more channels and Cross-border setting.
Collection terms settings for basic traded goods
The Collection terms (or Product Sales Terms) settings within a product card in Decision Critical helps you define how revenue for your traded goods is recognized. Here's a breakdown of the key aspects:
Channels and Collection Terms:
- Channels: These represent the different ways customers can purchase your basic traded goods. Common channels might include online stores, physical stores, or through wholesale partnerships.
- Collection Terms: This specifies when revenue is recognized for each channel. Decision Critical likely uses standard terms to indicate when payment is typically collected after ownership of the goods is transferred to the customer.
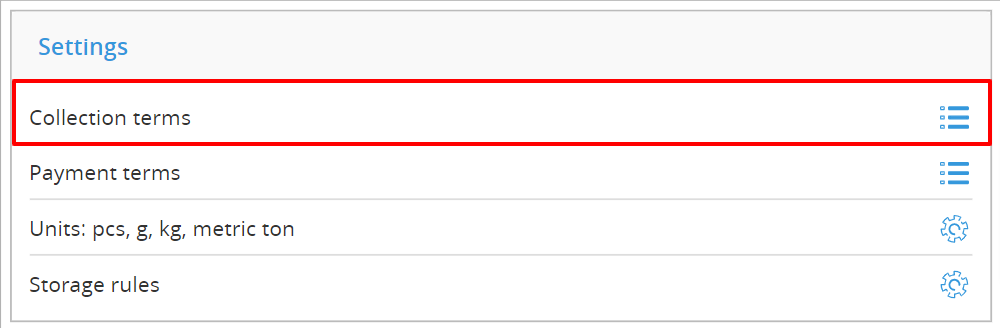
To set the collection terms:
-
Locate the "Collection terms" settings within Product Card, click the list icon button to access.

- In the "PRODUCT SALES TERMS" window, select the specific sales channel you want to configure.

-
Select the collection rule from drop-down options:
- On Account: Revenue is recognized when the customer receives an invoice for the goods (common for transactions with invoicing).
- On Delivery: Revenue is recognized when ownership transfers to the customer (typically at delivery or pickup).
- Prepayment: Revenue is recognized when the customer pays upfront (common for online orders with pre-payment).
- Set collection terms: Define timeframe when revenue is recognized for this channel (e.g., 1 Days after delivery for "on account").
- Once you finished, you can return to Product card to proceed.
- We highly recommend setting up your sales channels. Choose clear names, add all relevant channels, and configure cross-border settings if needed.
For detailed instructions on setting collection rules, adding channels, or renaming (including cross-border settings),
Read more: Adding more channels and Cross-border setting.
Collection terms settings for basic traded goods
The Payment terms (or Product Sales Terms) settings within a product card in Decision Critical helps you define payment recognition for suppliers, Payment terms specify how you pay your suppliers for purchased goods. Here's a breakdown of the key aspects:
Channels and Collection Terms:
- Channels: These represent different ways you acquire inventory (purchase channels) from suppliers, such as direct purchases, wholesale agreements, or through distributors.
- Payment Terms: This specifies when payment is due to the supplier after receiving the goods.
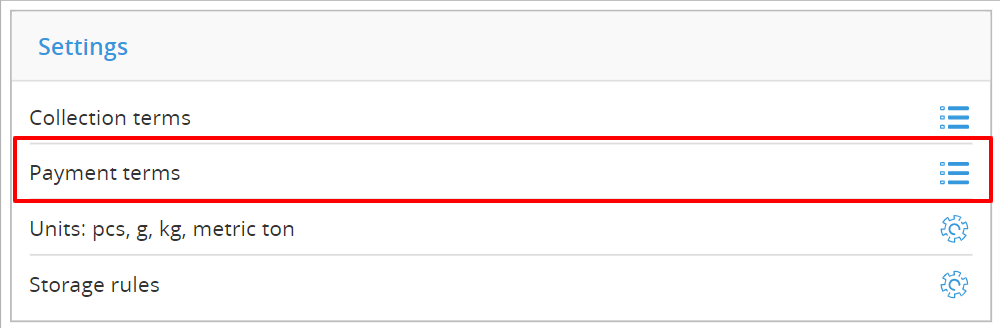
To set the collection terms:
-
Locate the "Payment terms" settings within Product Card, click the list icon button to access.
- In the "PRODUCT PAYMENT TERMS" window, select the specific sales channel you want to configure

-
Select the payment rule from drop-down options:
- On Account: Payment is due upon receiving an invoice from the supplier.
- On Delivery: Payment is due when the goods are delivered to your receiving location or upon taking ownership of the goods.
- Prepayment: Payment is made upfront to the supplier, before the goods are shipped or delivered. This might be offered to secure better pricing or for situations where immediate delivery is needed.
- Set collection terms: Define timeframe when revenue is recognized for this channel (e.g., 3 Months before delivery for "prepayment").
- Once you finished, you can return to Product card to proceed.
- We highly recommend setting up your purchasing channels. Choose clear names, add all relevant channels, and configure cross-border settings if needed.
For detailed instructions on setting collection rules, adding channels, or renaming (including cross-border settings),
Read more: Adding more channels and Cross-border setting.
Units (unit conversion rates) settings for basic traded goods.
The "Units" settings within your product card allows you to configure how units are handled for purchasing, selling, and potentially managing inventory. This section offers flexibility to accommodate different scenarios.
- Allow partial Units: Enable this option if you want to allow users to purchase your product in parts (applicable only to specific units you choose). This provides greater flexibility for your customers.

- Alternative Units: This feature allows you to define additional units for your product alongside the primary unit. You can then set a conversion rate (alternate unit/general unit) for each alternative unit, indicating how many units of the alternative unit are equivalent to one unit of the primary unit. This caters to users who might prefer to see prices or purchase your product in different units.
- To enable alternate unit: Click "alternate unit not set" > select the alternate unit options from drop-down menu > set conversion rate for alternate unit. (see example below)


- To enable alternate unit: Click "alternate unit not set" > select the alternate unit options from drop-down menu > set conversion rate for alternate unit. (see example below)
Example: Modular Wireless Headphones with Flexible Unit Options
- General Unit: Piece (This refers to a single headphone unit)
- Alternate Unit: Batch (This refers to a set of headphones sold together)
- Conversion Rate (Alternate Unit/General Unit ): 3 (1 Batch = 3 Piece, This clarifies that one batch contains three individual headphone units)
Explanation: This example highlights the modular nature of the wireless headphones. You can sell them individually (by the piece) or in larger sets (by the batch).
By utilizing these options, you can tailor your products offering to better suit your customers' needs and preferences. They can choose the unit that makes the most sense for their piece scope.
Storage rules settings for basic traded goods.
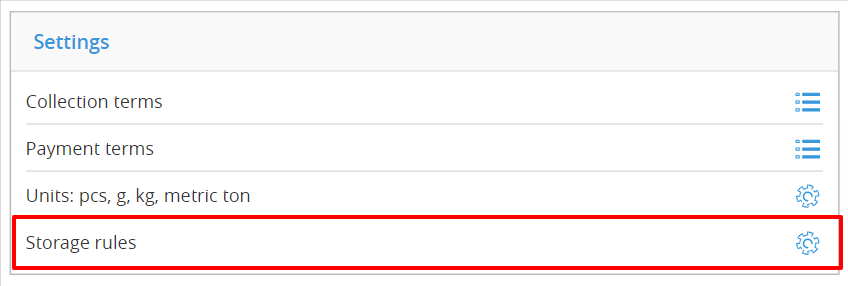
In Decision Critical, storage rules help you define how "Basic Traded Goods" are stored and managed across different warehouse locations. This allows you to optimize inventory placement based on factors like product characteristics, demand patterns, and warehouse capabilities.

- Storage Unit: "Store as (general unit)" indicates that the buttons are stored and tracked in inventory using the general unit (e.g., piece). This aligns with how you would typically count buttons.
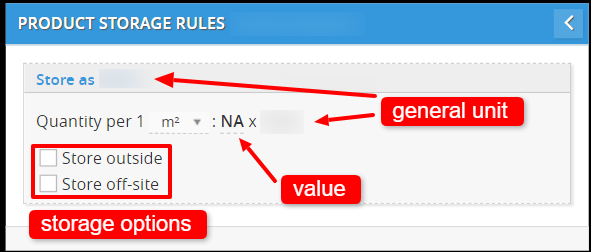
- Storage Efficiency: Quantity per Square Meter

- This allows you to define the storage efficiency of your traded goods (headphone in this case) within your inventory management system.
- In "NA", You will need to enter a numerical value representing the maximum number of units that can be efficiently stored in a space of one square meter (m²).
-
Storage Options:

- Store outside: This option might be selected if products are typically stored in an external warehouse or storage facility. To enable this option, just checking its box.
- Store off-Site: This could indicate that products are stored in a separate location from the main production facility. To enable this option, just checking its box.
- Storage Efficiency: Quantity per Square Meter
Other expenses (product-driven expenses for all channels) settings for basic traded goods.

The "Other Expenses (all channels)" section empowers you to define additional costs associated with your product. These are considered product-driven expenses, meaning they're directly tied to the use of your product.
To add product-driven expenses:
- Locate the "Other expenses" settings within Product Card and click the list icon button to access.
- In the "Product-Driven Expenses" window, click the button "+ ADD EXPENSES" to create a new expense entry.
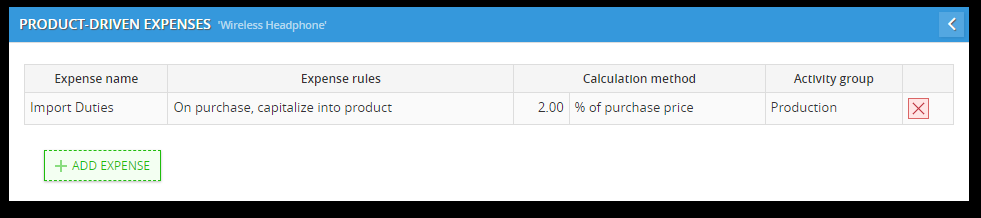
- Name: Enter a descriptive name for the expense (e.g., Import Duties).
- Expense Rule: Choose when the expense applies: "On shipment" or "On purchase."
- Calculation: Select how the expense is calculated, and enter the specific value (e.g., $0.05 per piece).
- Activity Group: Assign the expense to a relevant activity group.
- Once you've added all the necessary information, review your entries. When finished, return to the "Product Card" to see the newly added product-driven expenses listed.

What you can specify for each expense?
- Expense Name: Give your expense a clear and descriptive name (e.g., "Packaging Materials," "Shipping per Unit").
- On Shipment: This rule applies to expenses incurred during the fulfillment process, such as packaging, shipping, and warehousing. These costs are typically expensed in the period the product is shipped to the customer. (e.g., Shipping costs, Packaging materials)
- Expense Rule: Give pre-defined "Expense Rules" to categorize your product-driven expenses. These rules help streamline expense tracking and reporting by grouping similar cost components. Here are the three common expense rule types:
- On Purchase, Expense on Period: This rule applies to costs incurred at the time of product purchase that are expensed immediately in the current accounting period. These expenses are typically not capitalized into the product's value. (e.g., Transaction fees for buying inventory)
- On Purchase, Capitalize into Product: This rule applies to costs that become part of the product's cost basis. These costs are added to the initial purchase price and are reflected in the product's inventory valuation. (e.g., Import duties, Material costs)
- Calculation Method: Choose how the expense is calculated:
- Per Unit Cost: This method assigns a fixed cost per unit of your product sold (e.g., "$2 USD per Piece").
- %(Percentage) of Amount Sold: This method calculates the expense as a percentage of the base wholesale cost per unit (e.g., "10% of Wholesale Cost for Packaging").
- Activity Group: Categorize the expense by its nature. Common categories include:
- General: Expenses that apply broadly to your business operations.
- Administrative: Administrative costs associated with managing your business.
- Selling: Costs related to marketing and selling your product.
- Production: Costs incurred during the production or delivery of your product.
- Non-Operating: Expenses not directly related to your product's core operations.
- By defining these product-driven expenses and utilizing expense rules, you gain a clear understanding of your overall costs per unit and their impact on your accounting practices.
- This information empowers you to set competitive prices, optimize your supply chain, and ultimately ensure the profitability of your product offering.
- To delete the expenses, simply click on the delete button located on the right side of the list in PRODUCT-DRIVEN EXPENSES.

💡 If this doesn’t solve your issue or you have more questions, feel free to reach out through our [contact form]. We’ll get back to you within 2–3 business days.