This guide will help you explore your first sample model, adjust key assumptions, and save your own version — without needing to build anything from scratch.
Step 1: You’ll land inside the model you picked earlier
After logging in, you’ll be dropped straight into the sample model you selected.
For example, if you chose the Craft Brewery model...
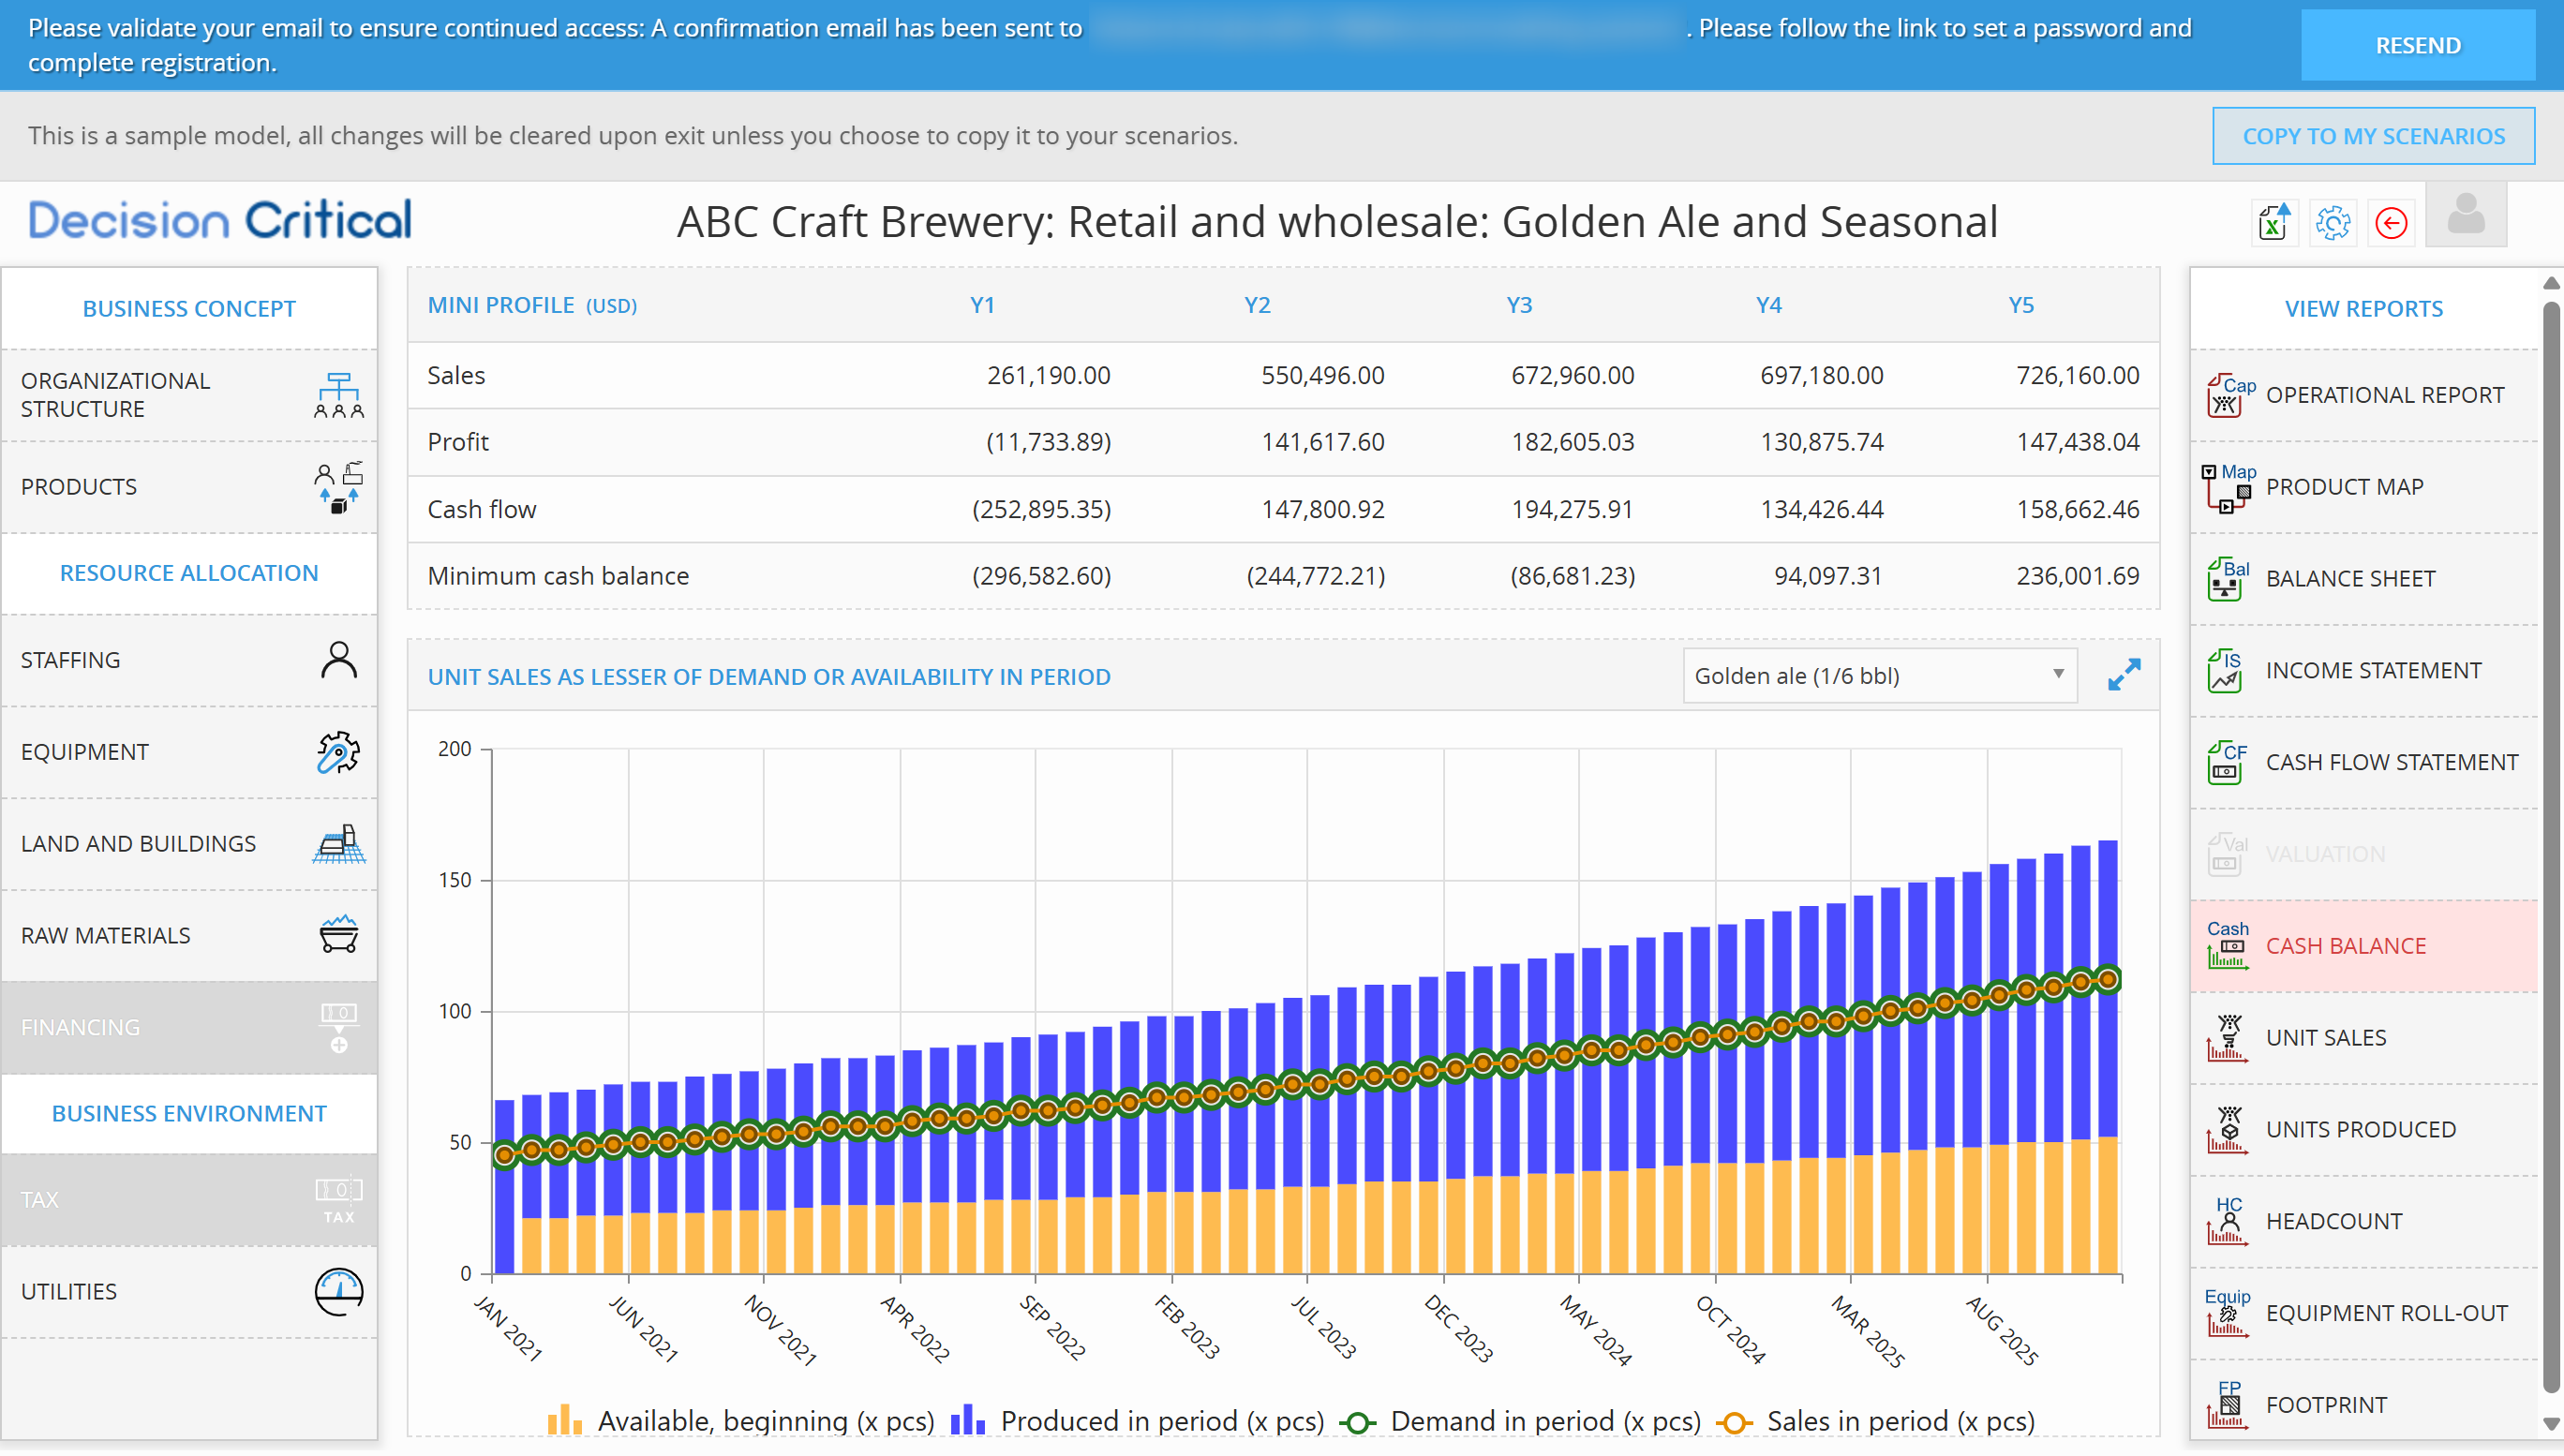
Everything is ready to go. You don’t need to create anything — just start exploring.
Want more detail on how Decision Critical work? Learn more here
Step 2: Complete your account setup
Before you go too far, make sure your account is active so your work gets saved.
Check your inbox for a confirmation email → click the link → create your password.
Still nothing? Click “Resend” to send the confirmation email again.

Once that’s done, you’re all set. The resend button will disappear automatically.
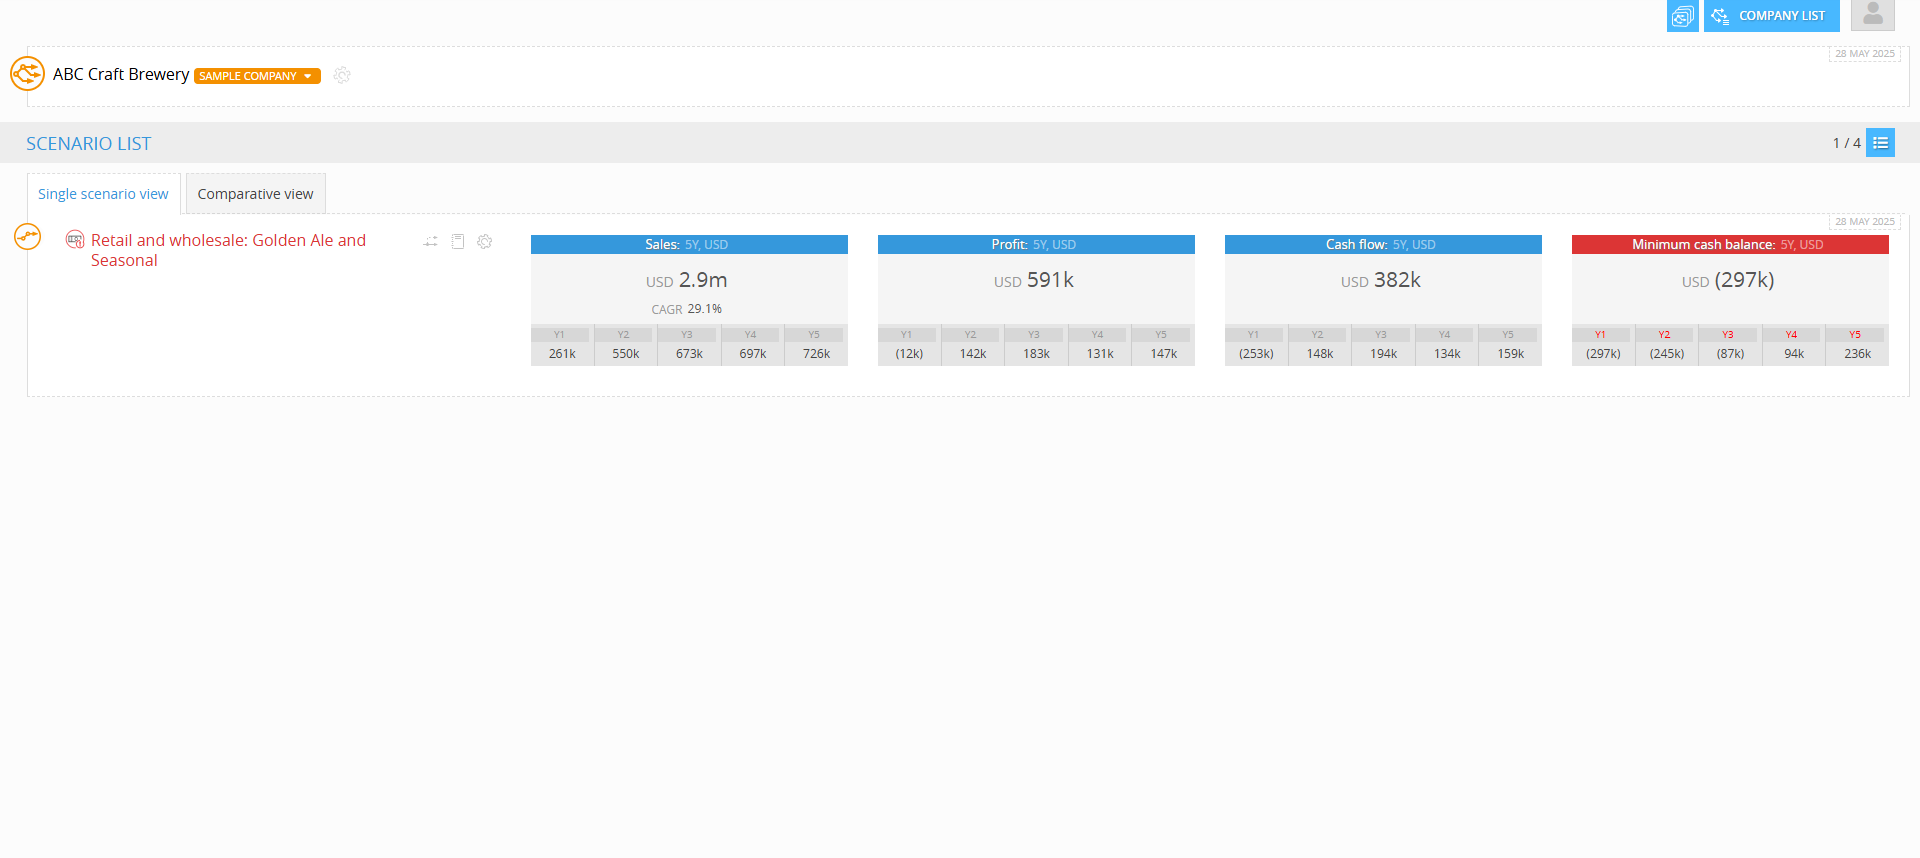
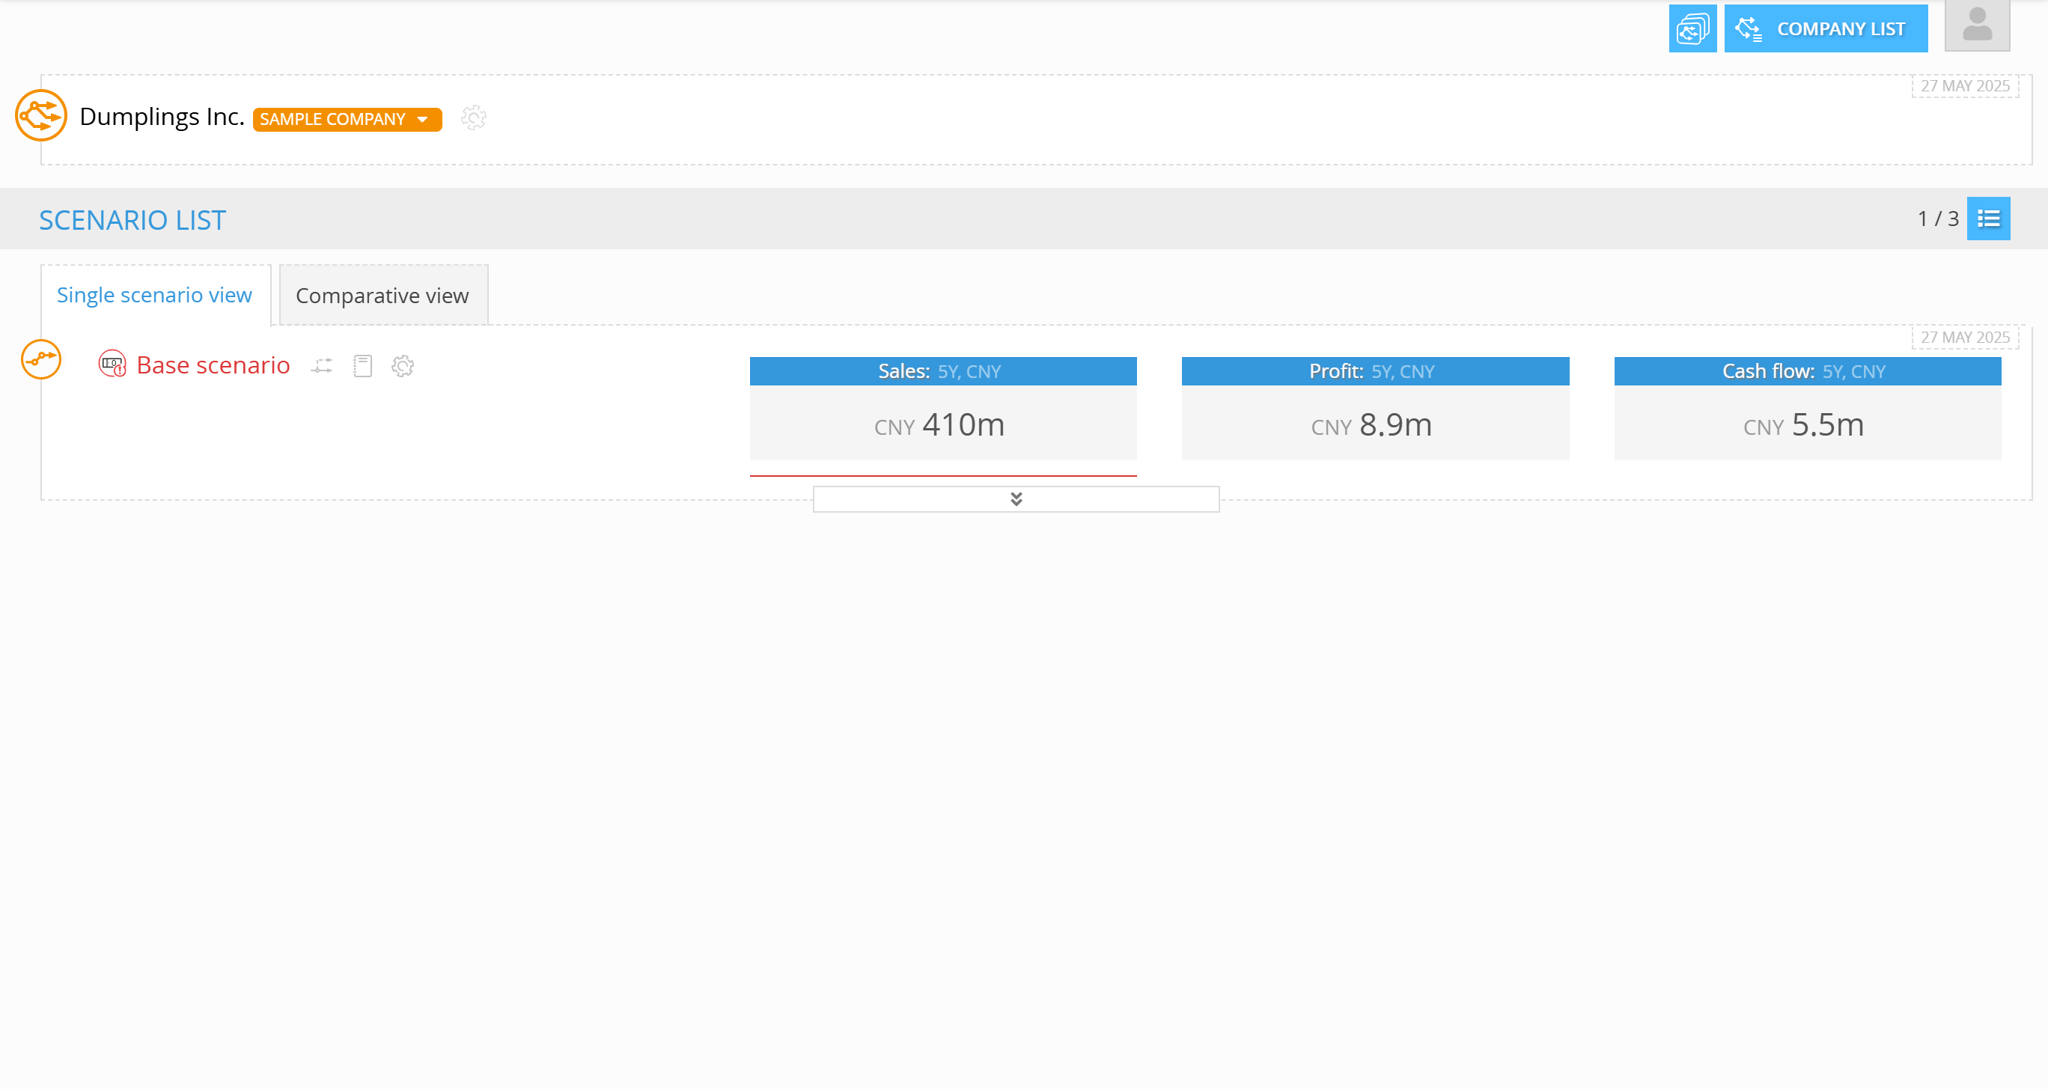
Step 3: Check the reports on the right side (recommend)
On the right, you’ll see built-in reports that show how the business performs under the current scenario.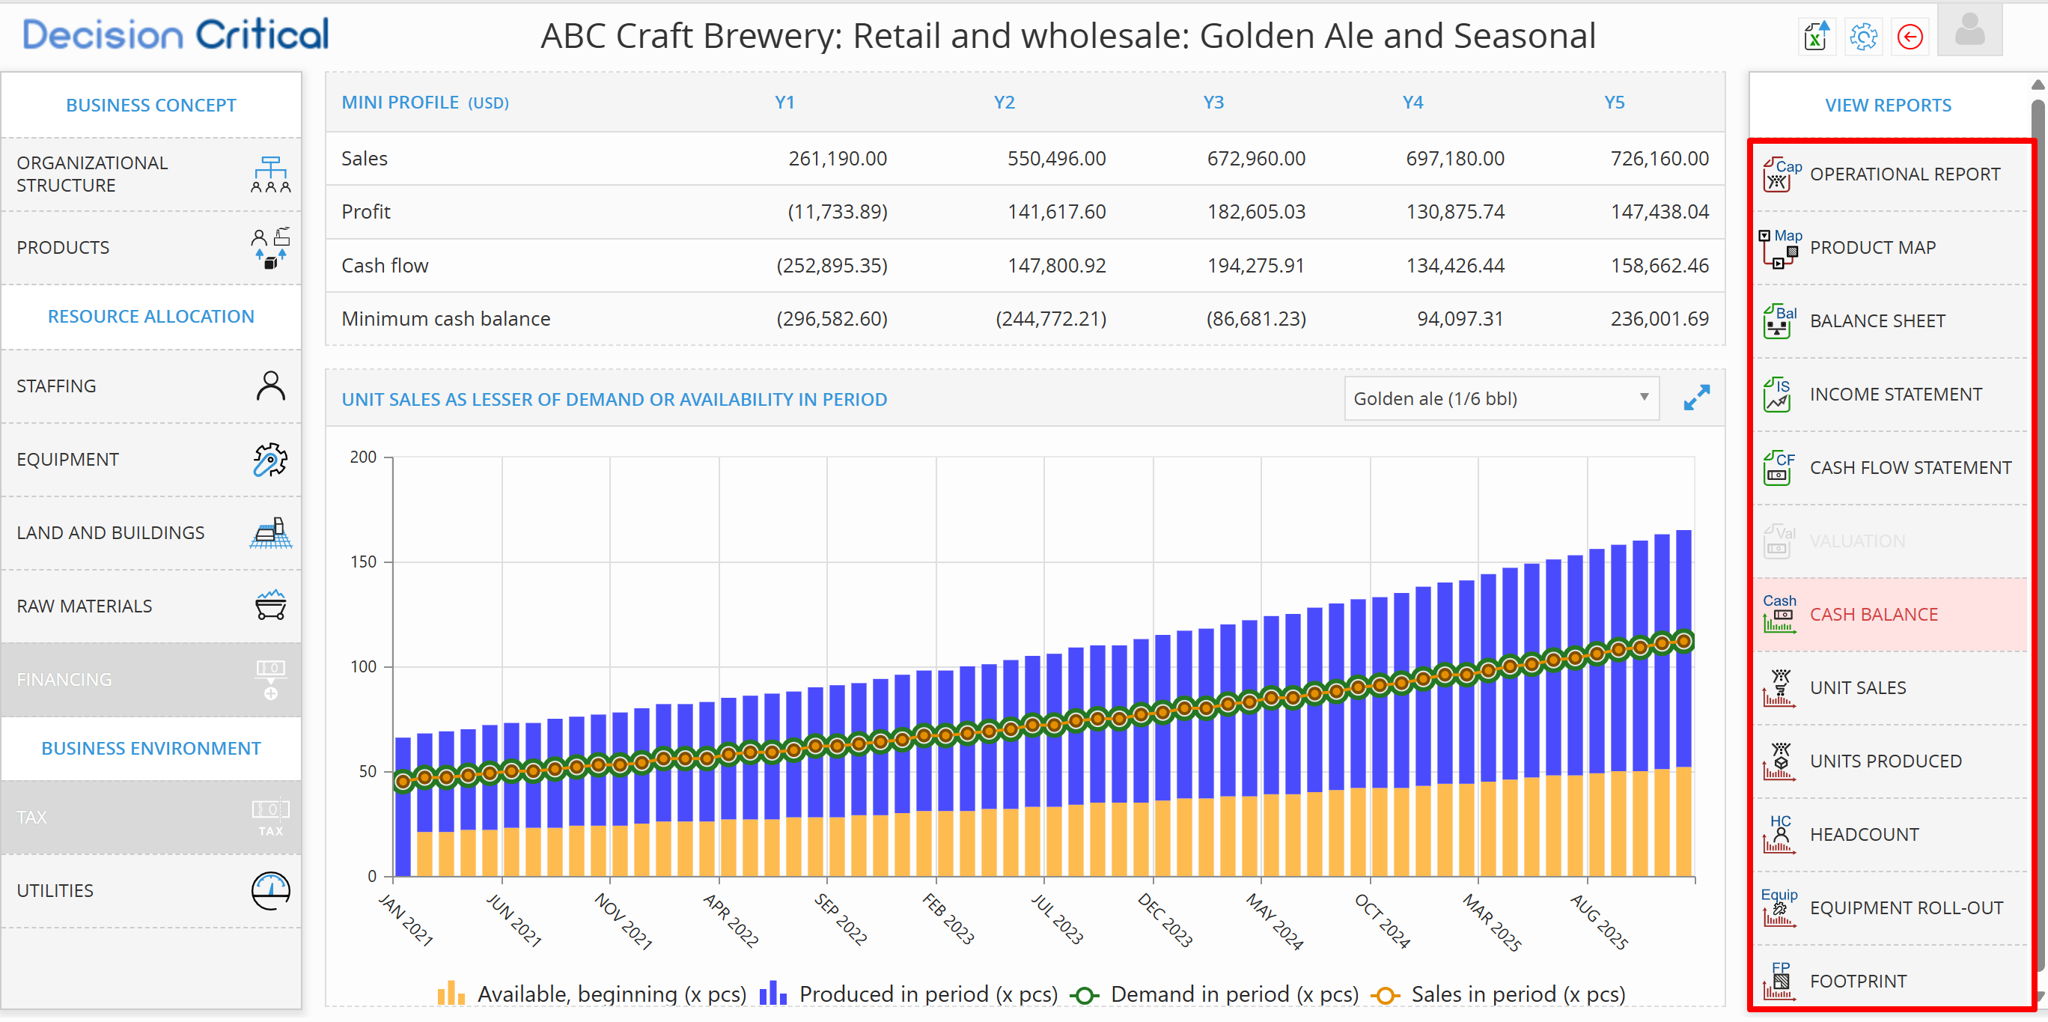
You can look at:
-
Revenue by product and channel
-
Gross margin and cost structure
-
Profitability over time
-
Scenario comparisons
These visualization will update automatically whenever you change any assumption. You don’t need to refresh or re-run anything.
Want more detail on how each reports work? Learn more here
Step 4: Adjust assumptions on the left (optional)
On the left side, you’ll see all the editable inputs for this model — this is where the planning happens.
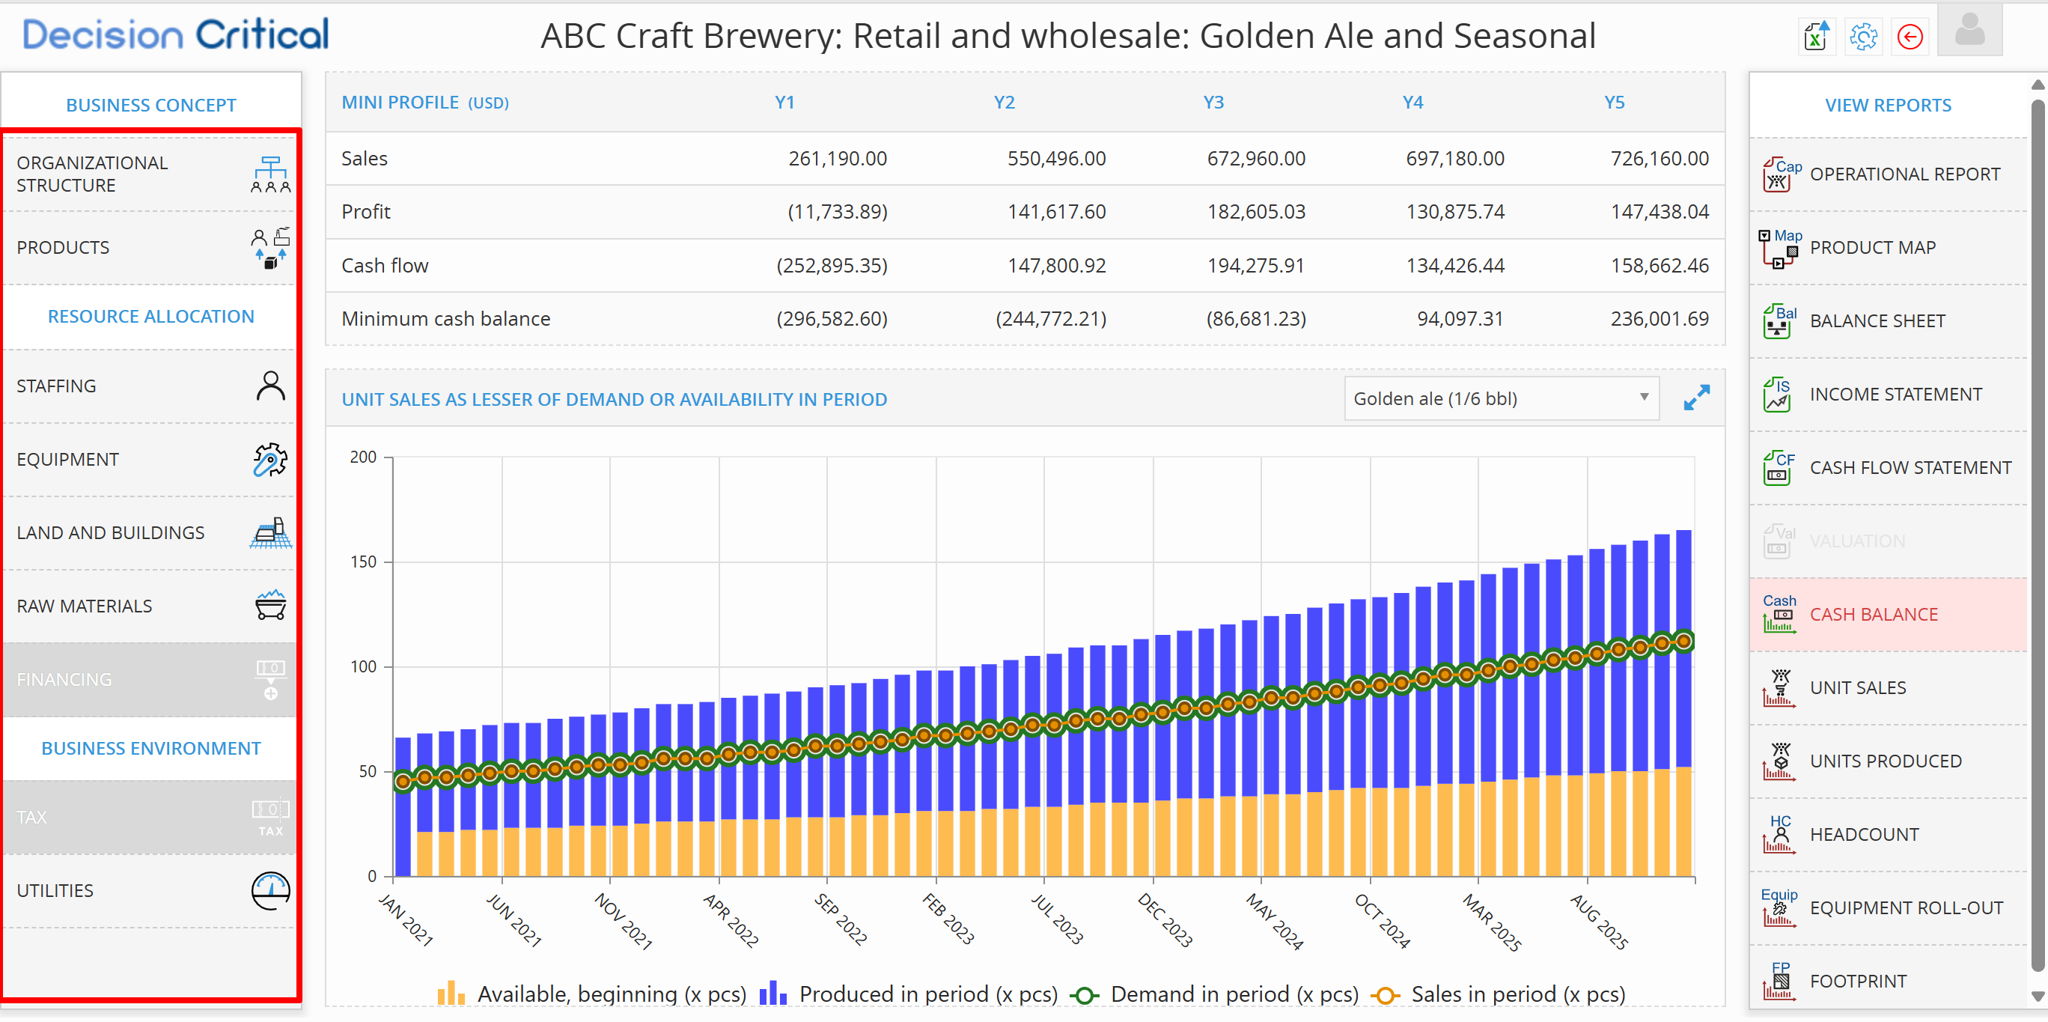
You can exploring by changing input like...
-
Sales volumes
-
Product pricing
-
COGS and operating expenses
-
Payroll and staffing
-
Inventory logic
And more.
Want more detail on how Decision Critical work? Learn more here
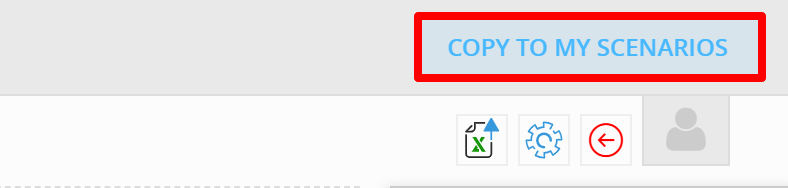
Step 5: Copy the model to your account
When you’re ready to make changes that stick, click “COPY TO MY SCENARIOS”

Once you click, you’ll stay on the same page — but the button will disappear.
That means the model is now yours. From this point on, any edits you make will be saved automatically.
Step 6: Wrap up and return
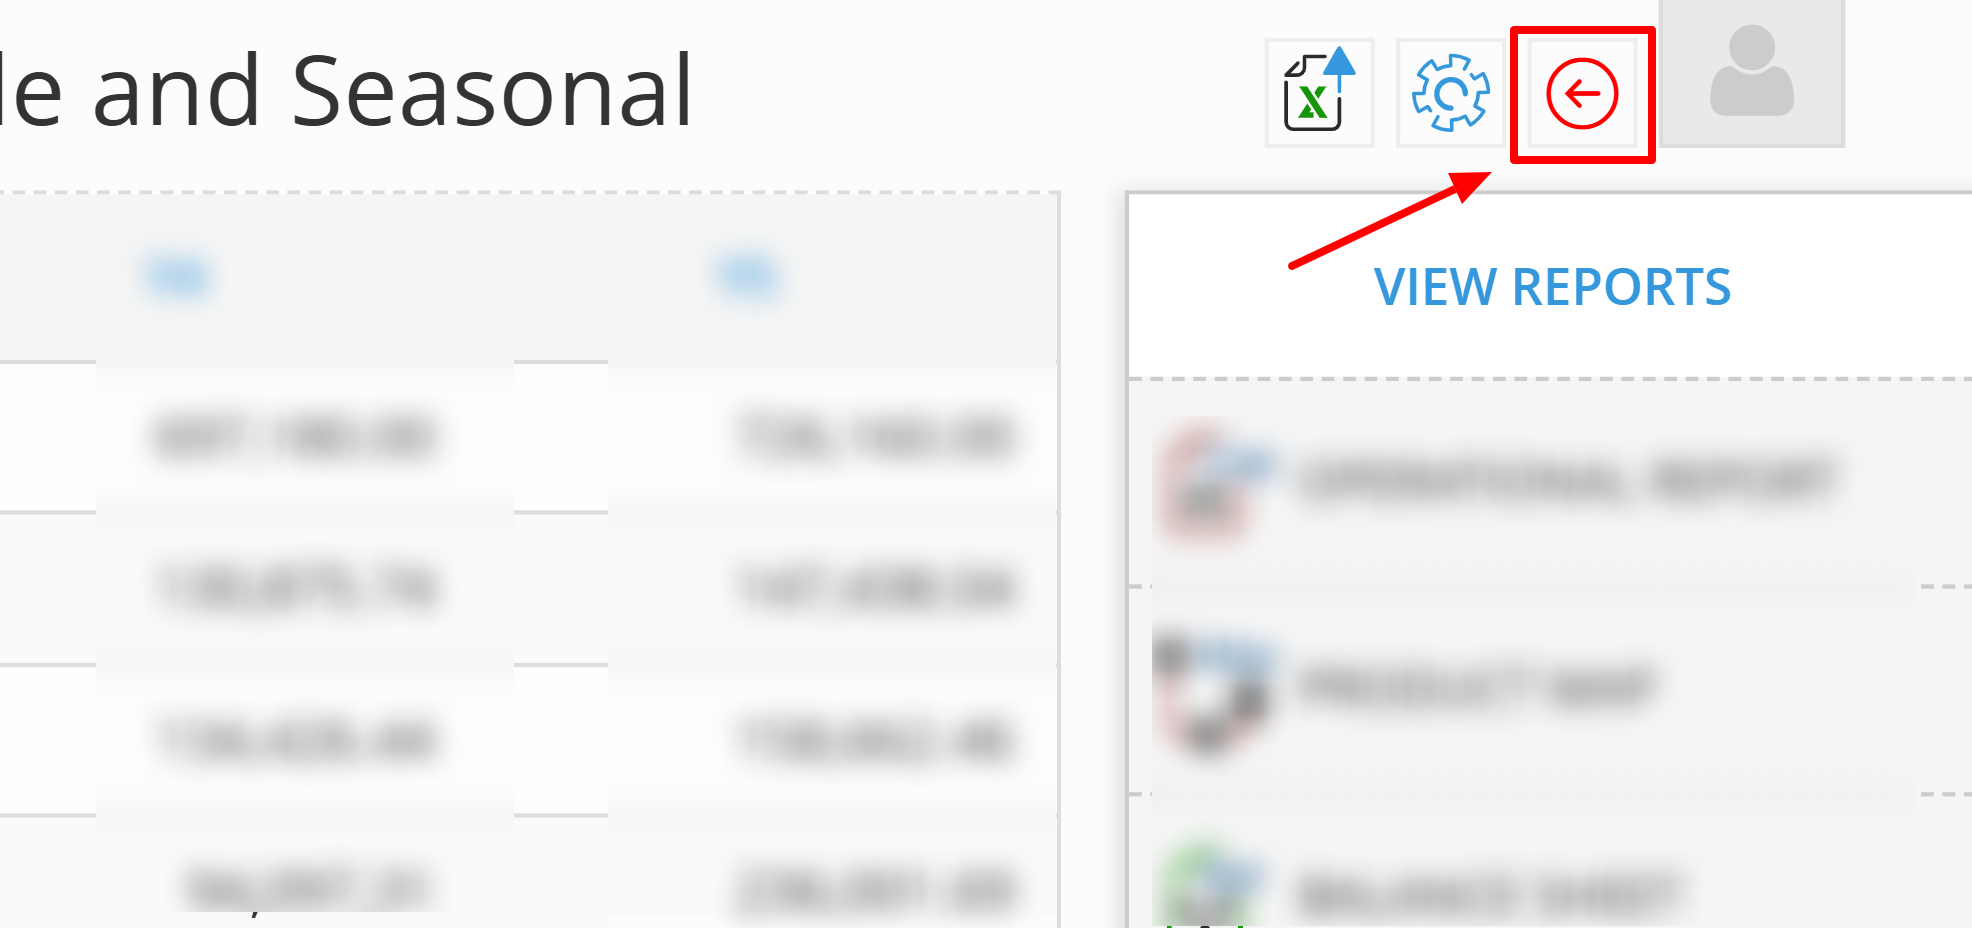
Once you’re done reviewing or testing your model, click the Return button in the top right. This brings you back to your company.
Step 7: You’ll find your scenario inside “Sample Company”'
"Once you return, your copied scenario will be saved inside a workspace called Sample Company.
This isn’t just a placeholder — it’s a dedicated space where:
-
You can explore and work with your copied model
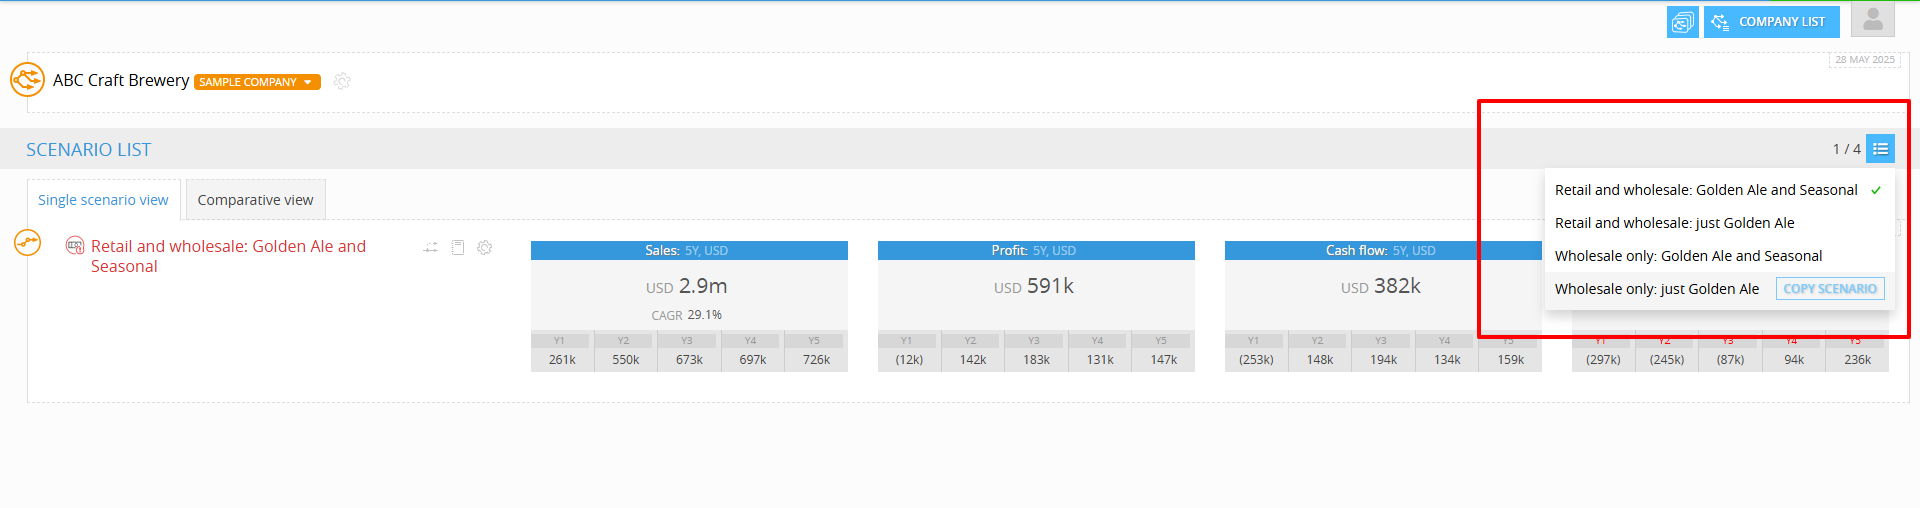
You can do that right from your current workspace.
-
Click the scenario dropdown at the top right of your screen
-
Browse through the available sample scenarios
-
Click “Copy Scenario” next to the one you want to add
The scenario will be copied into your Sample Company workspace and saved under your account. From there, you can edit, compare, or use it as a base to build your own version.
-
-
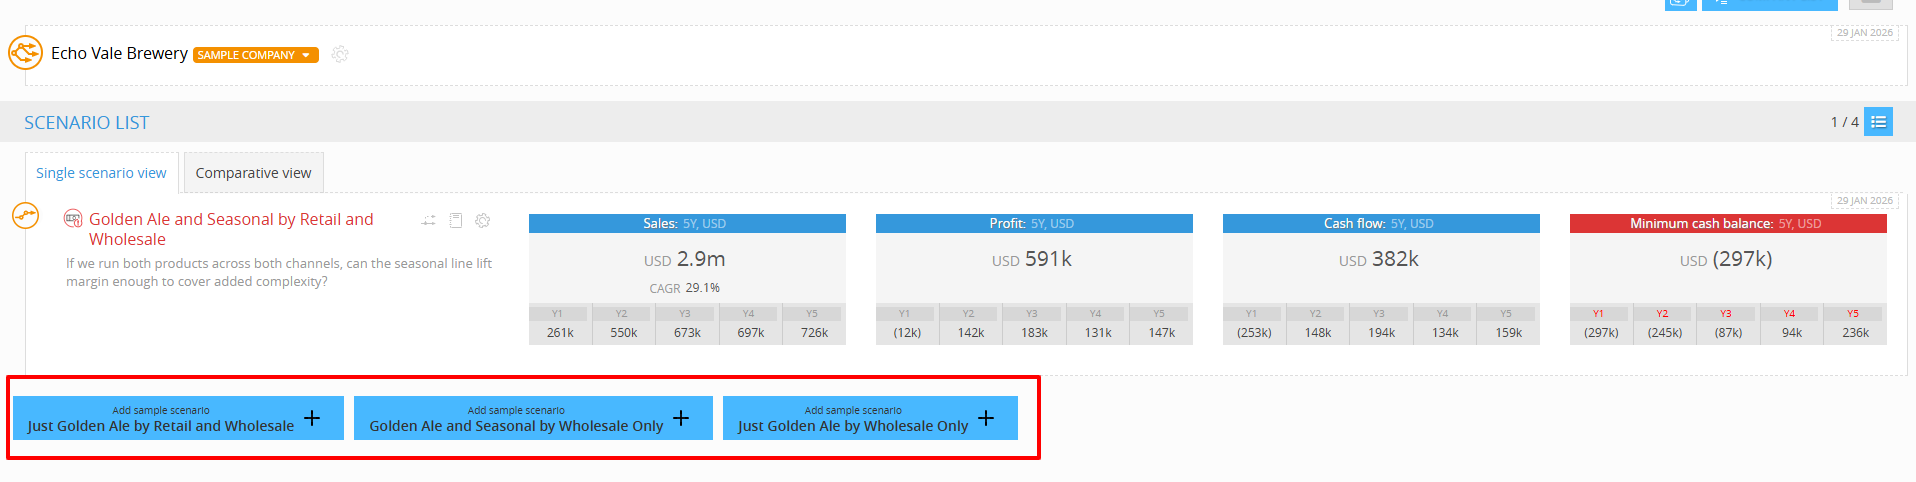
You can try out more sample models from our library
-
All future sample models you explore will be grouped here by default
You can also add other scenario samples using these quick add buttons under the scenario list.
This setup gives you a flexible environment to test, compare, and experiment — without needing to create your own company until you're ready.
You can rename or reorganize things later, but for now, Sample Company is your sandbox.
Step 8: You’ll now see your saved company and scenario
On your dashboard, you’ll now see: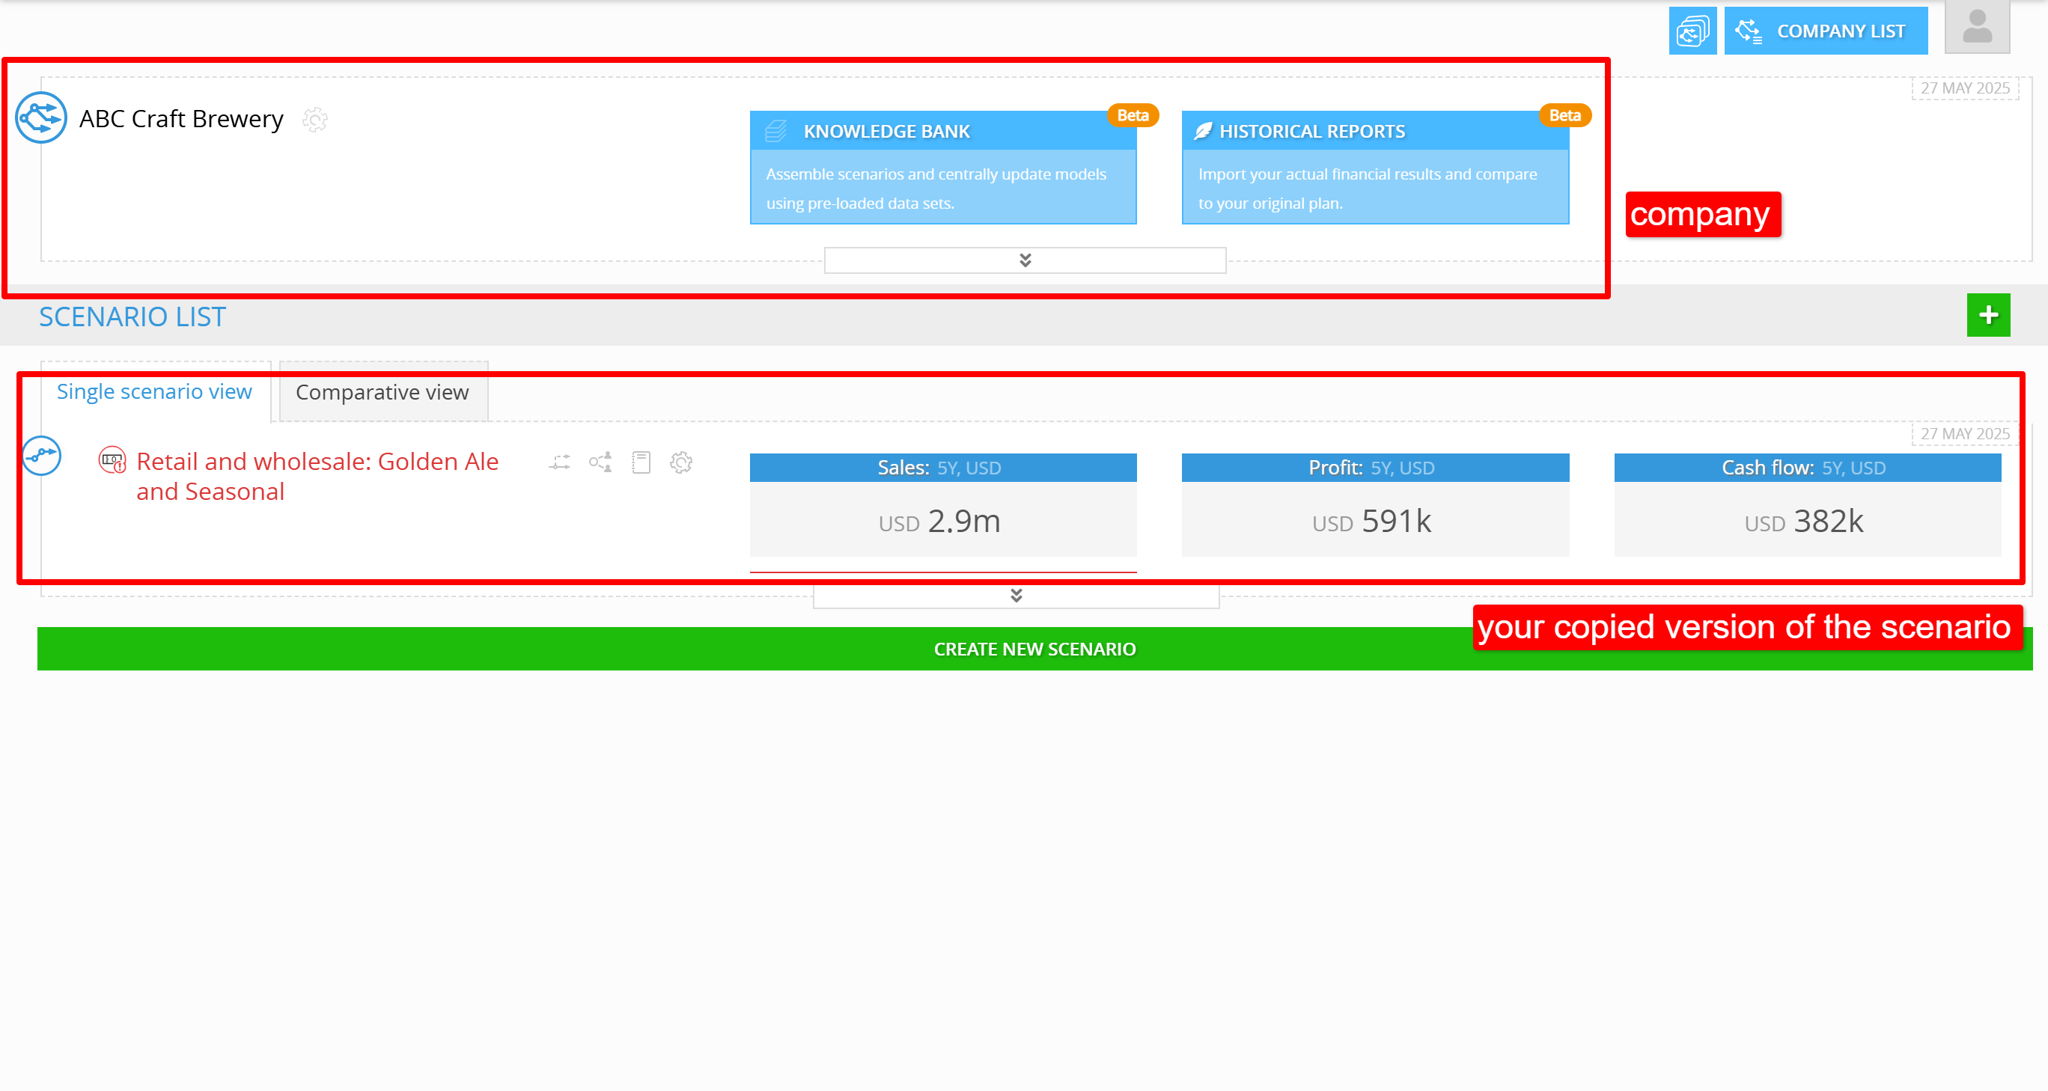
-
Your company (e.g. “ABC Craft Brewery”)
-
The scenario you just worked on
✅ What You Can Do on This Screen:
-
Duplicate a Scenario:
Click the copy icon. In the scenario tab: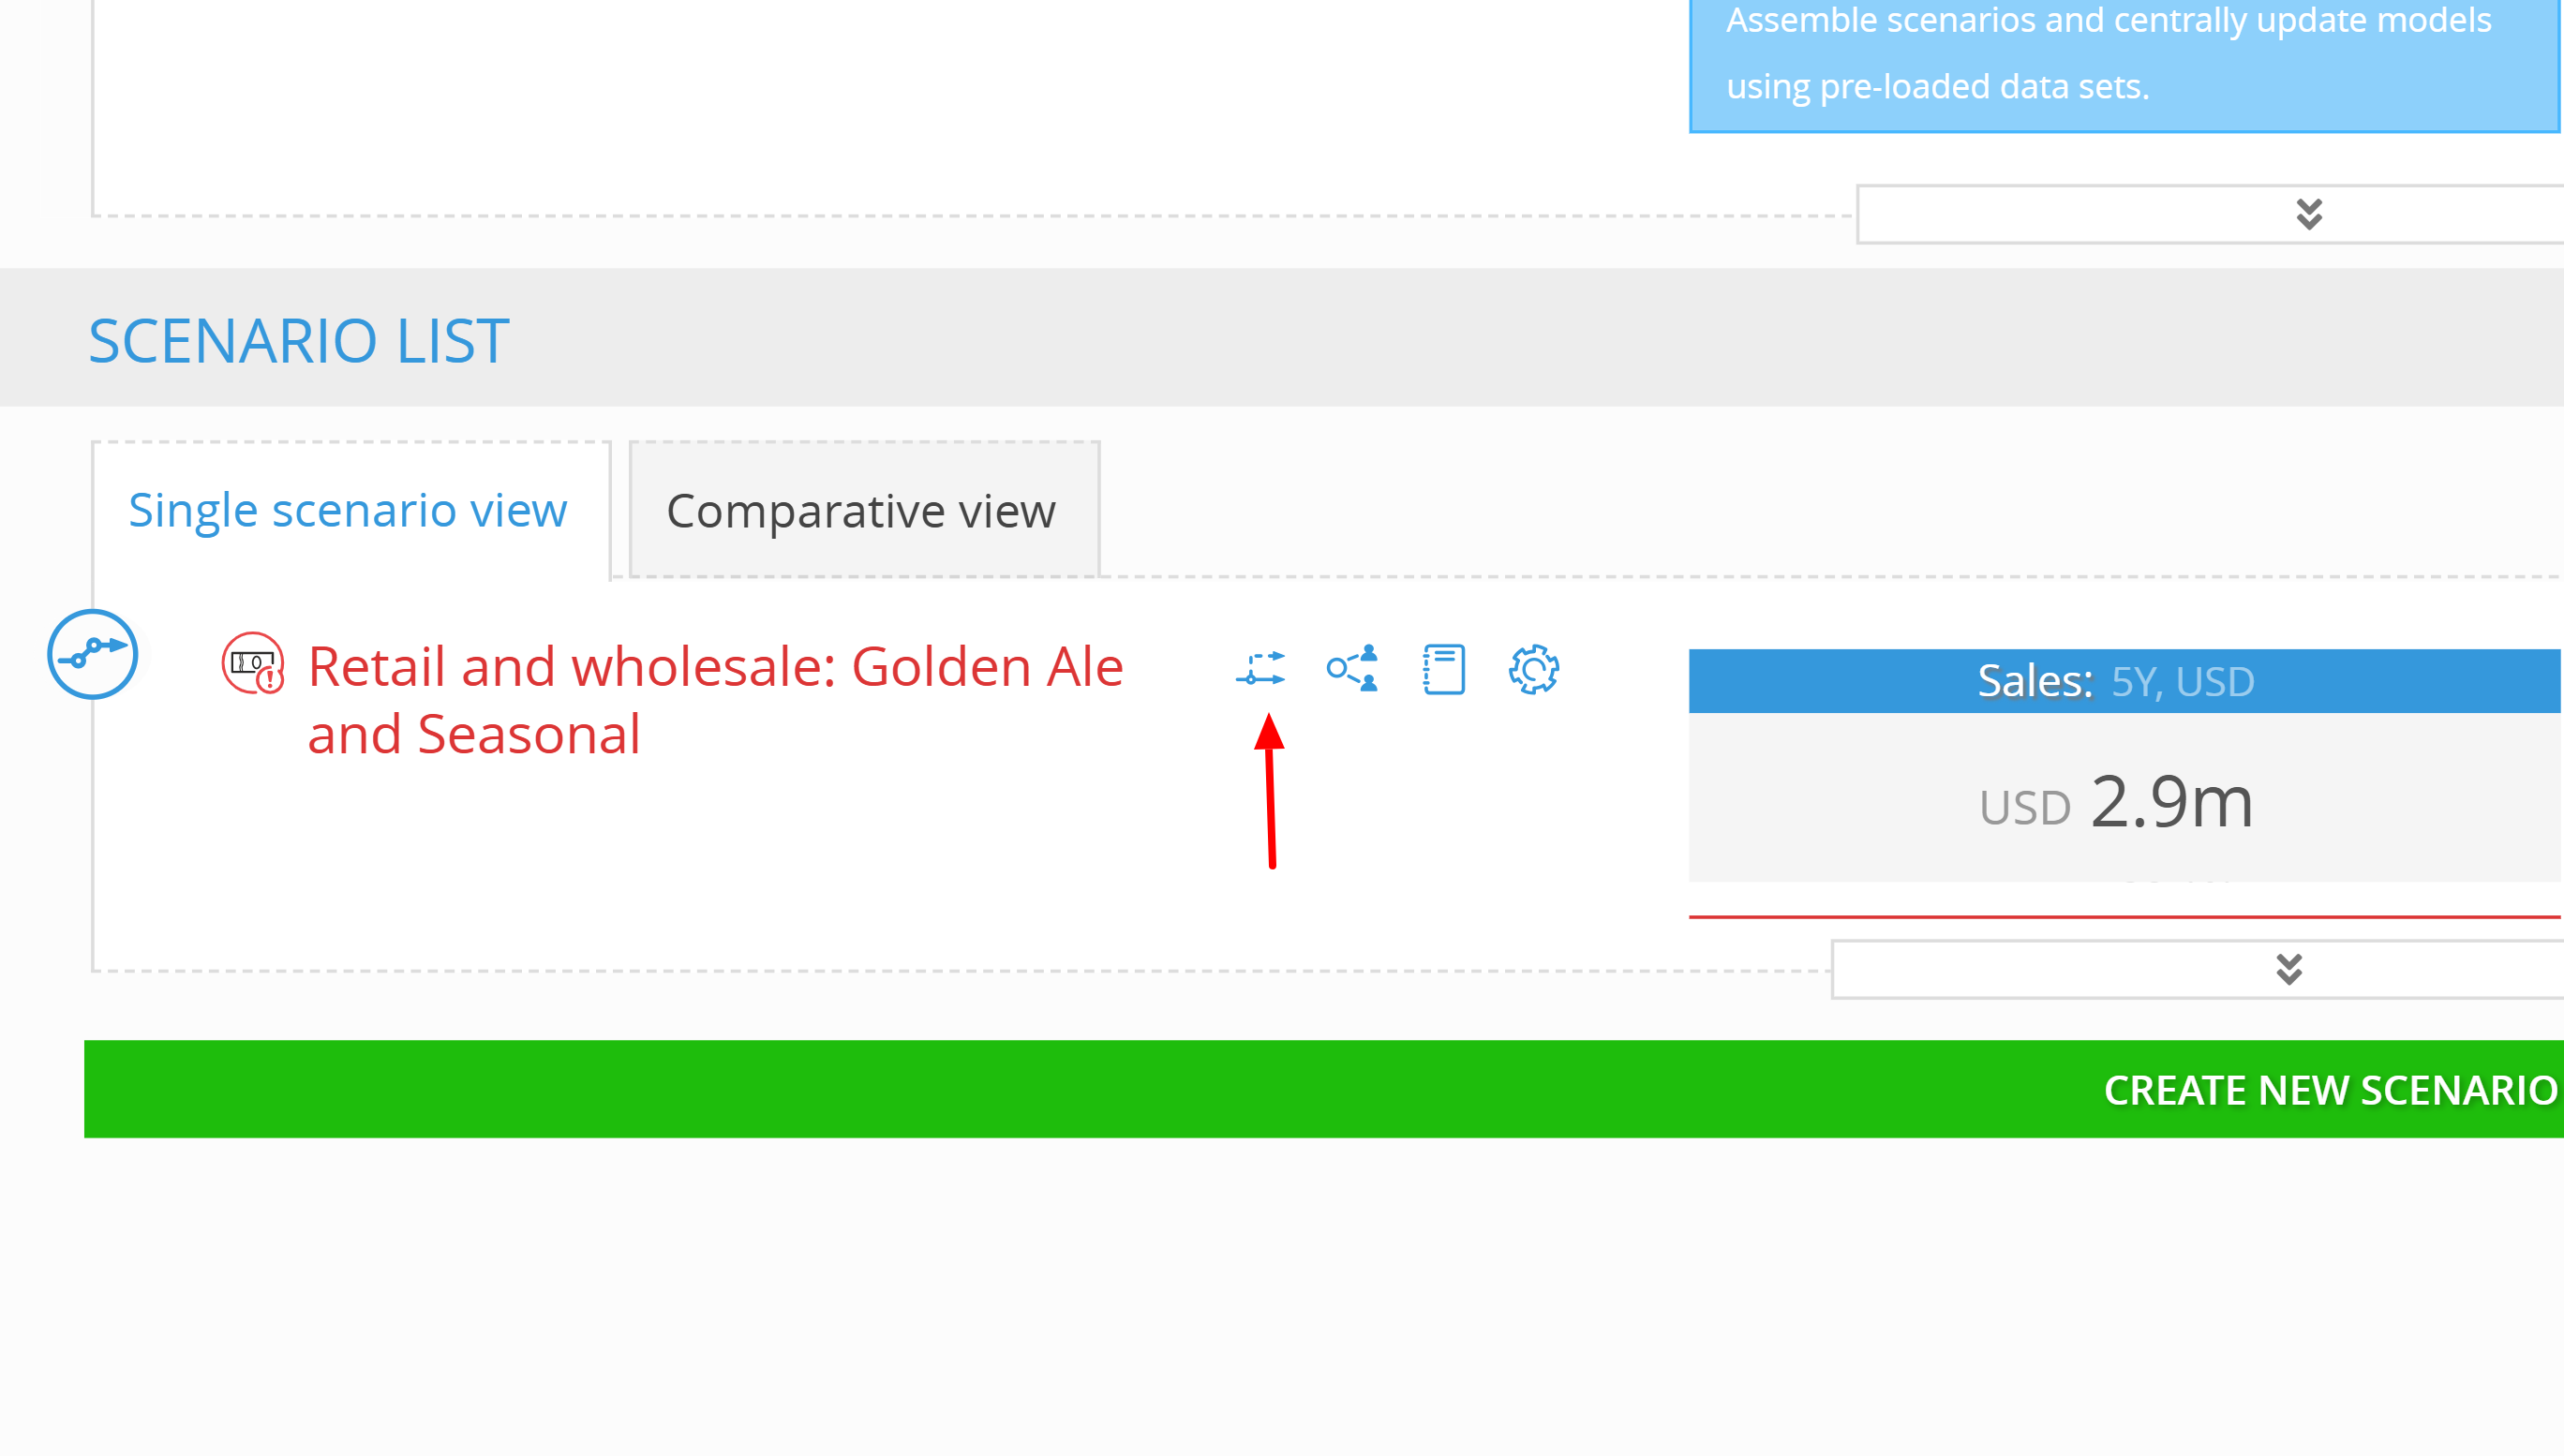
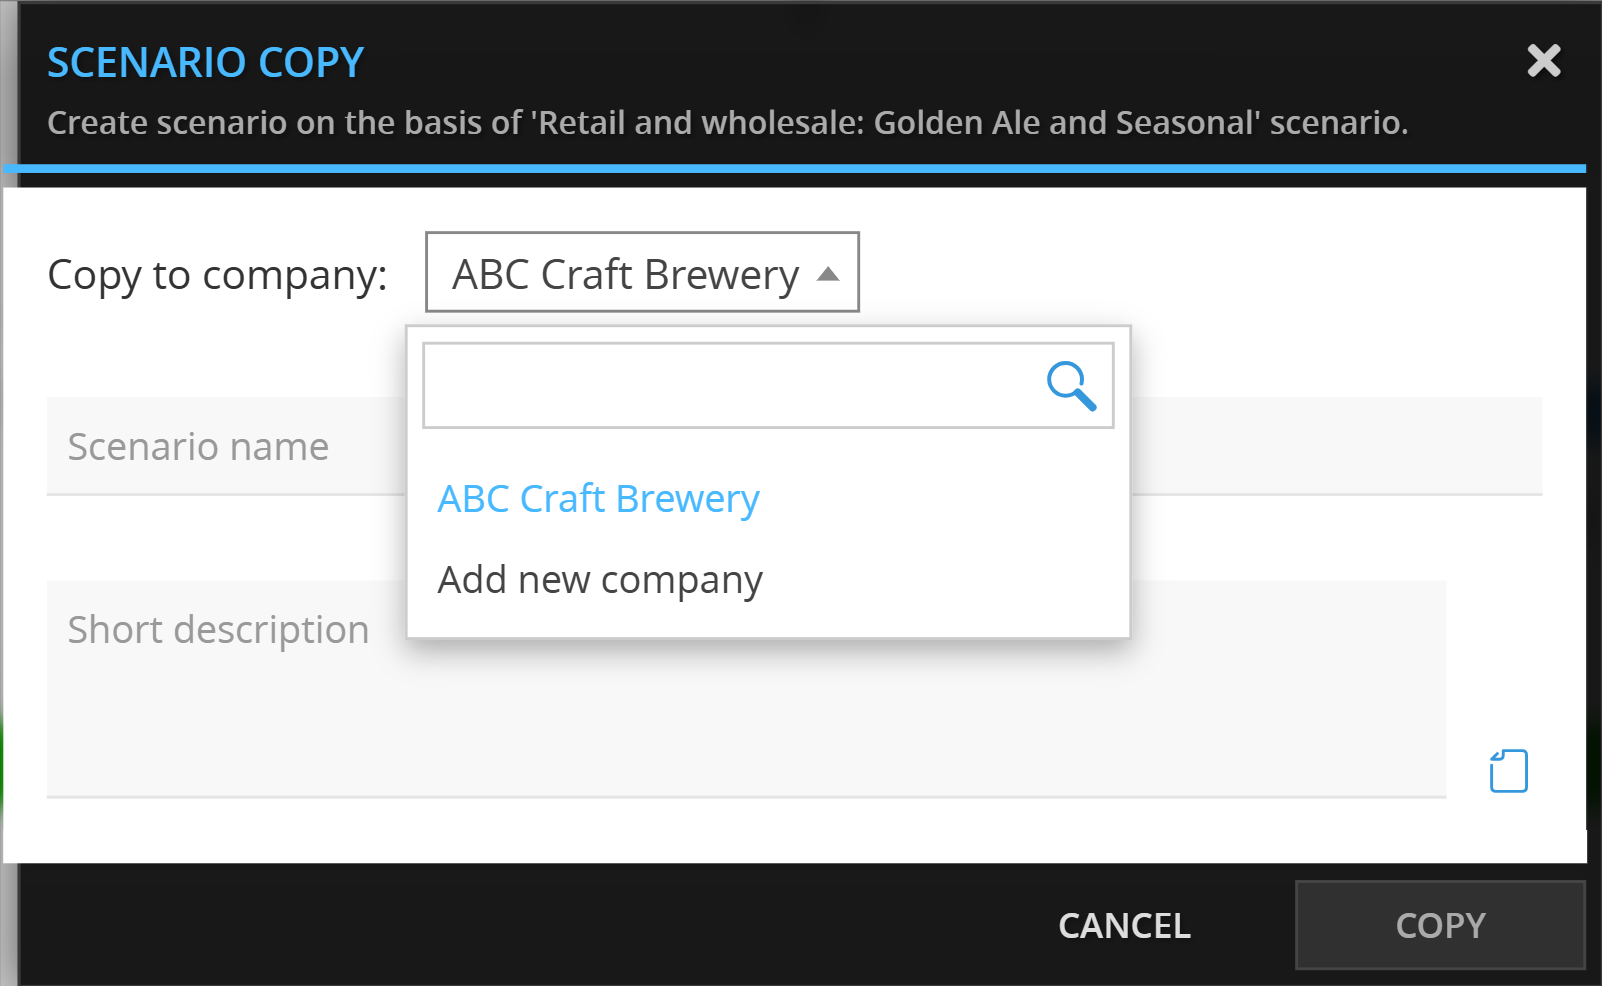
-
Choose the company to copy to (or create a new one).
-
Name your scenario (don’t use the same name as the original).
-
Add a description (optional).
-
Click COPY.
-
-
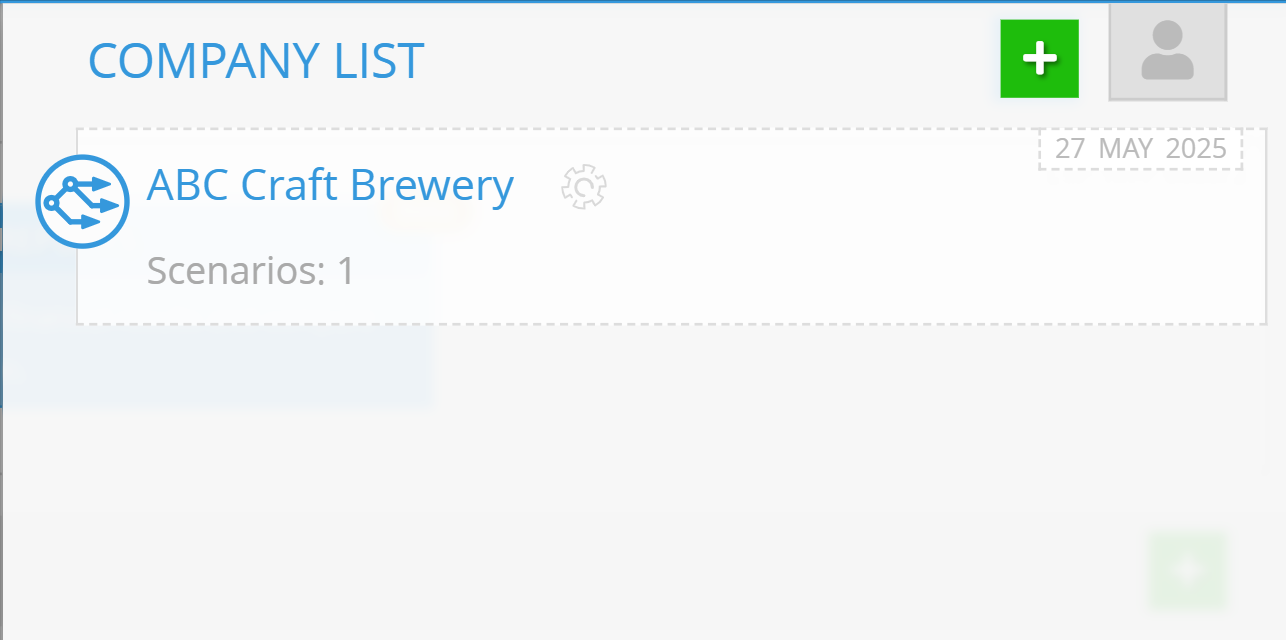
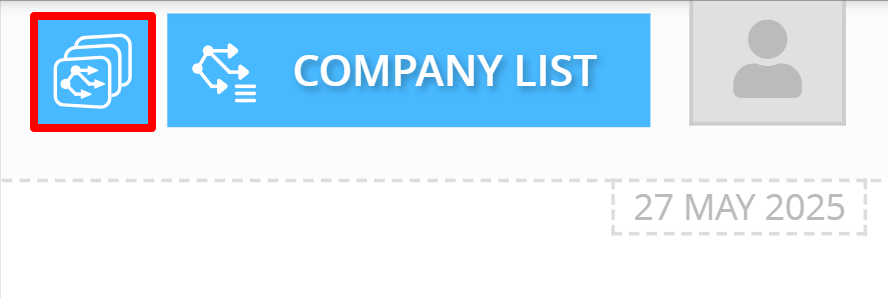
Check Your Companies:
Click COMPANY LIST (top right) to view or switch companies.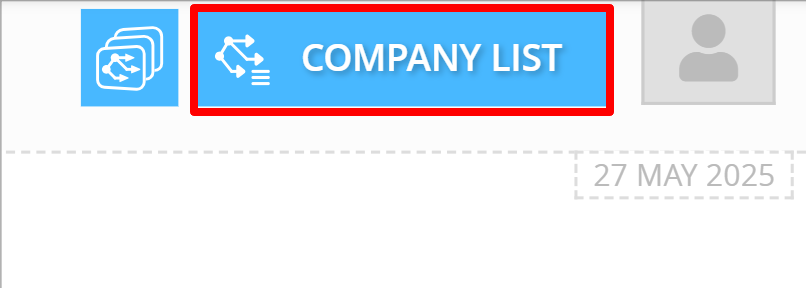
-
Share a Scenario:
Click the share icon. Choose who to share with, set their access level, and send the invite.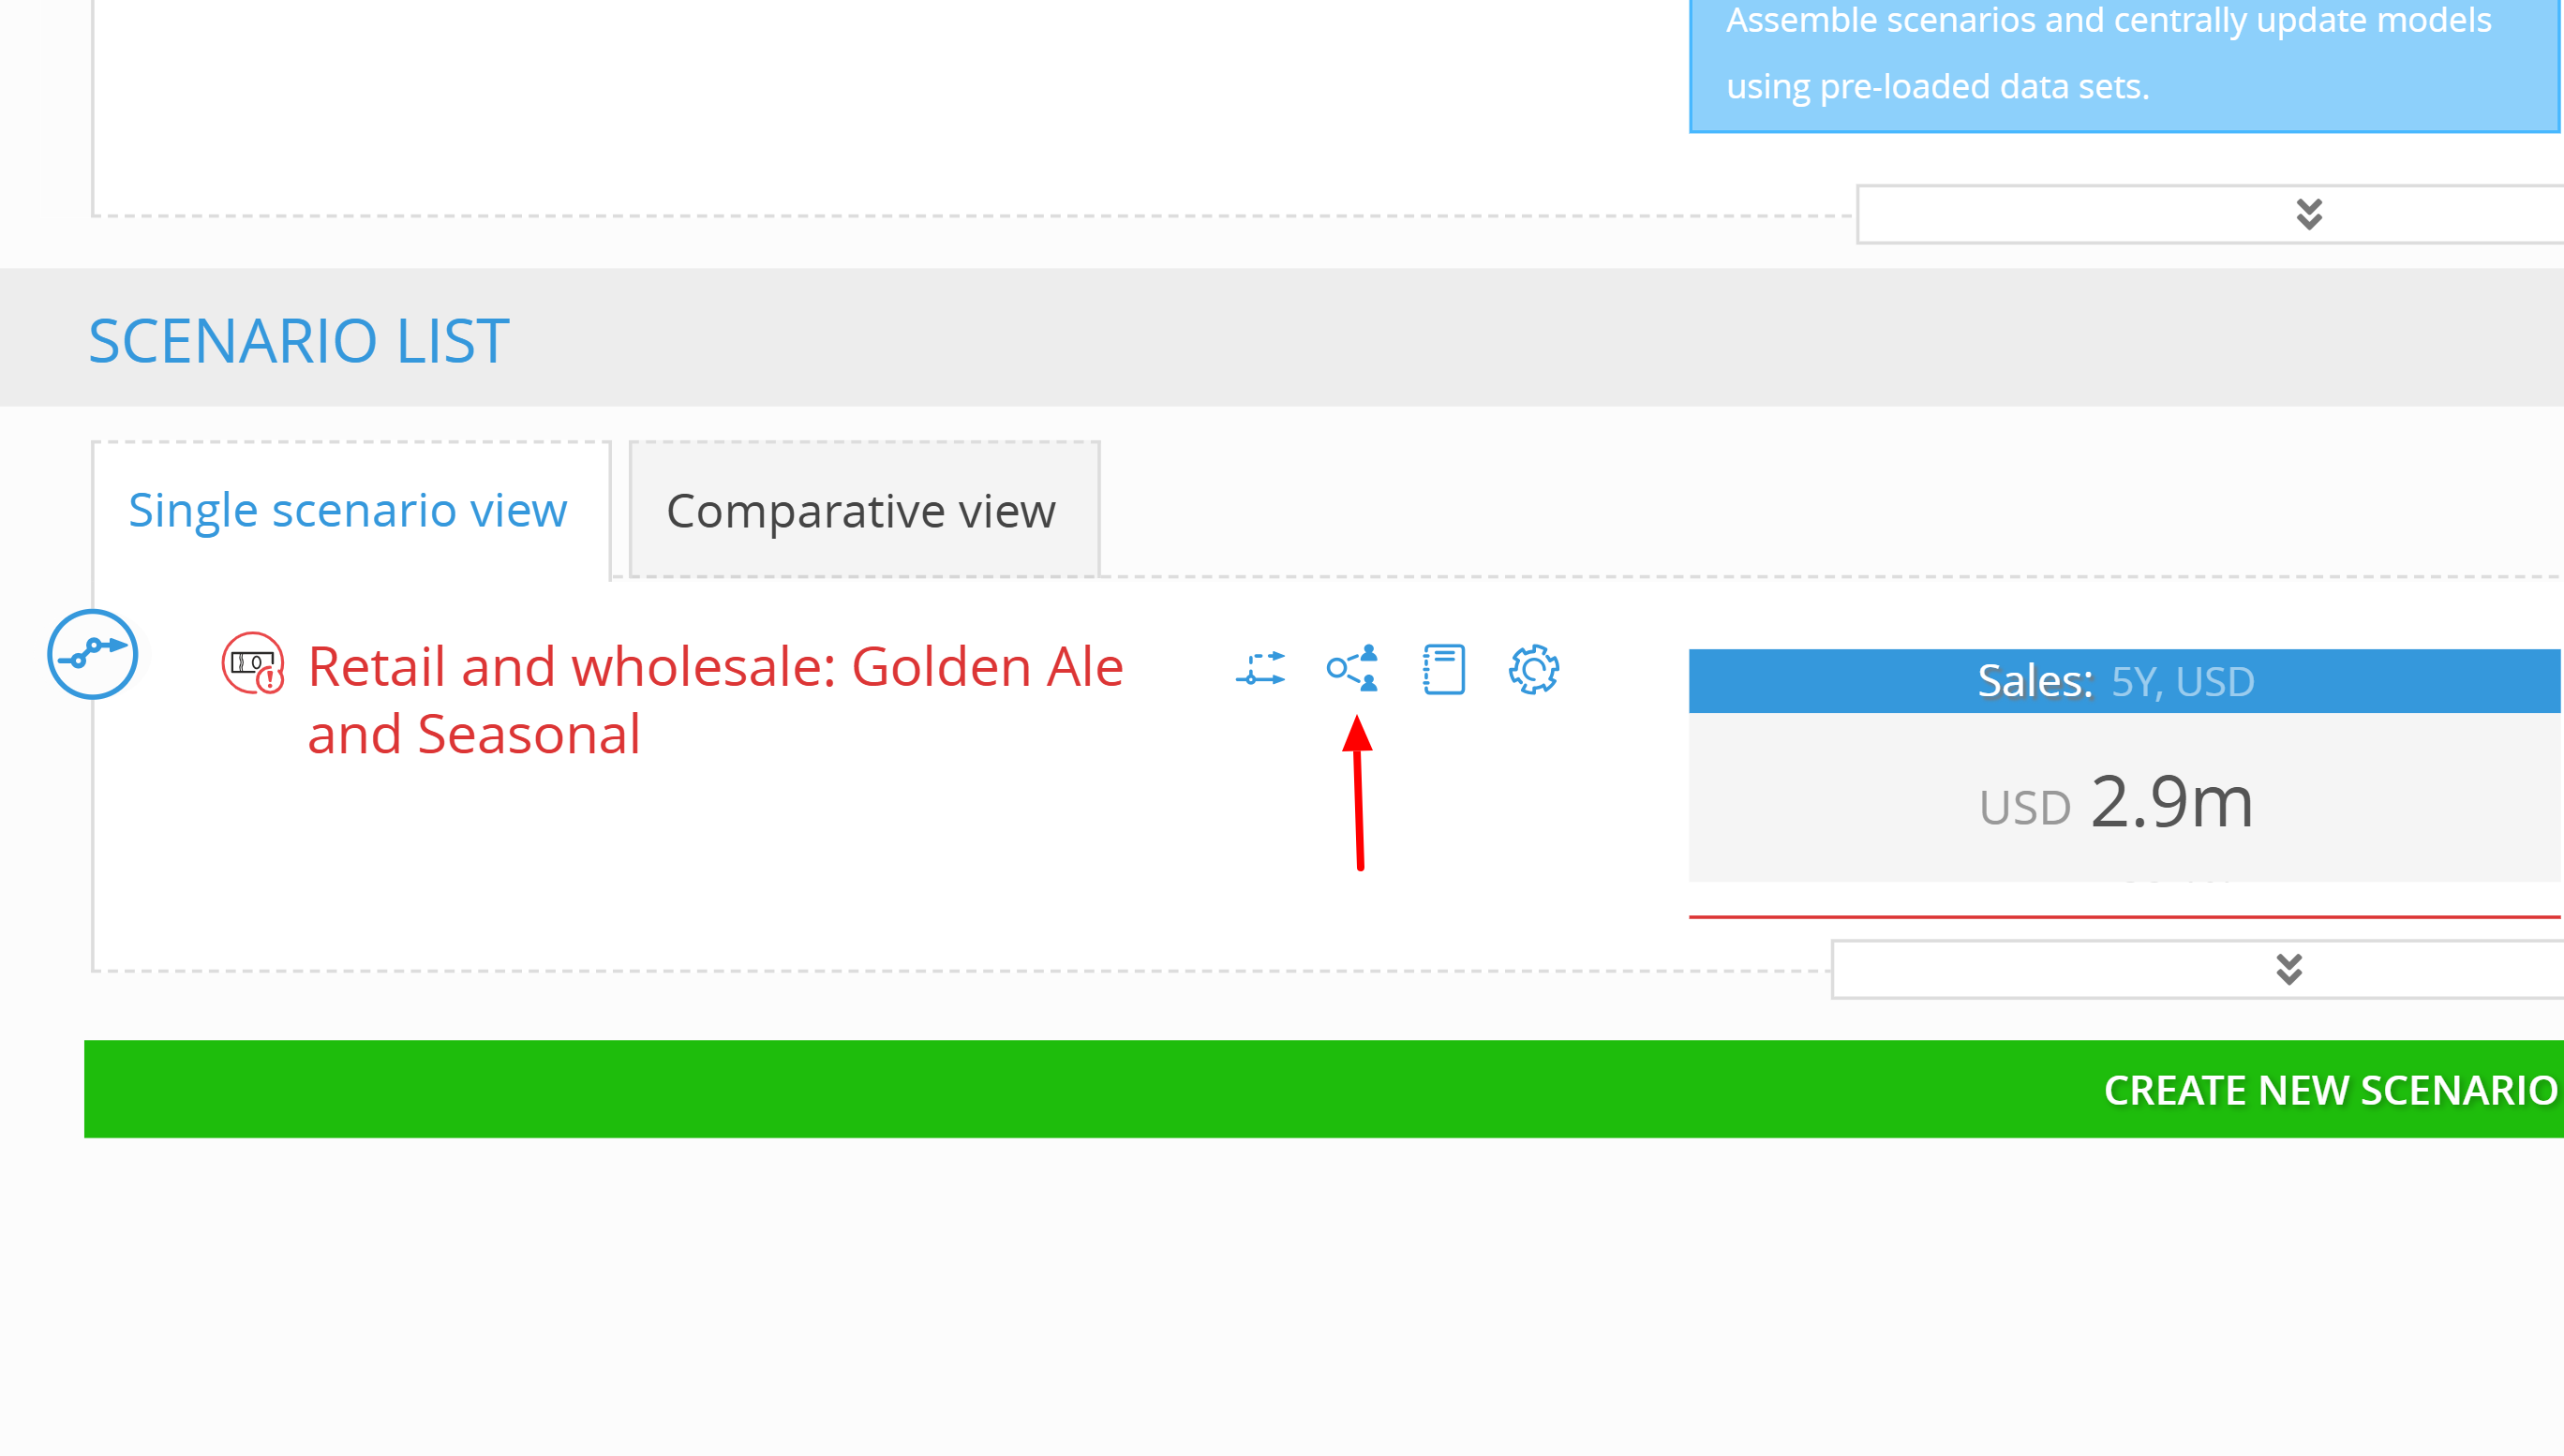
For more on Scenario Sharing Learn more here -
Create a New Scenario:
Click the big green CREATE NEW SCENARIO button at the bottom.
Your data is saved. You can pick up right where you left off.
Exploring Sample Models (Templates)
Sample models are a safe and practical way to explore real-world use cases before committing anything to your actual company workspace. Here's how to use them effectively.
Step-by-Step Guide
1. Open the Sample Model Library
Click the Templates icon (stacked squares) at the top-left of your screen.
This opens a list of sample companies and pre-built scenarios across different industries.
2. Choose a Company and Scenario
Browse the sample companies such as Dumplings Inc., and click “Explore Scenario” under any version you’d like to review.
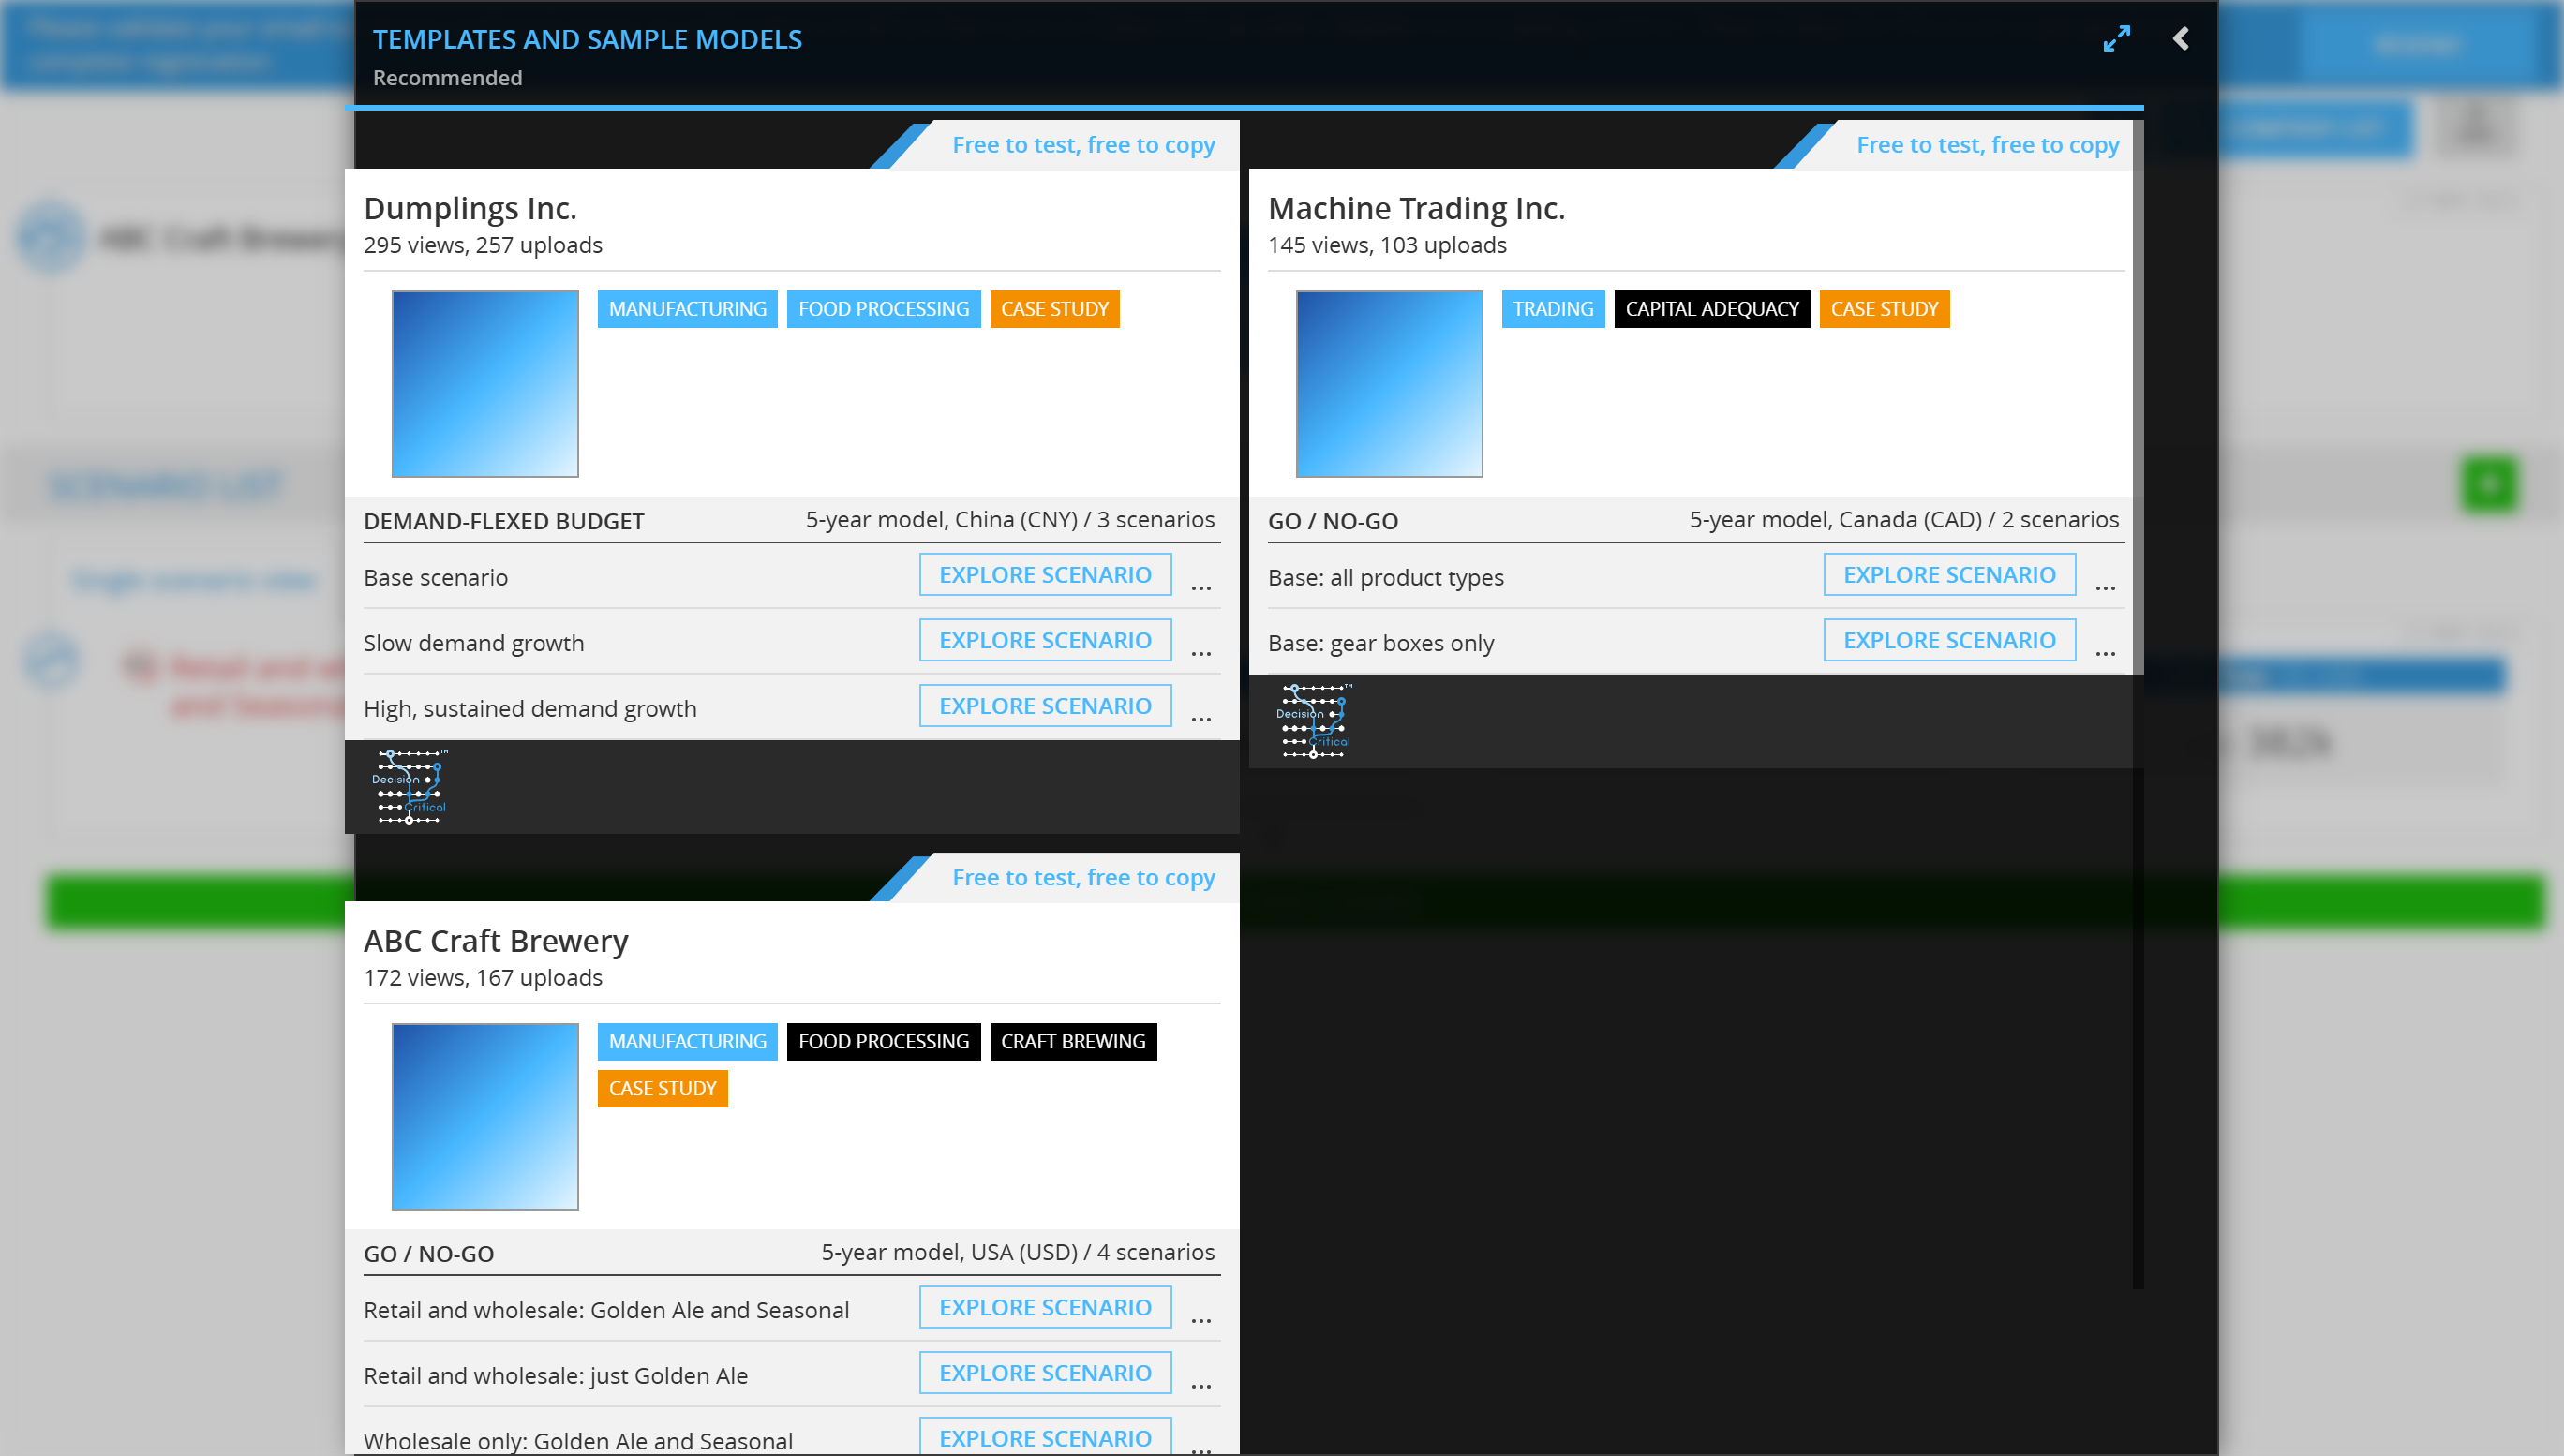
This will open the scenario in preview mode. You can review it, but no data is saved or copied yet.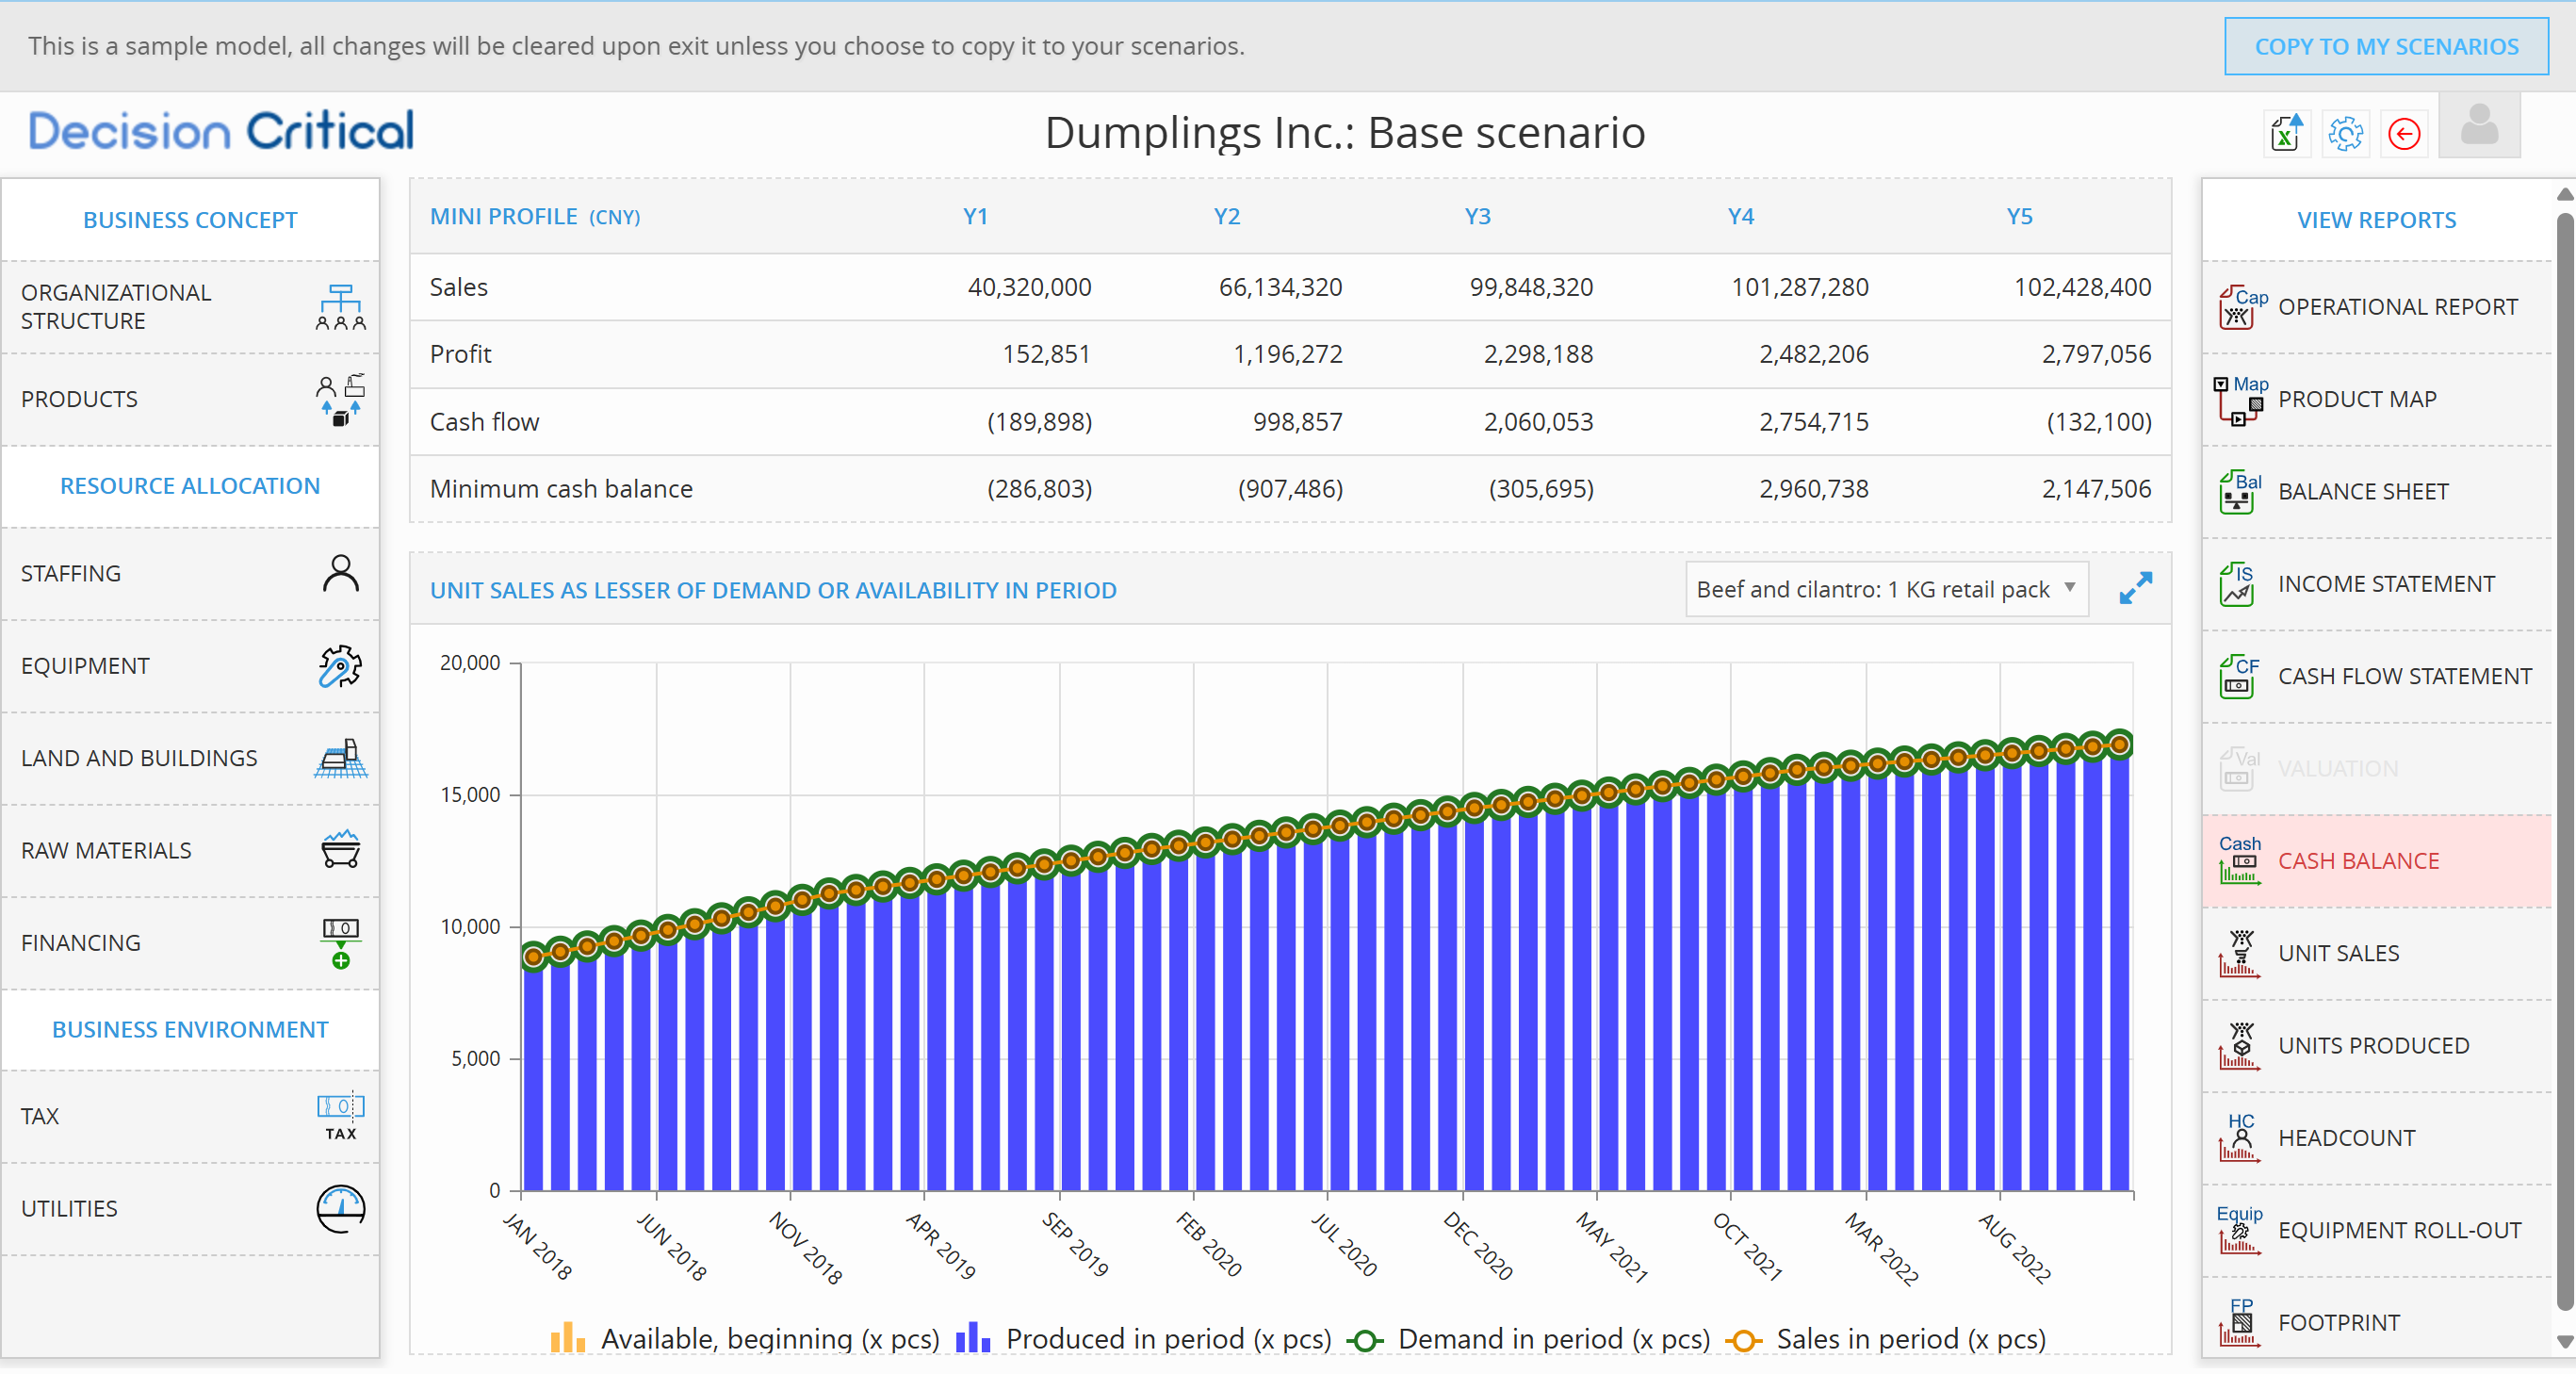
3. Copy to Your Sample Company Workspace
While inside the scenario, click “COPY TO MY SCENARIOS.”
This creates your own editable copy inside a Sample Company — a temporary workspace meant for exploration.
You’re not modifying the original. You’re working within your own version, isolated from others.
4. Explore and Compare Additional Scenarios
To try more versions within the same company:
-
Click Return (top right) to go back to the template list
-
Click Explore Scenario on another version
-
Click Copy to My Scenarios again
Each copy will be added into the same Sample Company, allowing you to compare scenarios side by side before deciding on your final direction.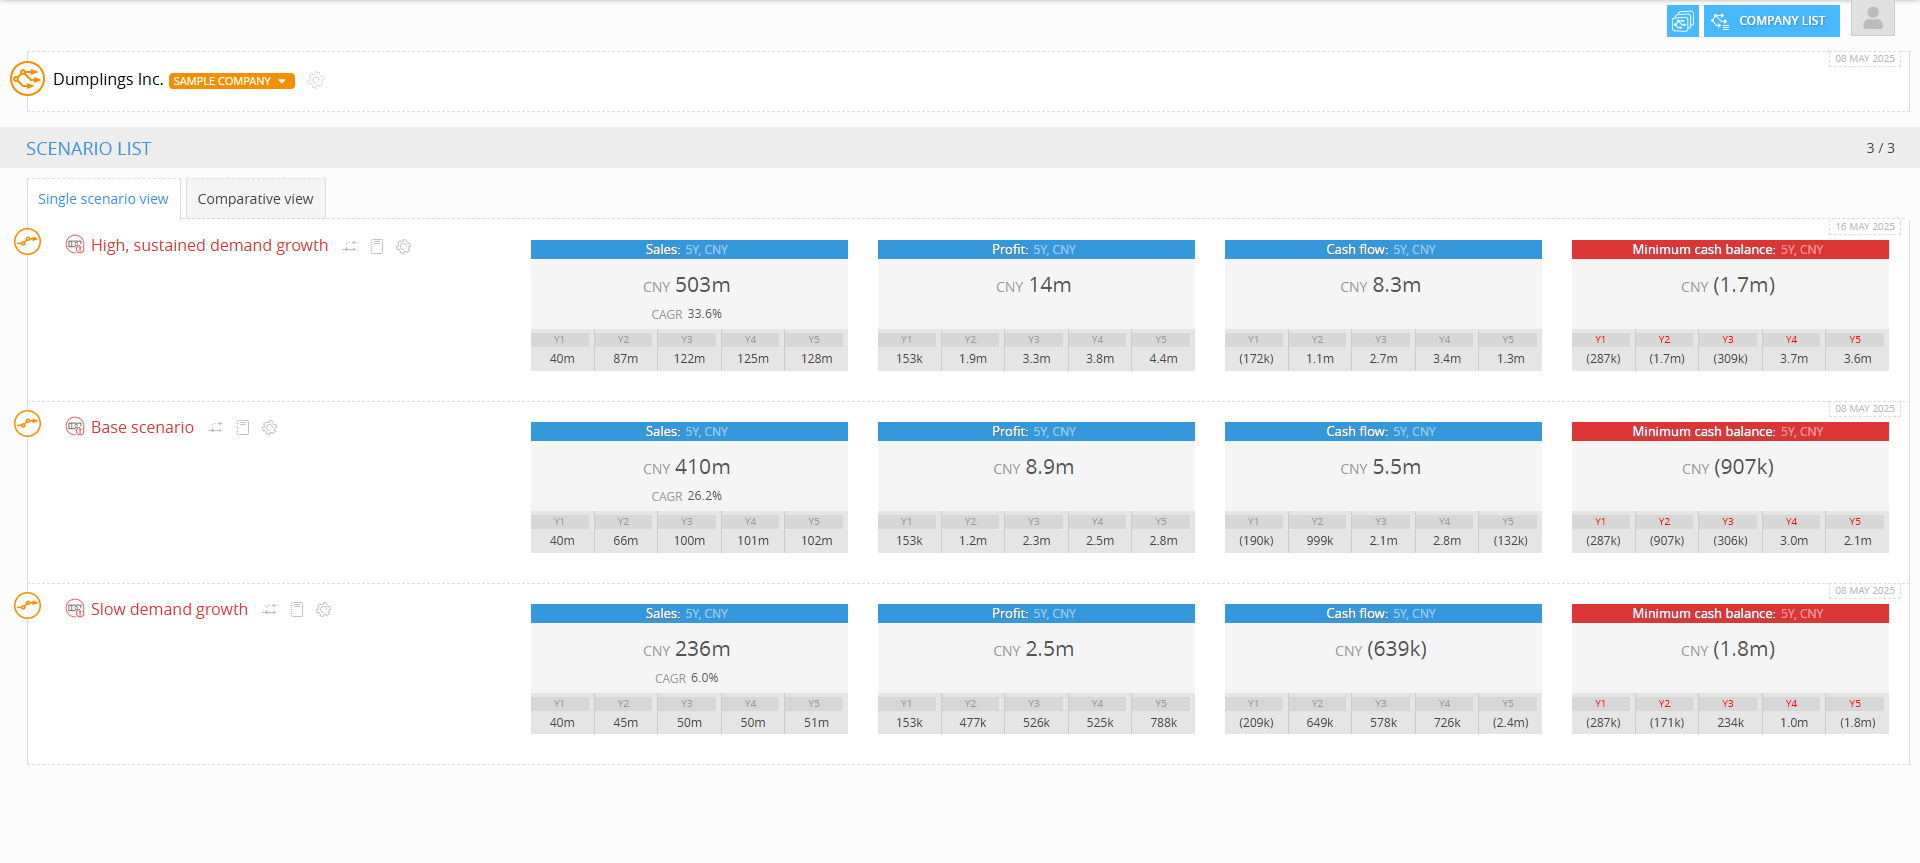
5. Convert to a Standard Company
Once you’re done testing and ready to continue working more seriously: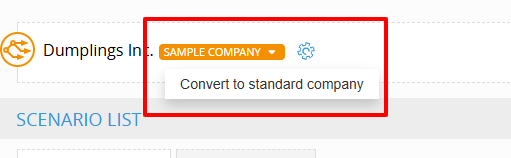
-
Click the dropdown next to the Sample Company name
-
Select “Convert to Standard Company”
The workspace will become a normal company under your account. You can rename it, add team members, and continue as with any regular company.
What is a Sample Company?
A Sample Company is a temporary, sandbox-style workspace created when you copy a sample model. It allows you to explore and experiment freely without affecting your main workspace or company data.
You can:
Test multiple sample scenarios in one place
Try out planning structures before fully committing
Compare different versions side by side
Once you're satisfied with the setup, you can convert the Sample Company into a Standard Company to begin full planning.
How to Know You're in a Sample Company
You can always tell you're in a Sample Company by checking these two things:
There is a “SAMPLE COMPANY” label in orange, shown next to the company name
The company icon is orange, not blue like standard companies
This visual cue helps you distinguish exploratory environments from production workspaces at a glance.
Let me know if you'd like this adapted for a product manual, UI overlay, or quick-reference card.
That’s it — you’re ready to plan
You’ve explored a working model, edited assumptions, and saved your own version — without needing to build anything from scratch.
Now you can:
-
Run more scenarios
-
Test pricing or cost changes
-
Compare different product mixes
-
Or build something new using your own structure
Start simple. See what changes. And plan with confidence.
For further assistance, visit the Help Center or contact support@decisioncritical.pro